The problem:
As I’ve already alluded to, some previous owners of our early 90’s house liked to DIY everything. But they weren’t very good at the details. So things are slowly falling apart, are drafty, etc.
 !!!!!find me!!!!!
Here’s the floor plan that I haven’t ever posted yet. The garage was built and attached to the existing house, then the back room was added onto that. The garage seems to have been built by professionals, but the back room was almost certainly a DIY job gone wrong. *We live outside city limits and permitting in our county is almost non-existant save for wells, septic tanks, etc.
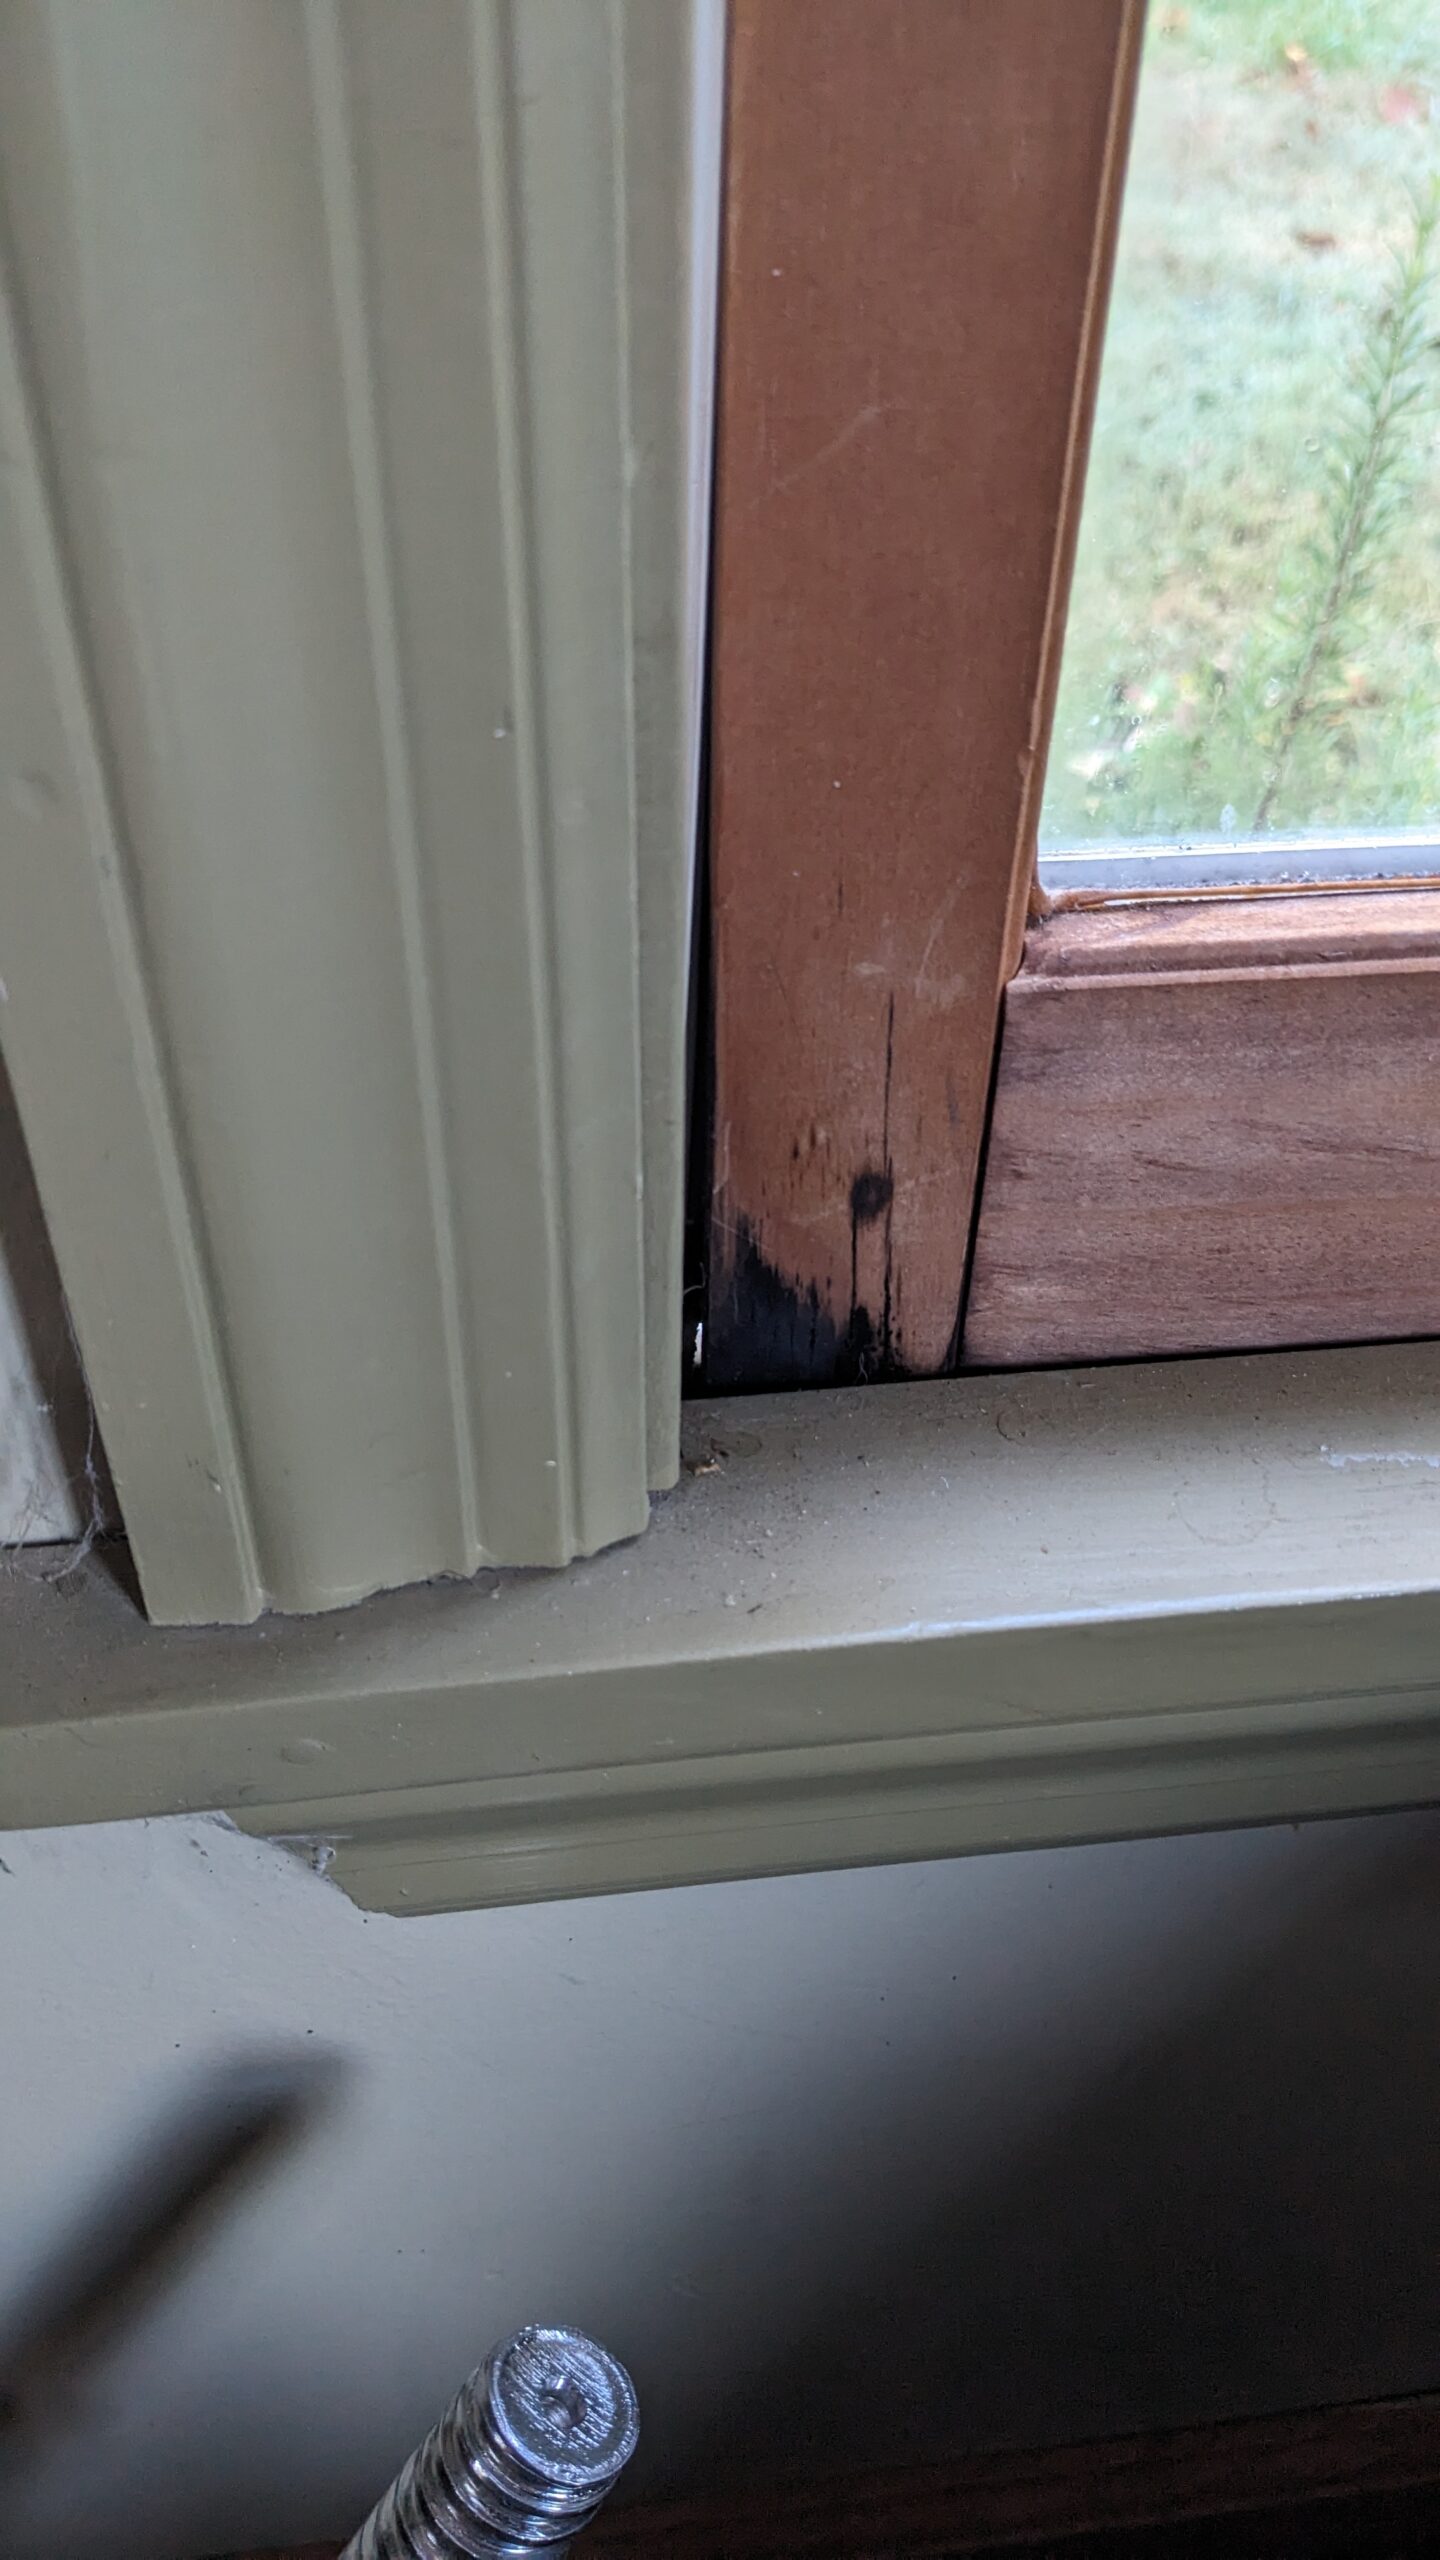
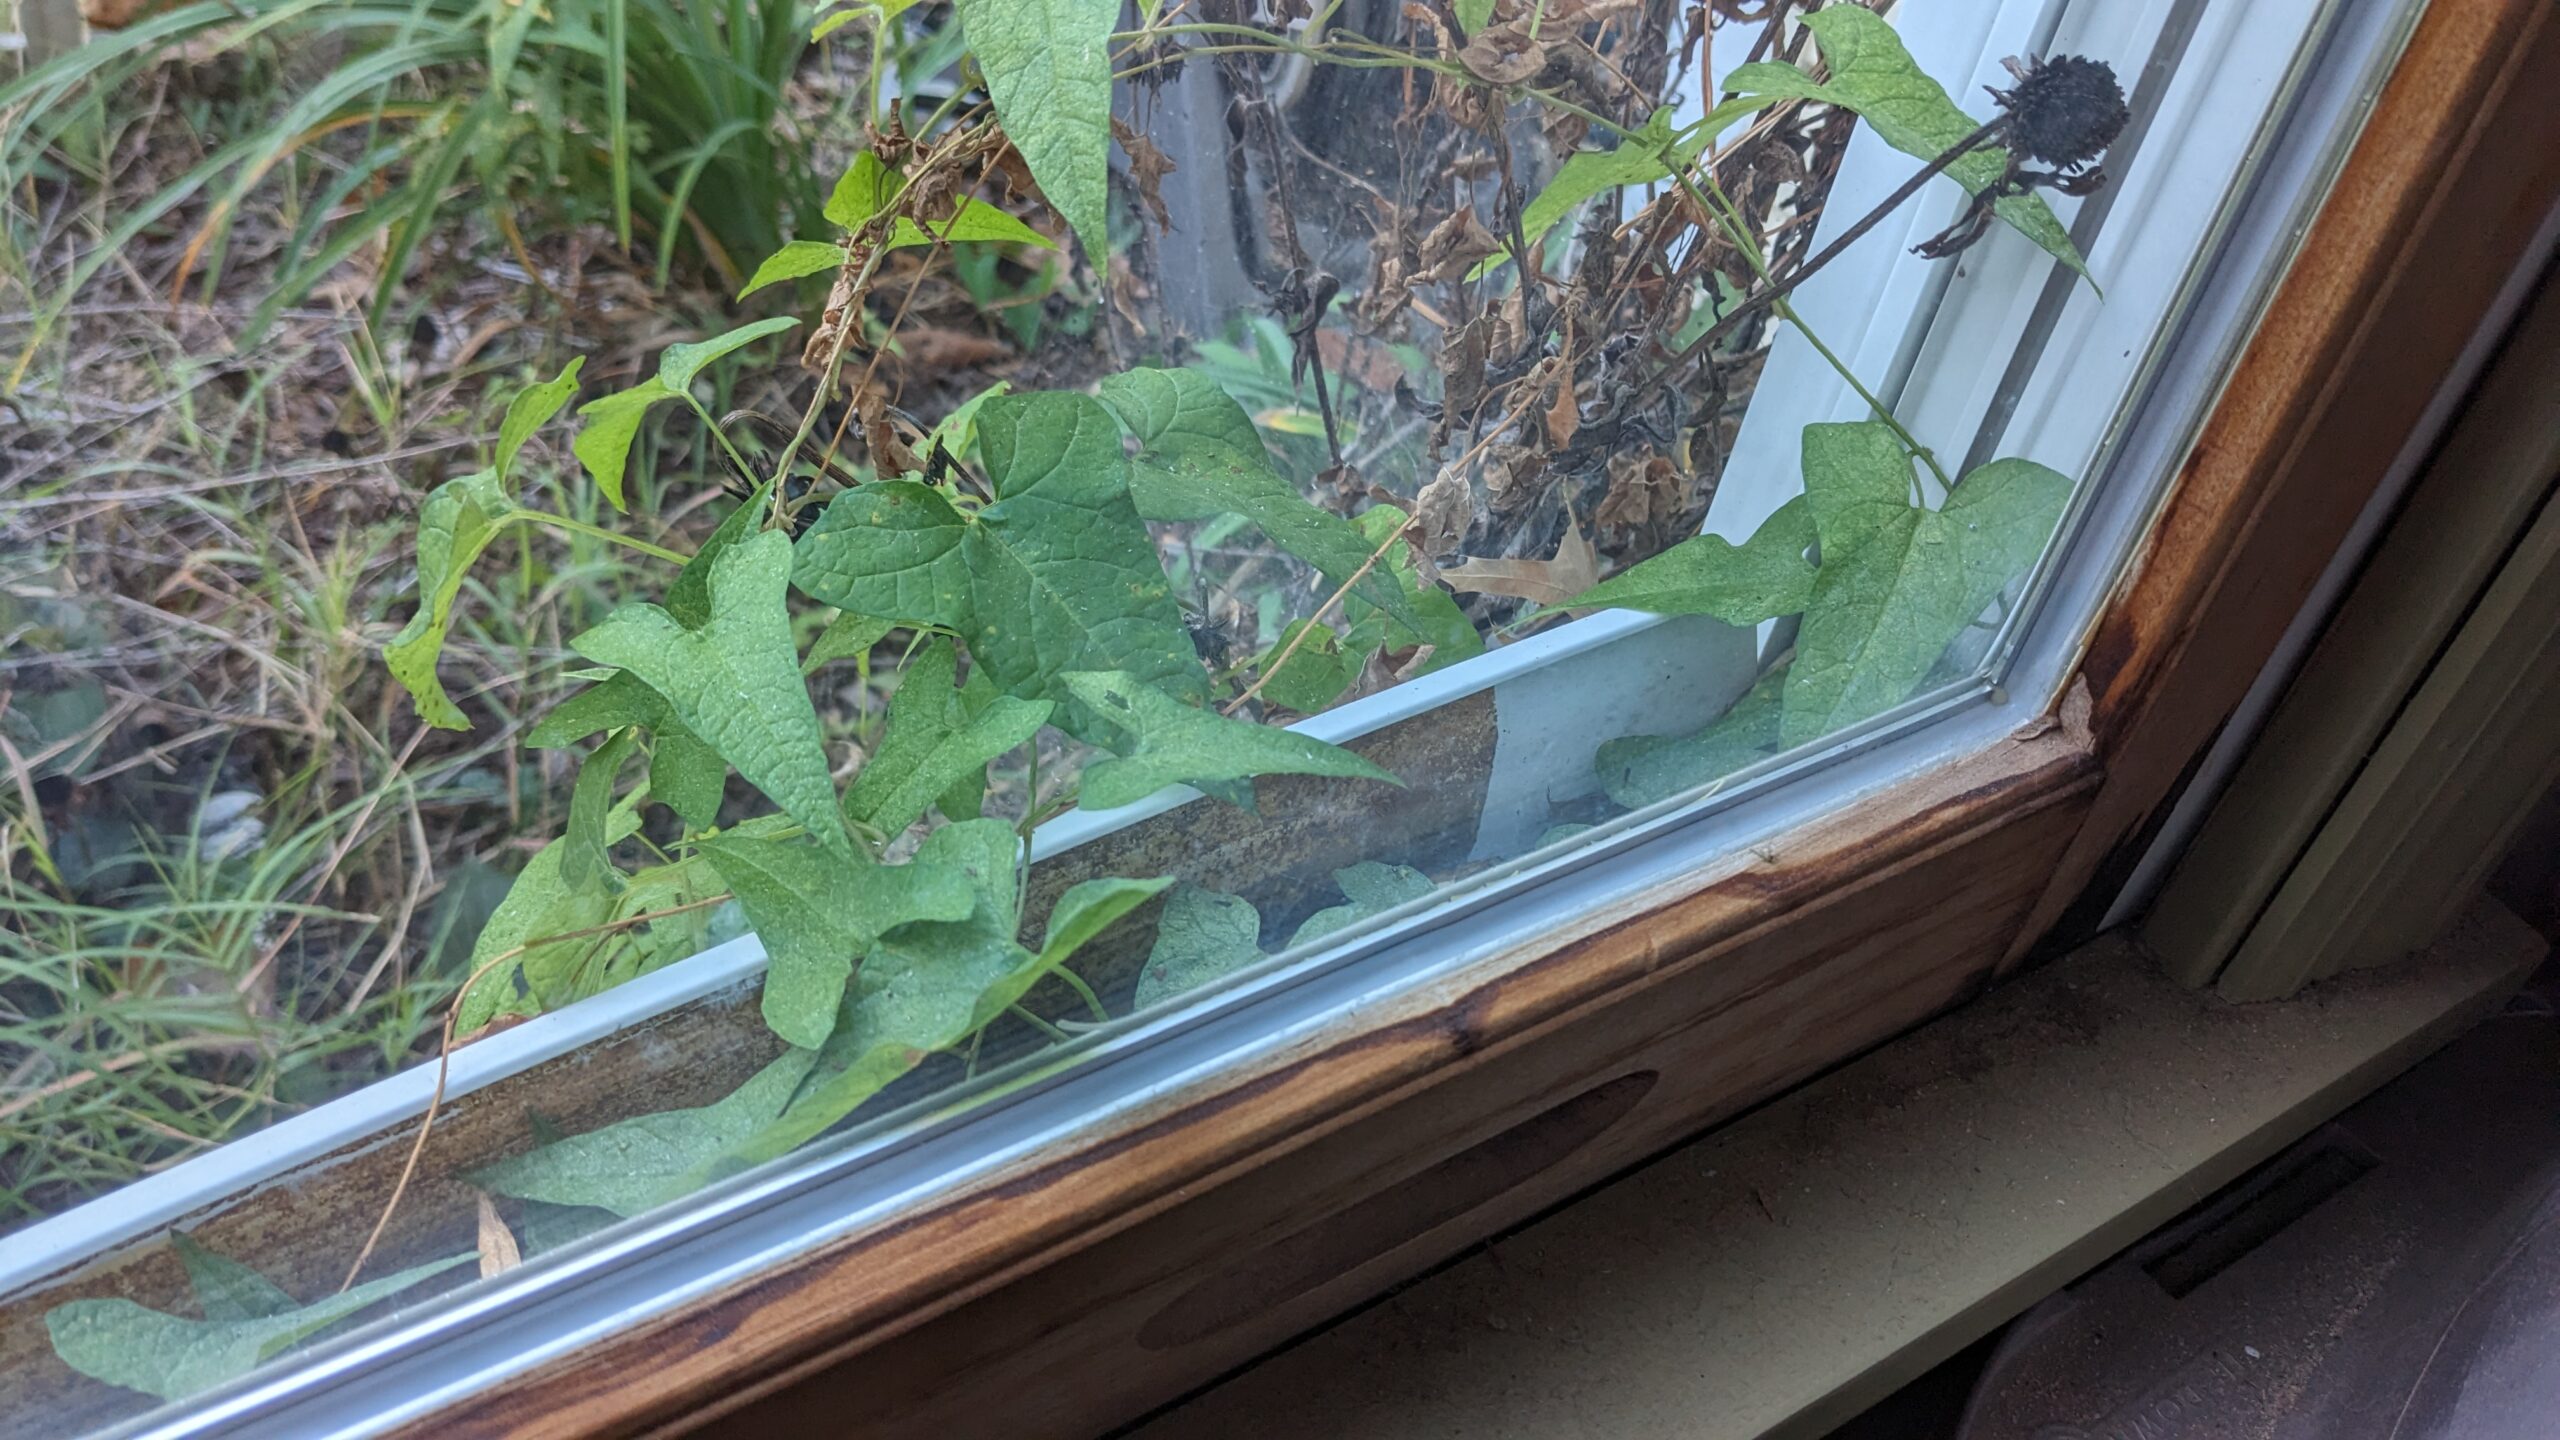
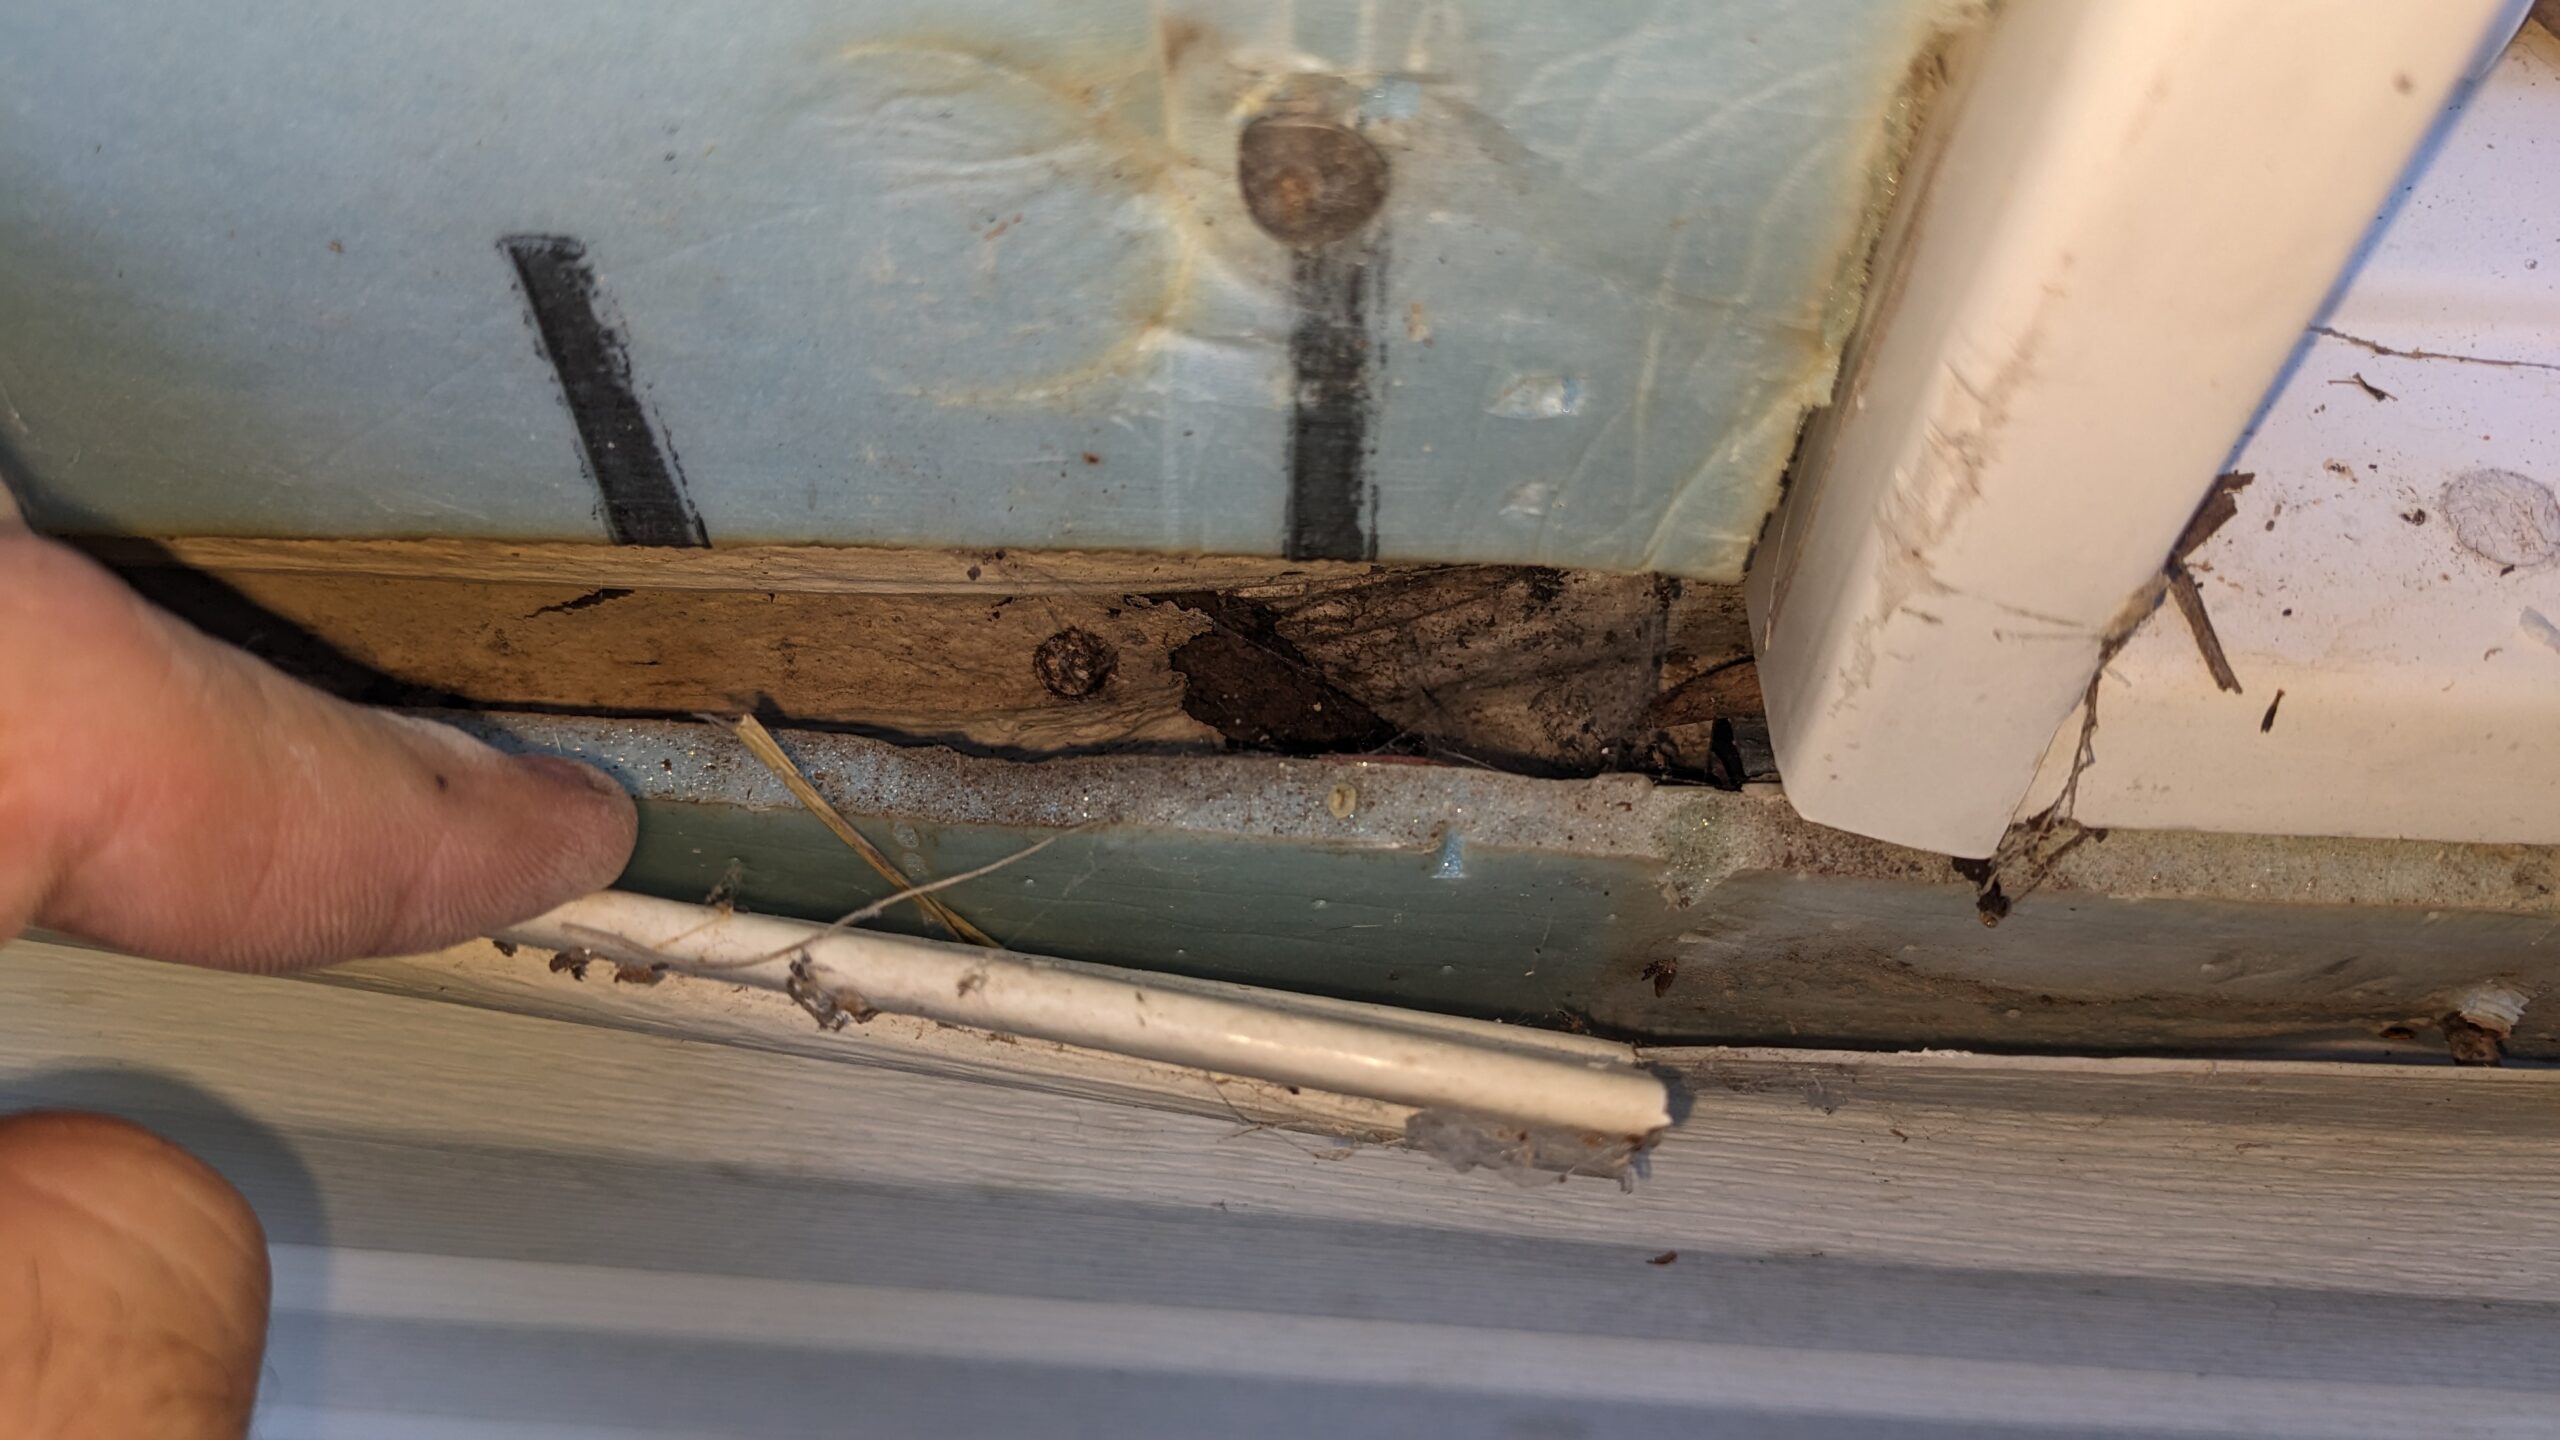
This is what I’ve been looking at for the past few months. There are two windows on the south side of the addition, on either side of the fireplace and entertainment center. The bottom sash doesn’t fit snugly into the casing and leaks air. And the windows are wood with a PVC facing glued on as the outer skin. The seal had long since failed and allowed the wood underneath to rot.
I initially covered the gap with painter’s tape just to stop the air leaks in the winter and summer. Then the PVC facing fell off when the rot got bad enough. I knew that there was a possibility that the damage was severe and hidden behind siding, so I spent about a year pricing out windows, and ultimately finding a matching pair at the Habitat for Humanity Re-Store for a bargain ($300 for both vs. ~$7k for custom built with a questionable install by a local contractor).
The Process:
This is NOT a normal project that you can do after work, unless you know that your damage is minimal. If you start the project at 7pm and learn that your sheathing/studs are rotten, there isn’t a quick fix. Be prepared to rip out an entire portion of your exterior wall, and deal with the HVAC consequences for a few days.
Before you start you should have a tarp or some thick plastic sheet (2-3 mil plastic drop cloth is probably ok) to tuck under your siding and prevent damage if it rains in the middle of your undertaking. Scrap wood furring strips, deck screws, staples, and spray foam will help hold things down tight in windy conditions and prevent tearing the plastic and the larger drafts. Have plenty of framing lumber and sheet goods on hand to replace all of the studs and sheathing if needed. You don’t want to buy a half sheet of plywood or OSB and then realize in the middle that you don’t have enough material to close everything back up at the end of the night.
The project will have a few stages:
- Buy the materials. Some things were special order and took a week to show up (Prosoco Red Guard, particular flashing tape)
- Tear down. Going slowly and assessing the damage as we go. I only want to replace what’s necessary, and develop the reconstruction plan in my head as I go.
- Frame the wall. King, jack, cripple studs. A proper sill and header. Etc.
- Sheathing and flashing. Using liquid flash which will take at least an hour to dry. So all of this will happen and be inspected a few times along the way before installing the window.
- Install the window. Dry fit, get it flush and level. Screw it in, and apply flashing.
- Close up the outside. Housewrap tucked in and stapled, make sure flashing is adhered, put on siding.
- Drywall inside
- Paint
- Replace trim
Tear Down:
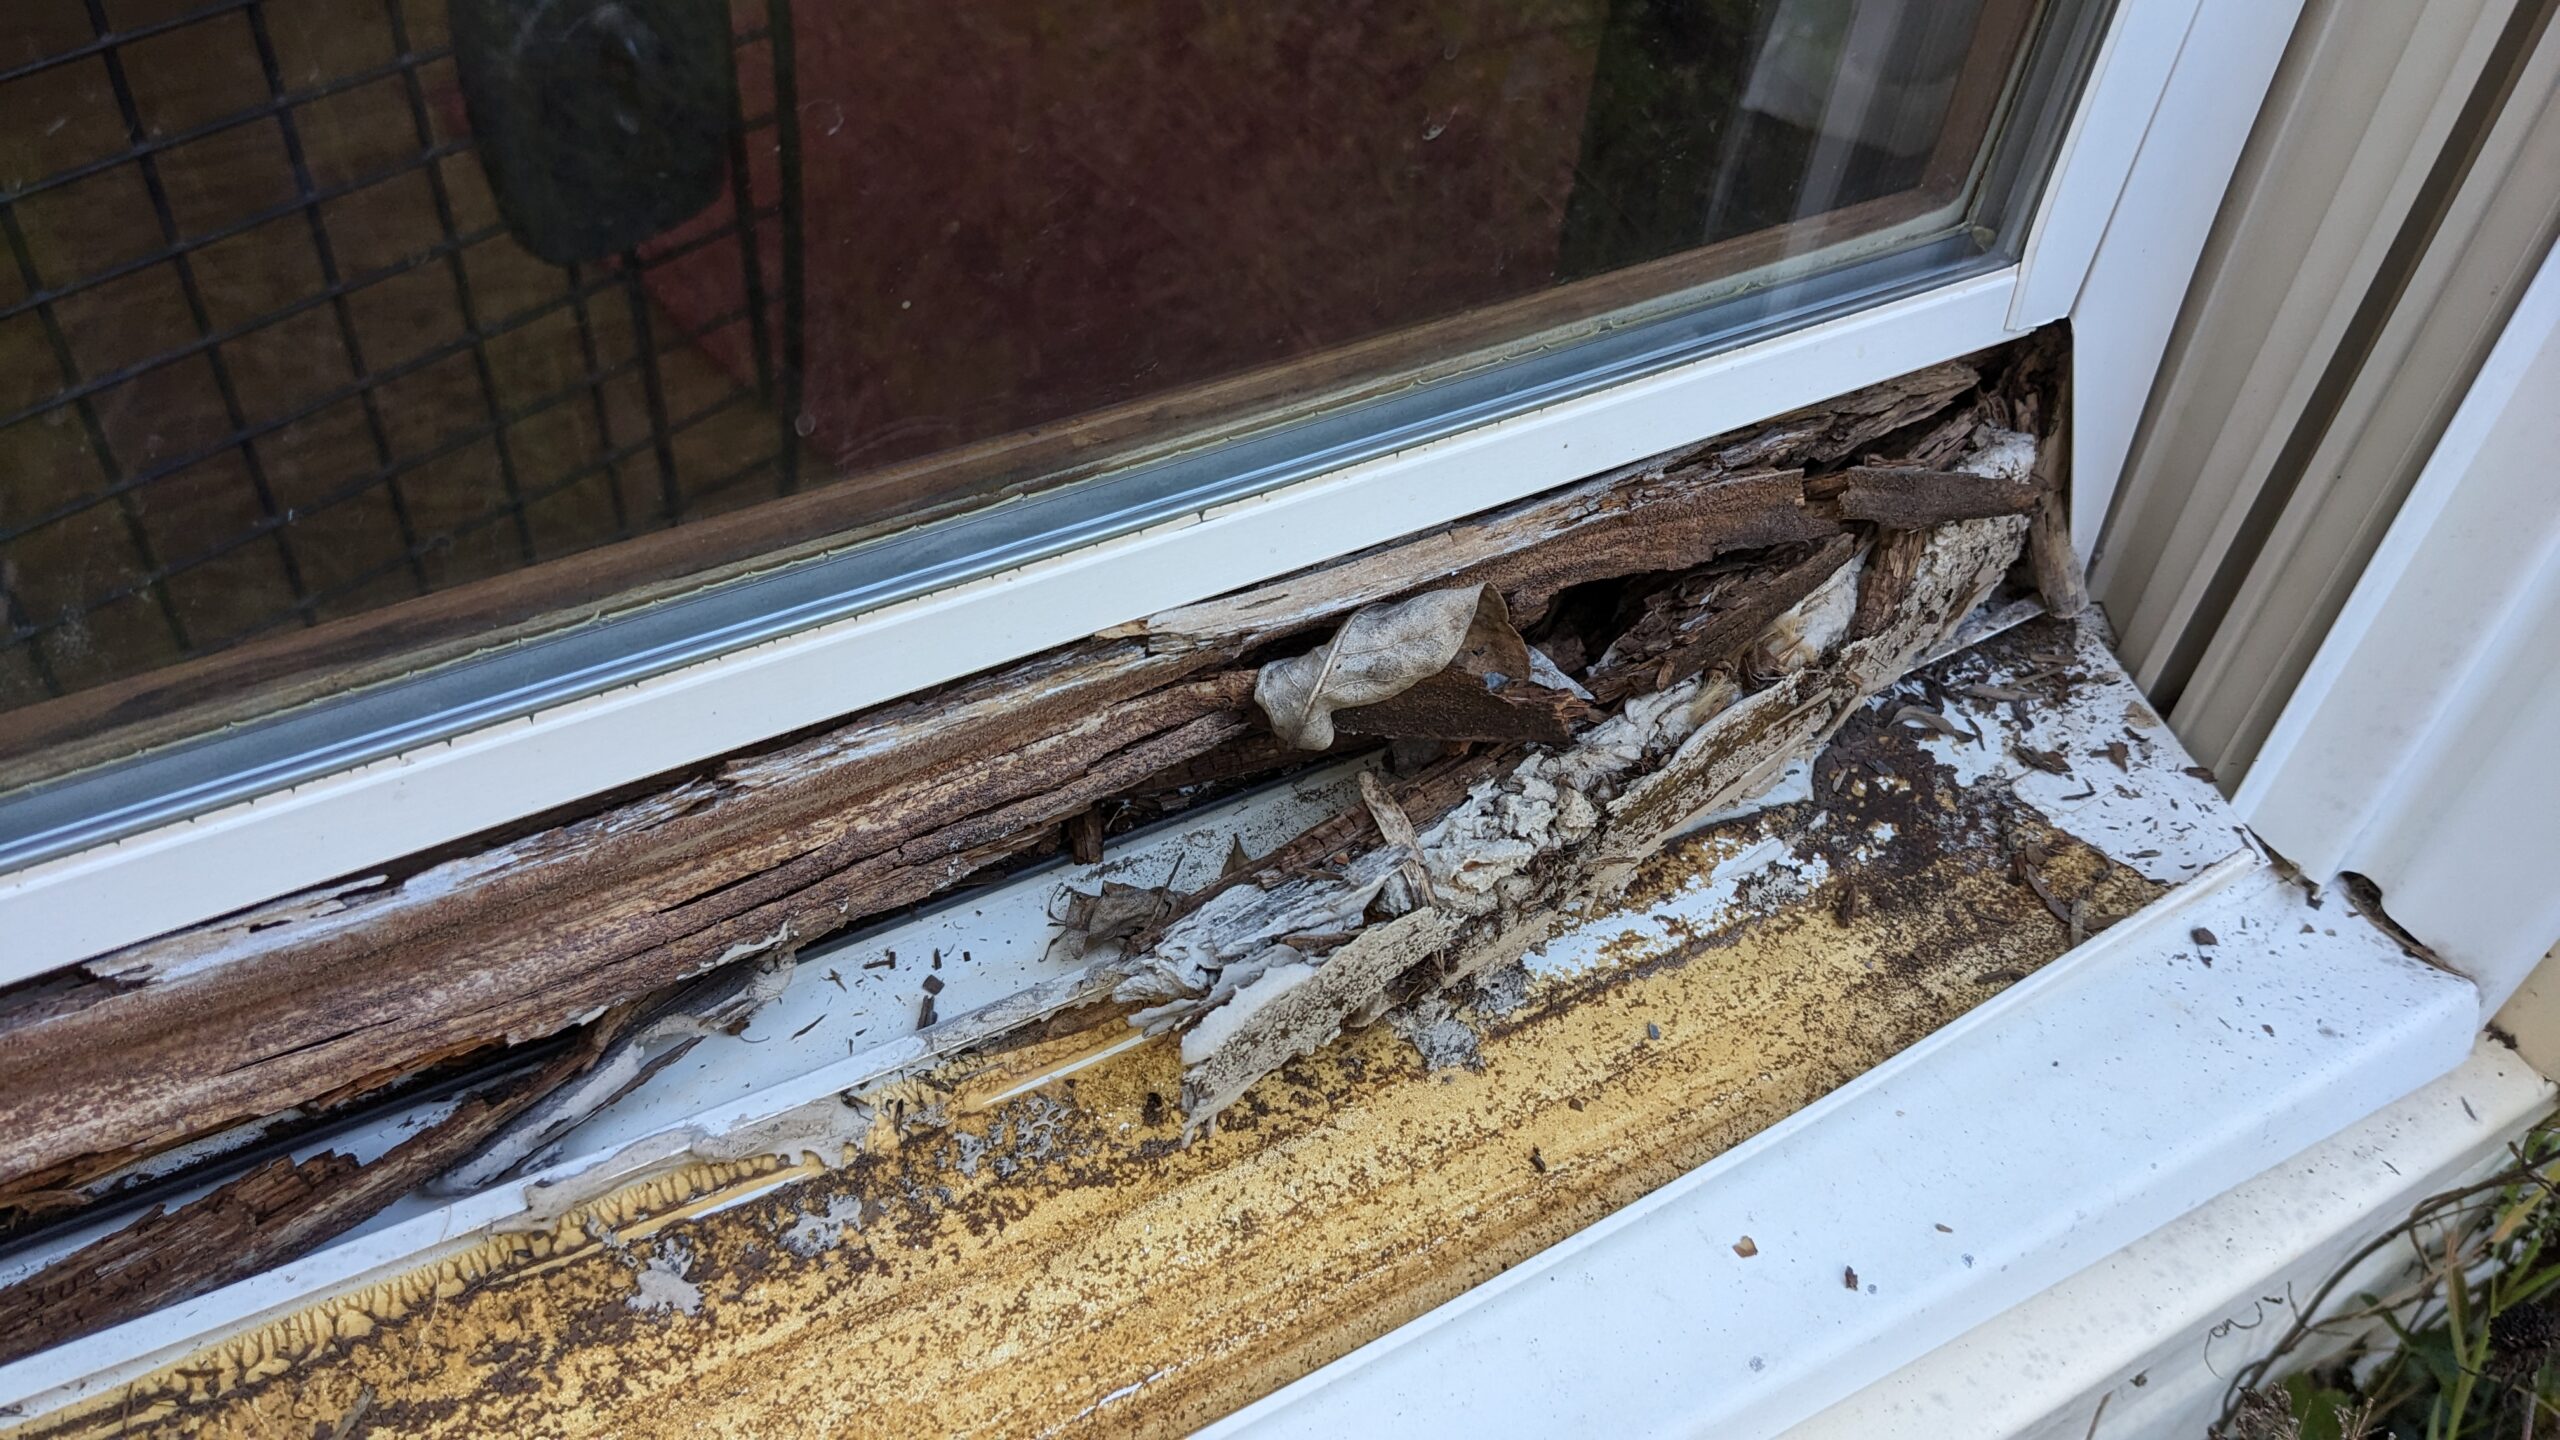
The outside of the window. PVC skin laying jelly side up. The further I dug, the more it seemed like the stain and poly on the inside edge of the window was the only thing holding the entire lower sash together.
This entire grey log is construction adhesive packed into the voids to hold the PVC back on. More evidence that the previous owner was well aware of the problem in 2010 and did their best to hide it before the sale. I’m not entirely sure I blame them, knowing that the 2008 crash wasn’t entirely over, and probably realizing that their construction skills were not up to par and they’d have to hire people to fix all of their mistakes properly. Either way, I’ve inherited all of these problems now. (I wasn’t there to inspect the house myself, I came in 9 years later)

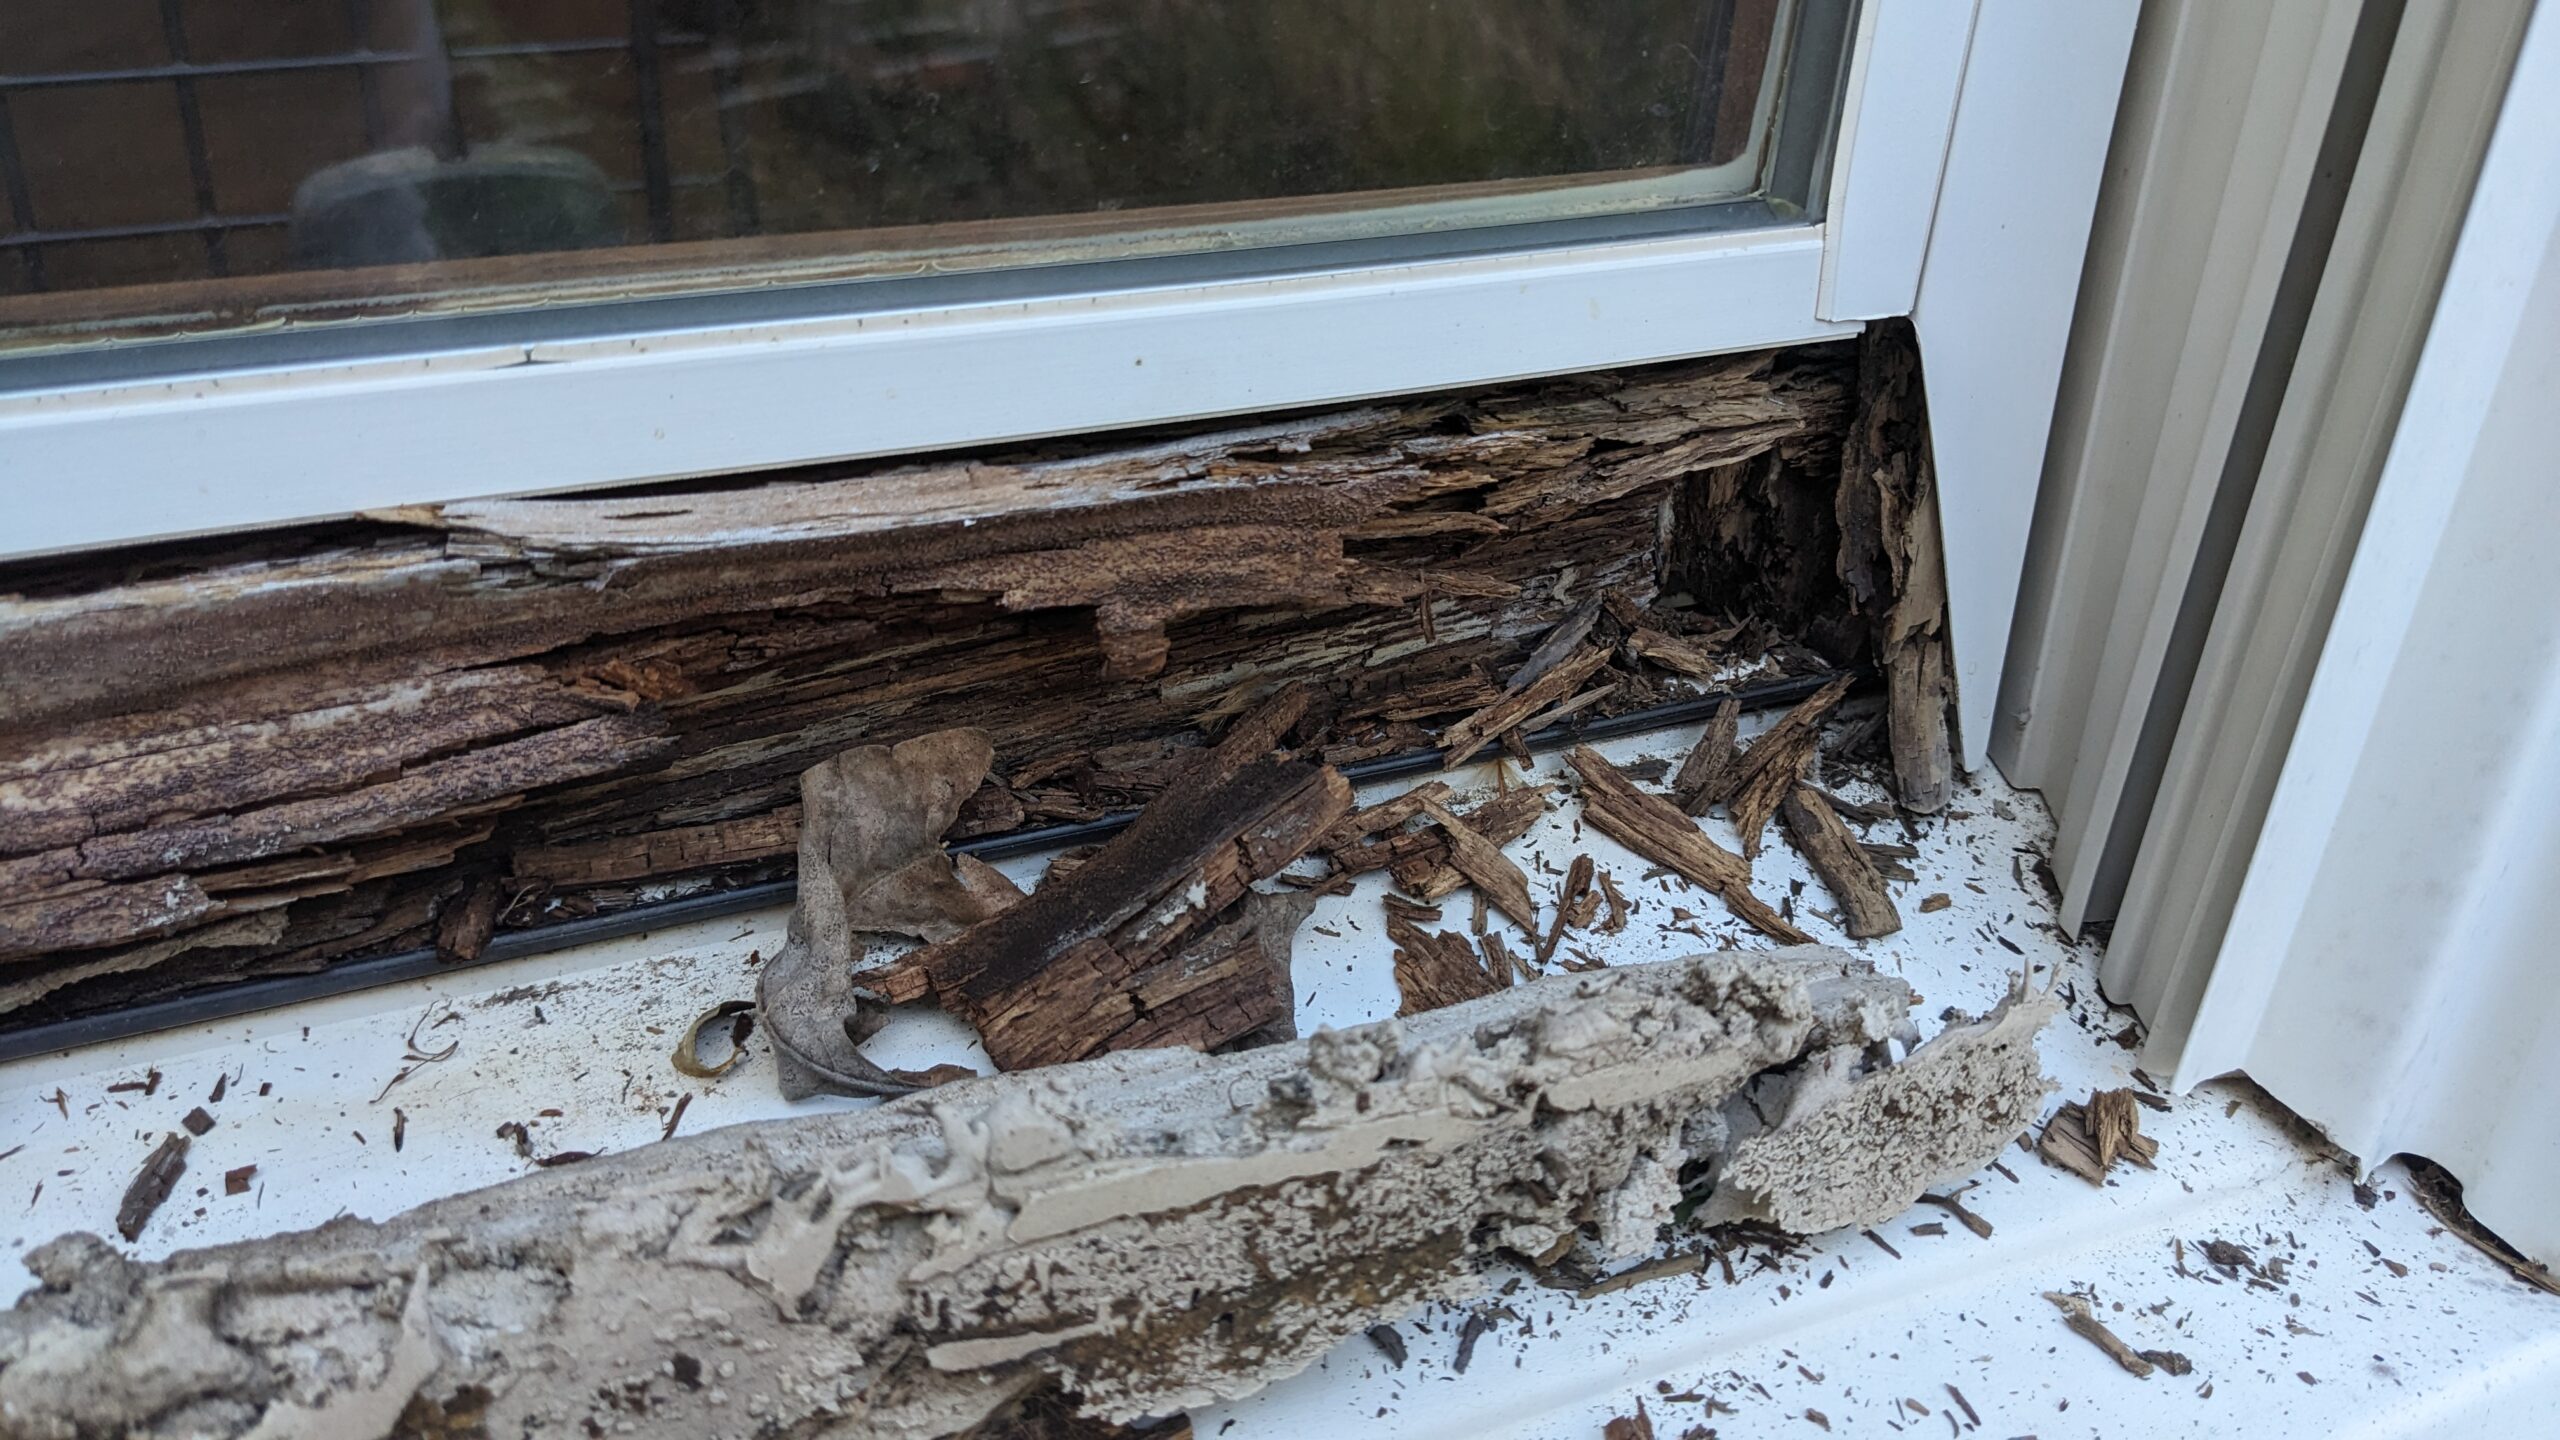
This is the inside again after gently removing all of the rotten wood from the outside. There’s almost nothing left. Lots of light and air getting through.
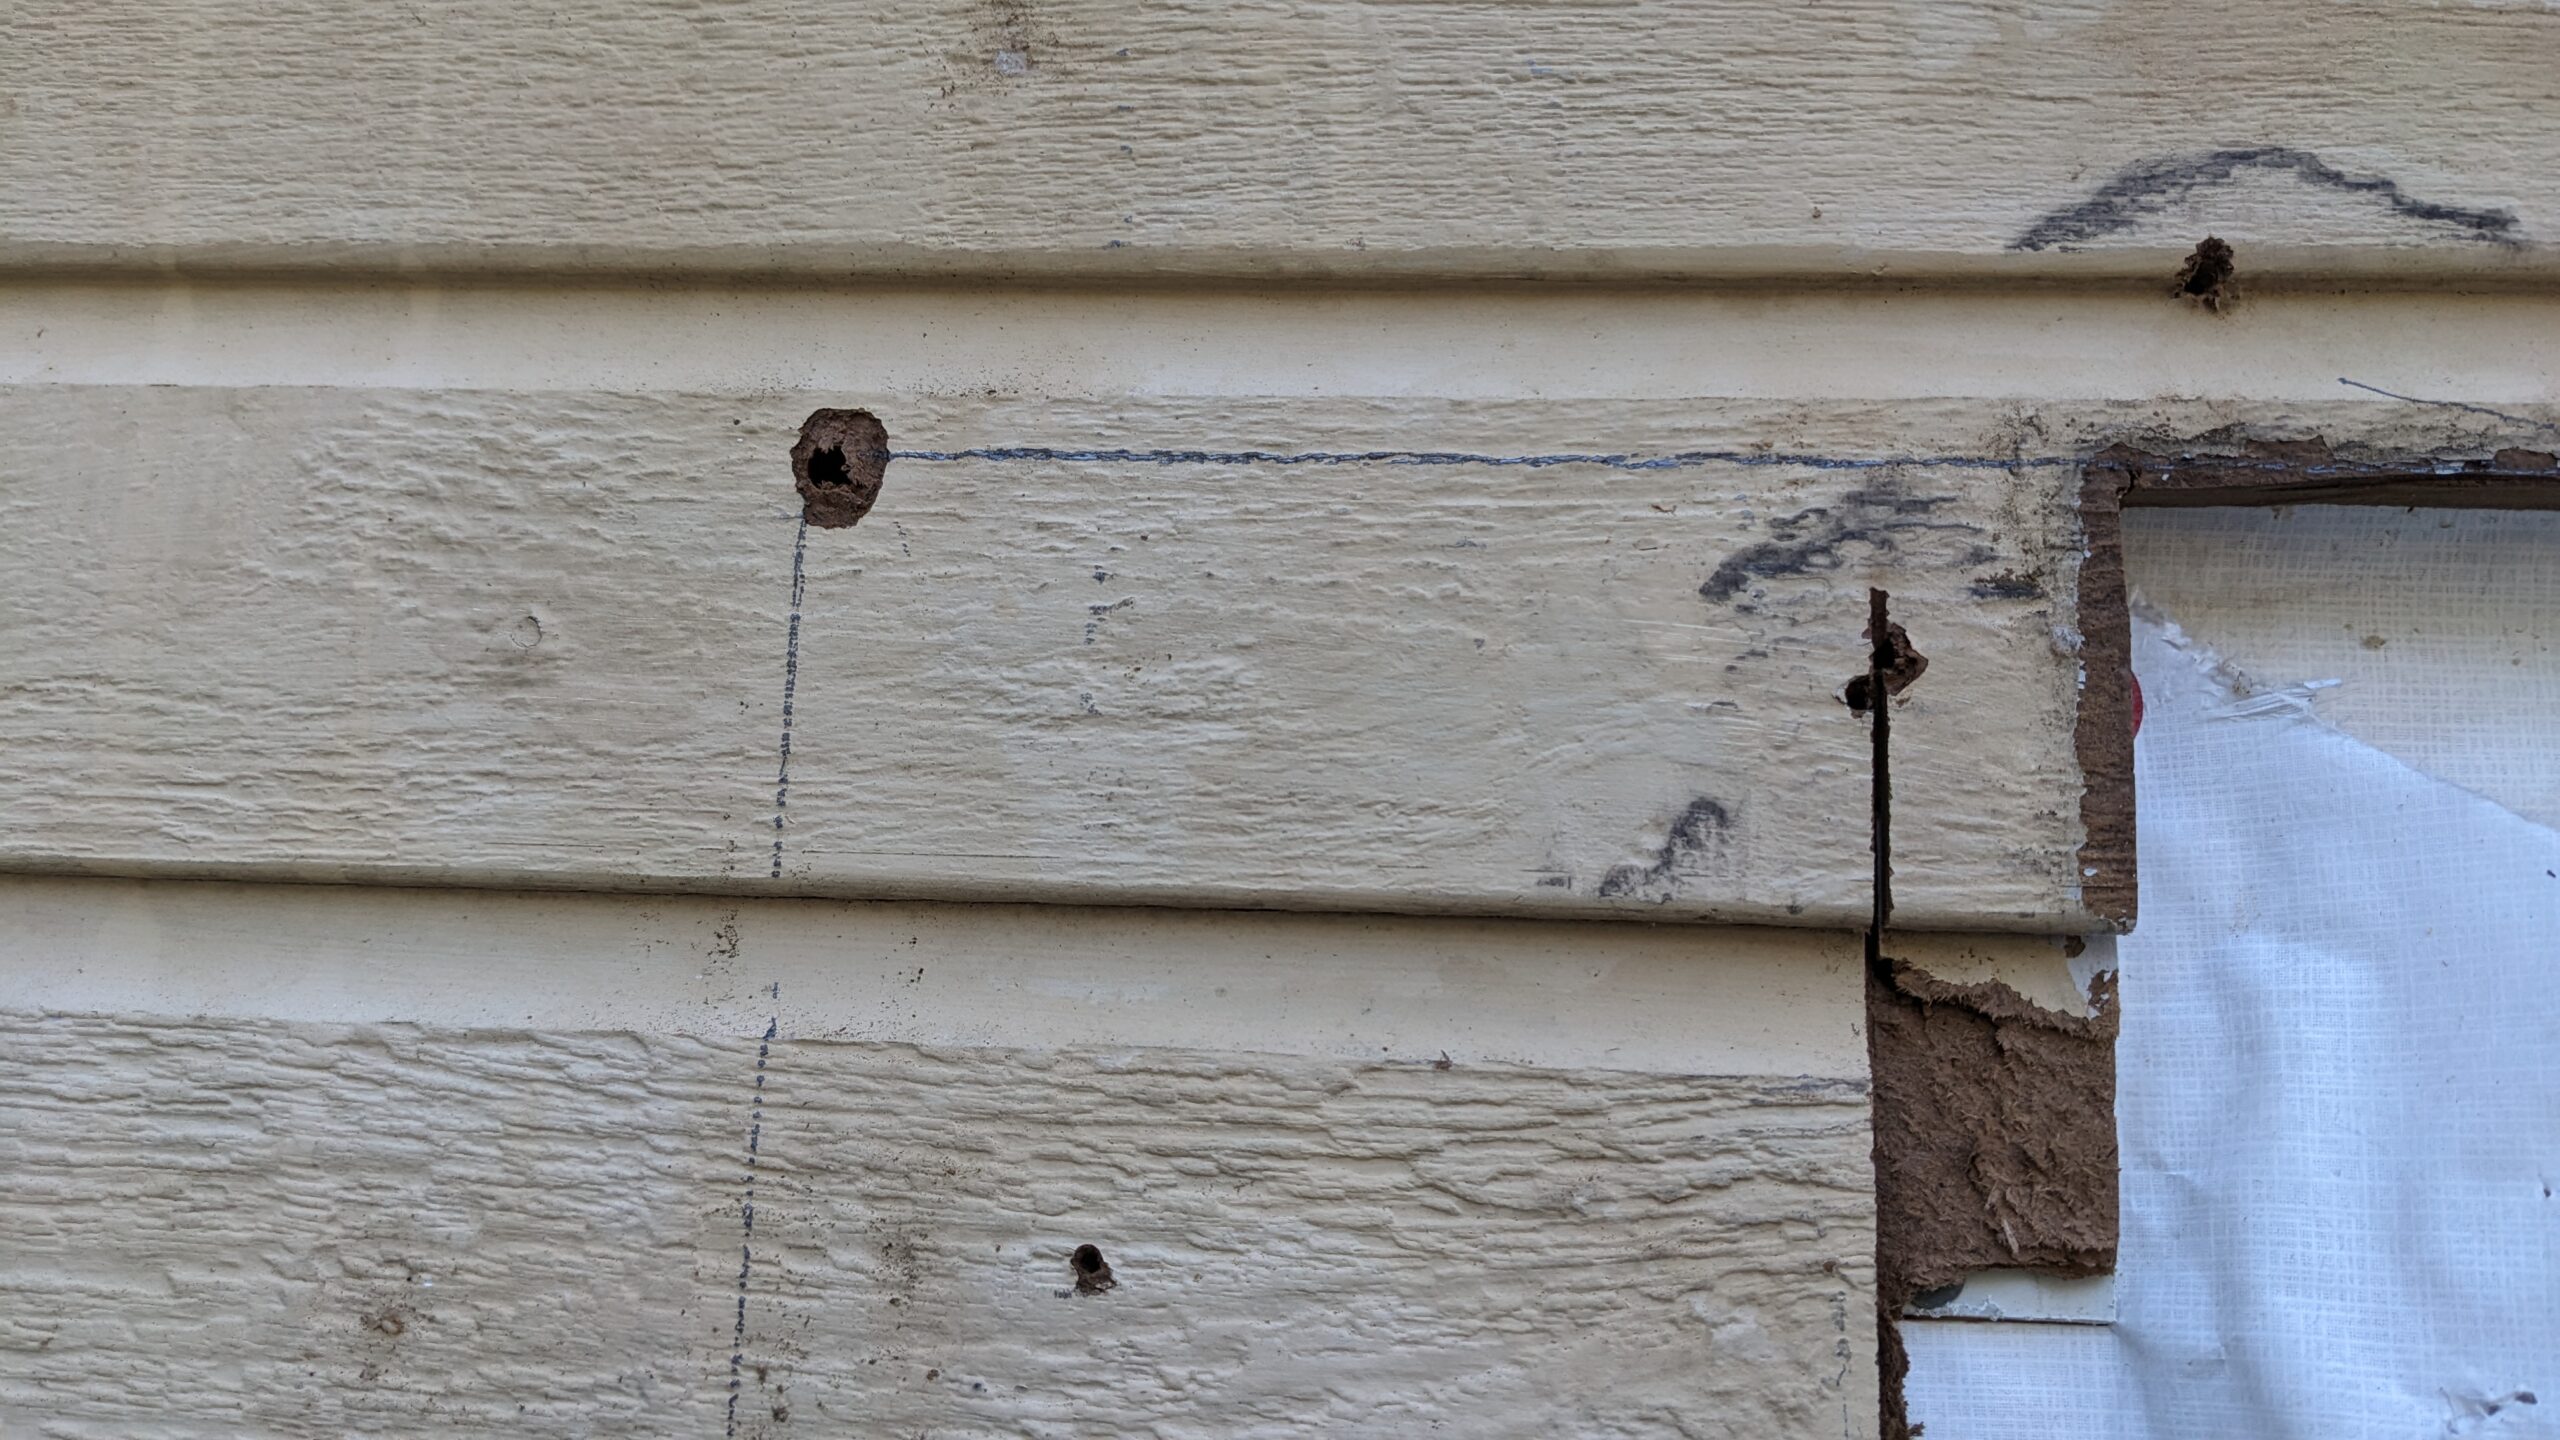
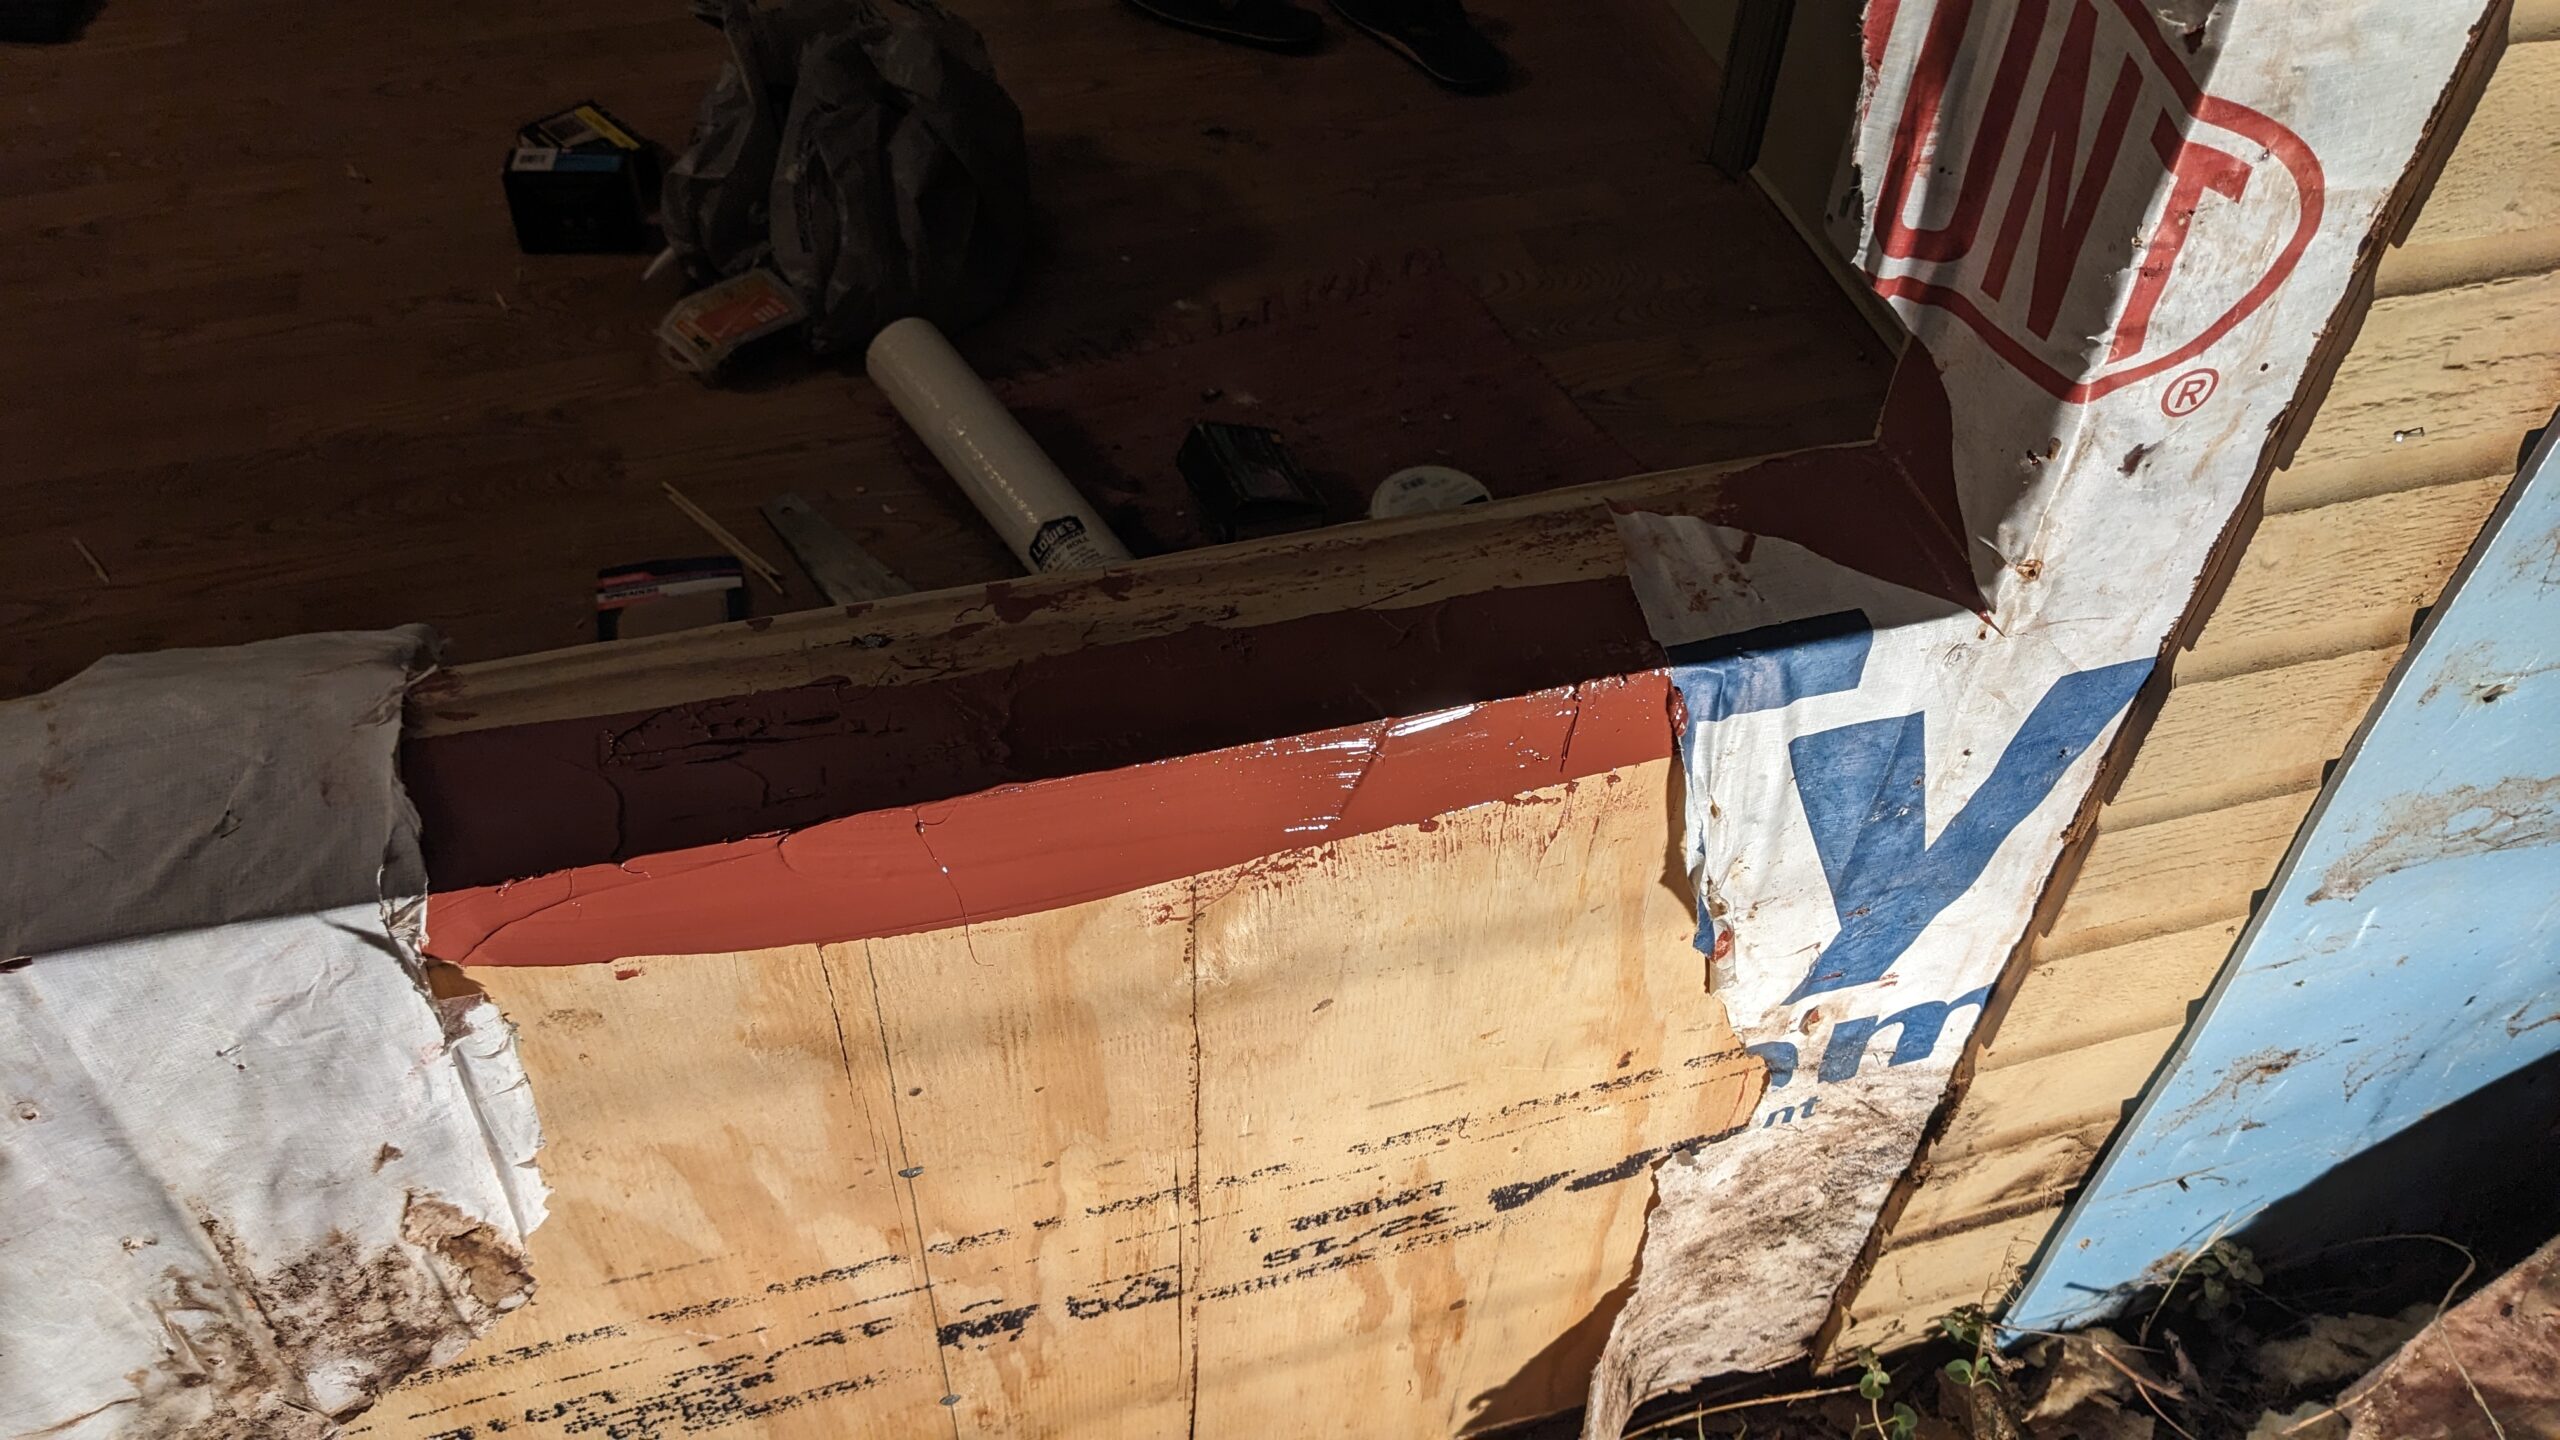
Preliminary look at the outside. That’s R-1 foam board under the siding. And the original masonite (hardboard) siding is underneath that. You can see some rot right at the corner of the window at this point.
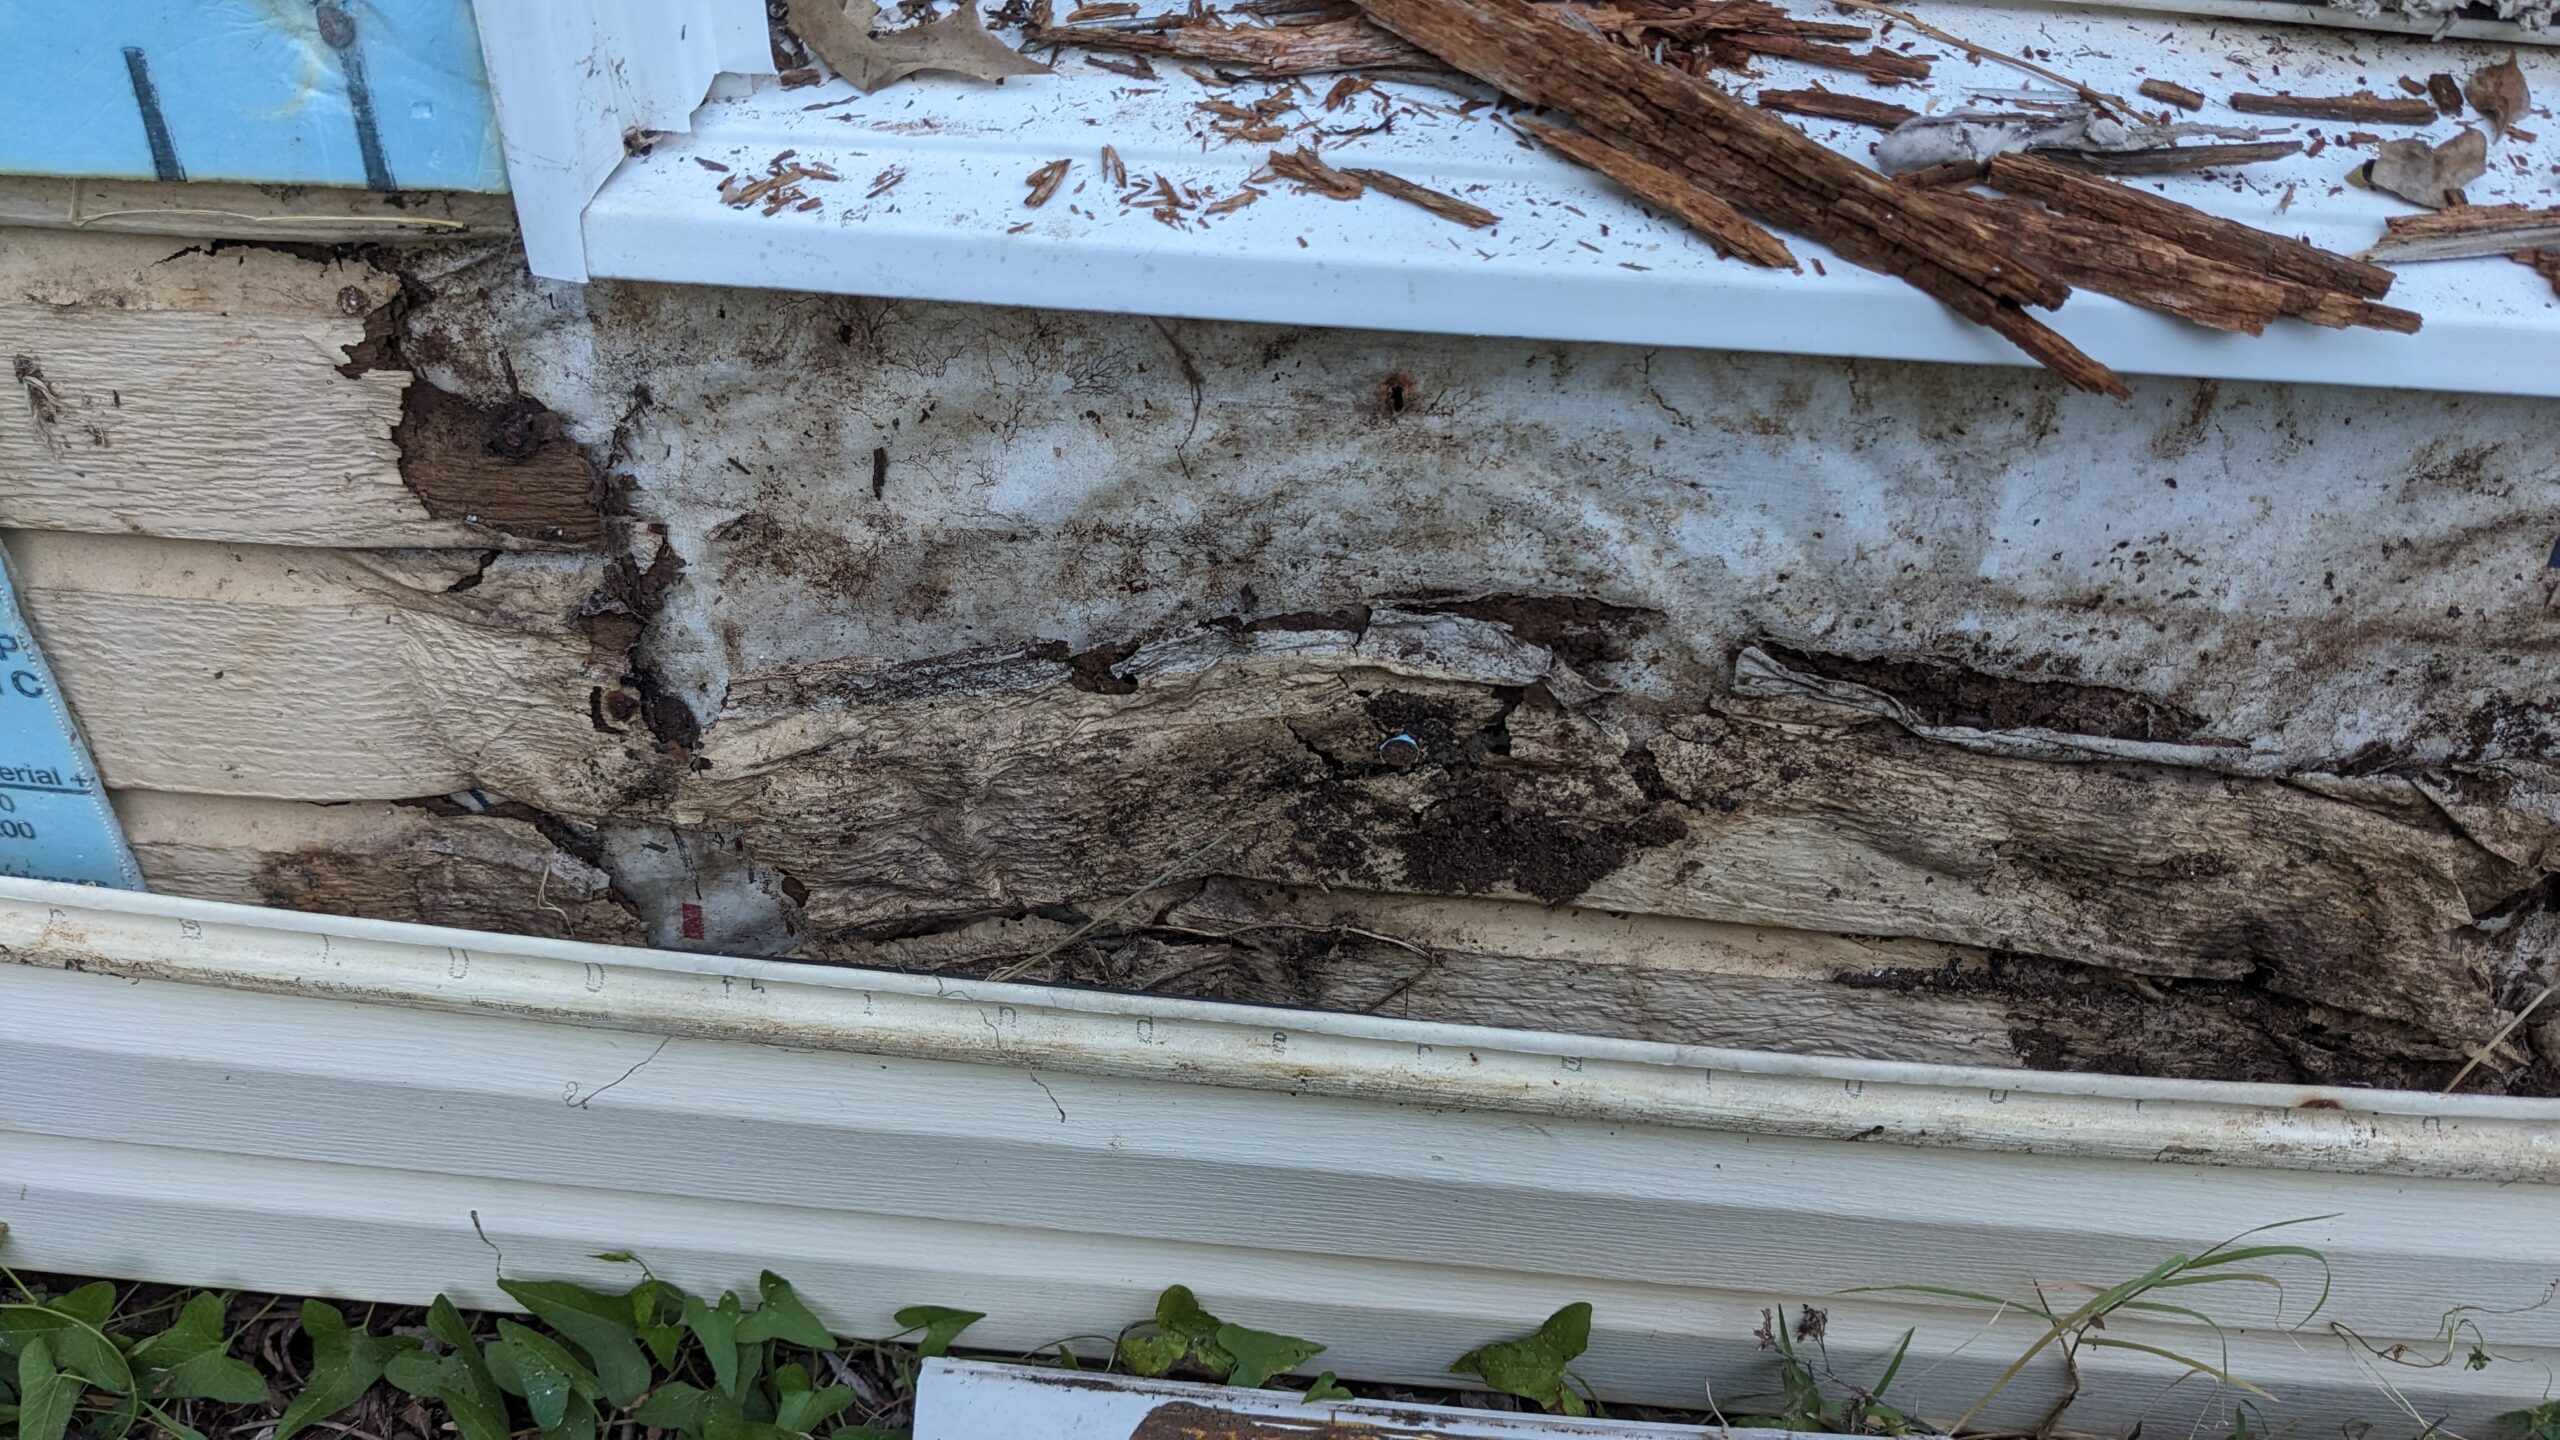
Ok. There’s no more siding at this point. Just dirty house wrap. What little siding was left underneath the window was held together either by the layer of paint, or hopes and dreams.
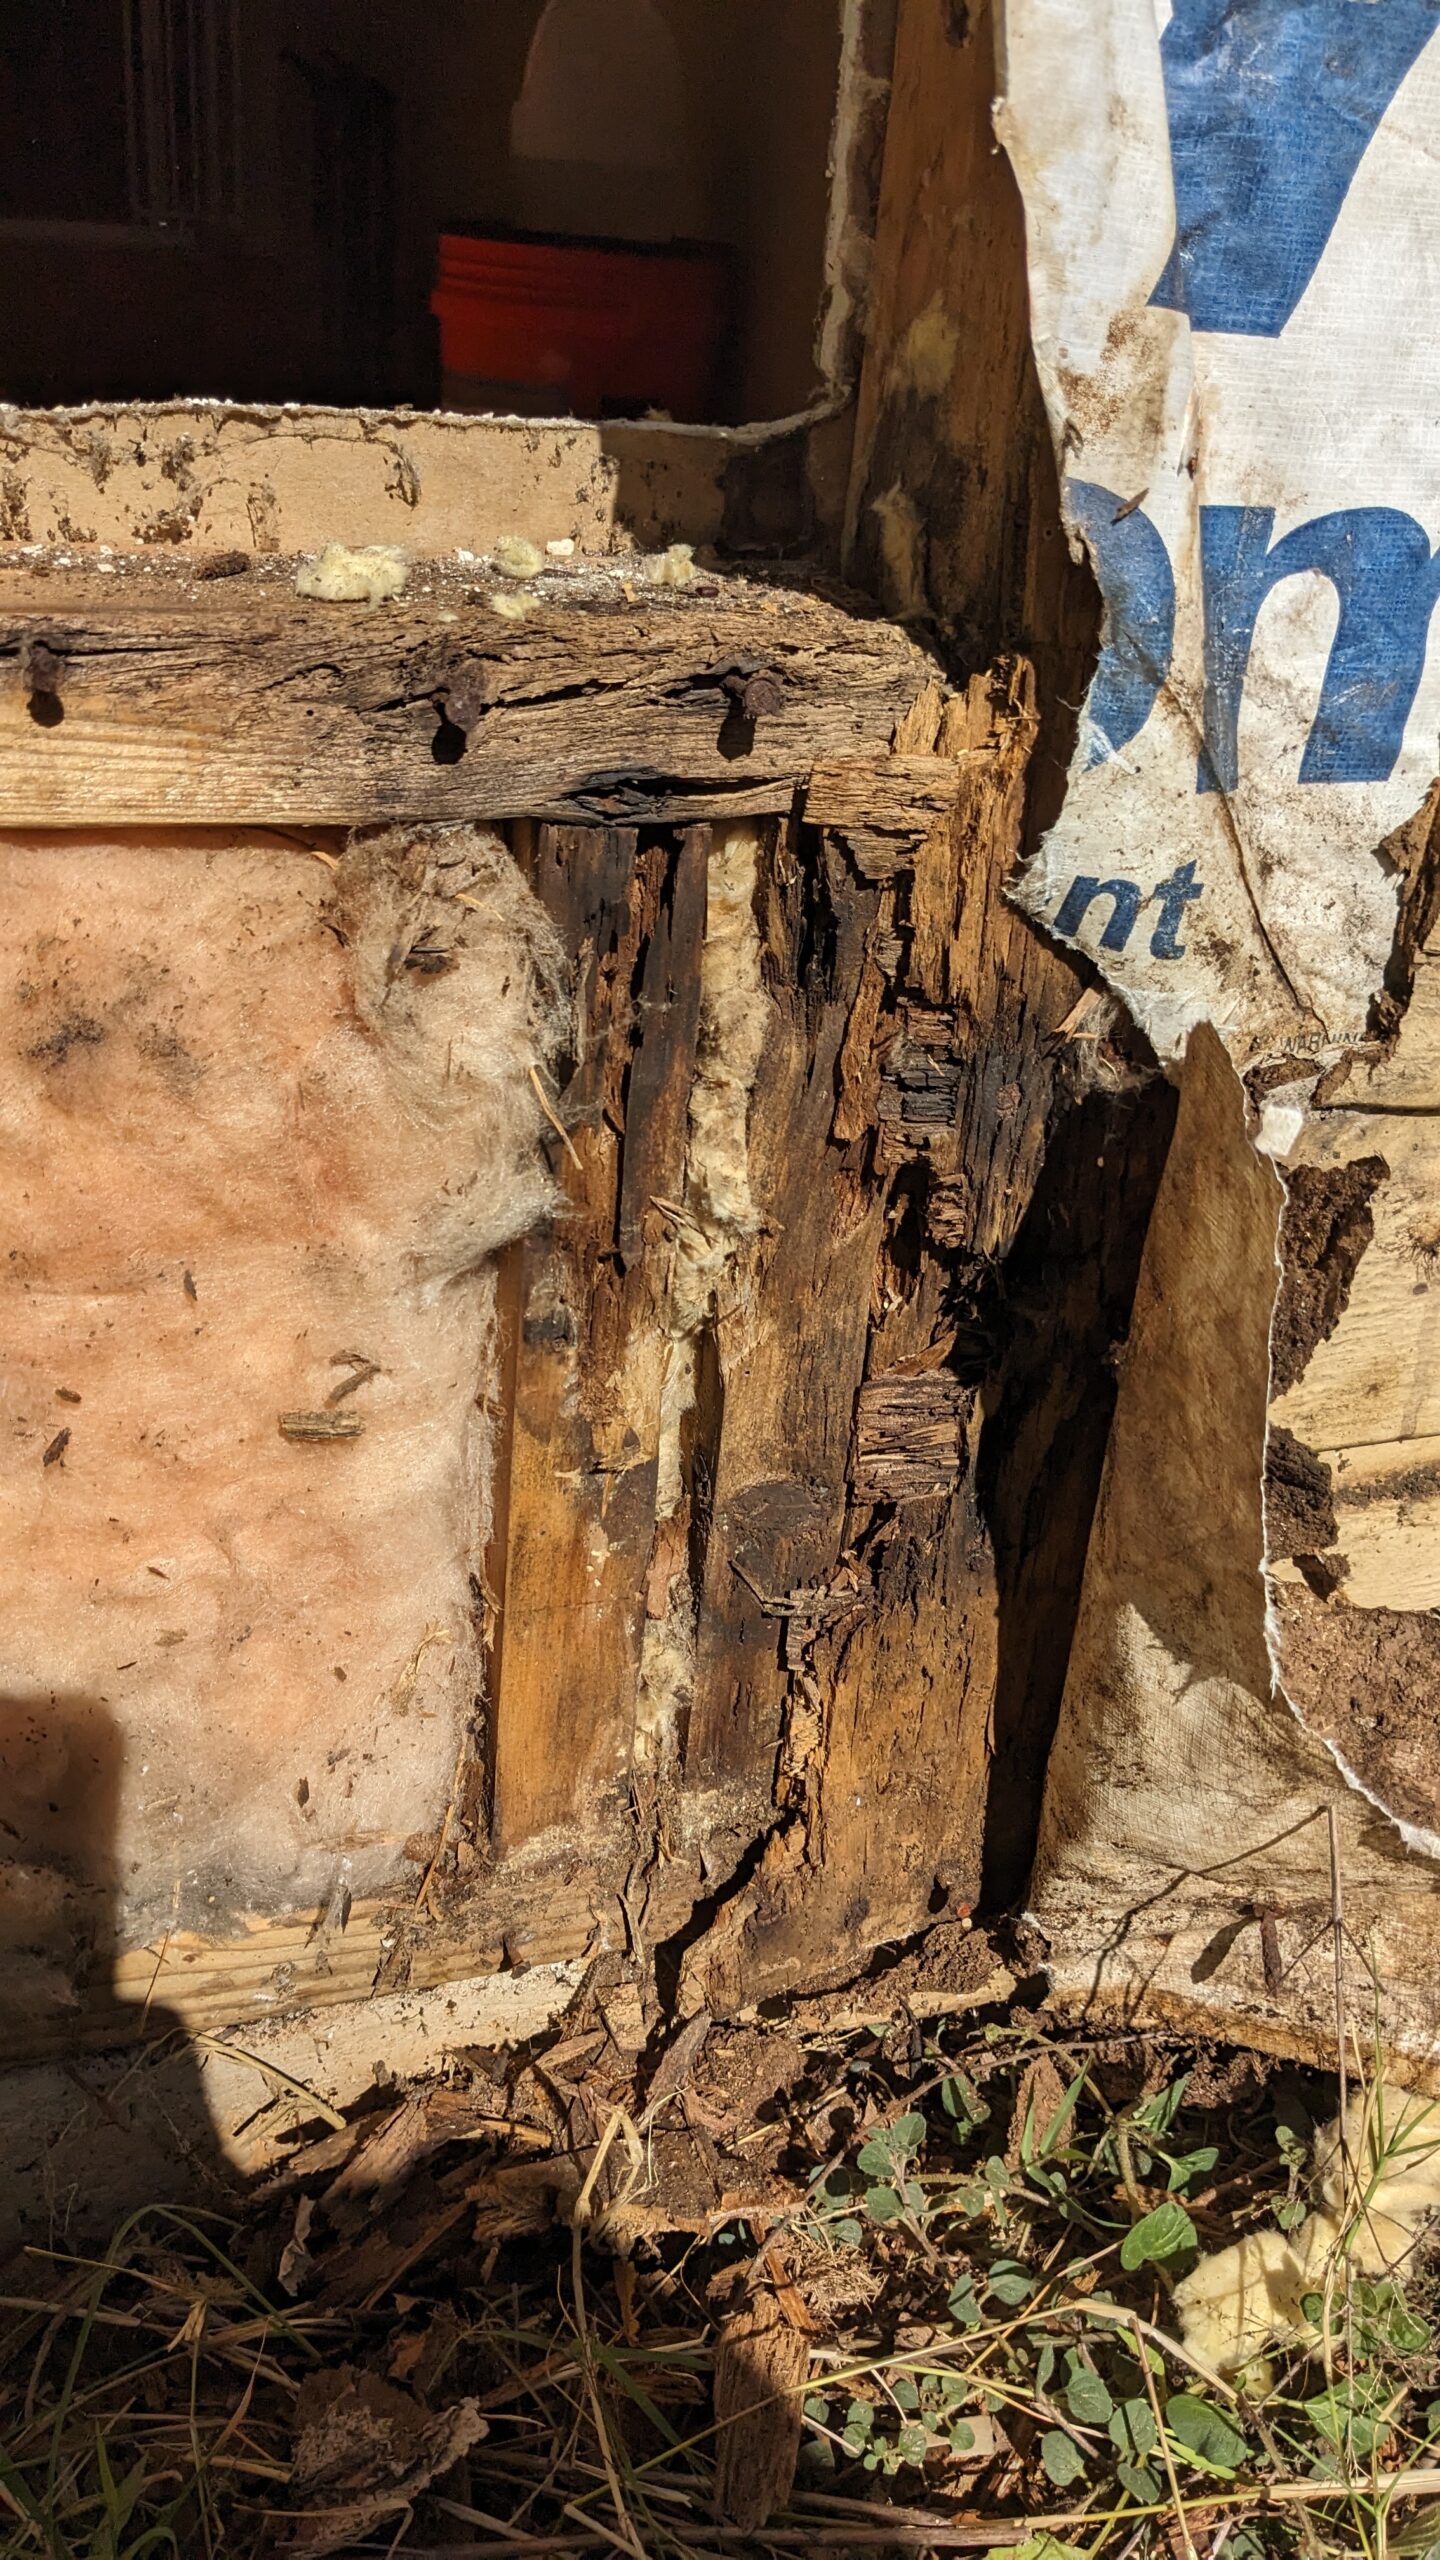
The house wrap ripped apart easily. The sheathing was plywood instead of OSB, but didn’t stand a chance given the lack of water protection. The sill plate is treated and was ok, but the rest of the studs in/around the window were absolutely trashed. Let’s also take some time to appreciate a cripple 1/2" from the jack. Why is it even there?
I’m using a pry bar to remove jack studs without messing up the existing sheathing. I don’t want unnecessary seams and 3" wide strips of new plywood to fill gaps because I didn’t measure properly. This took a very long time with two sets of siding nails, along with the framing nails holding the sheathing to the studs.
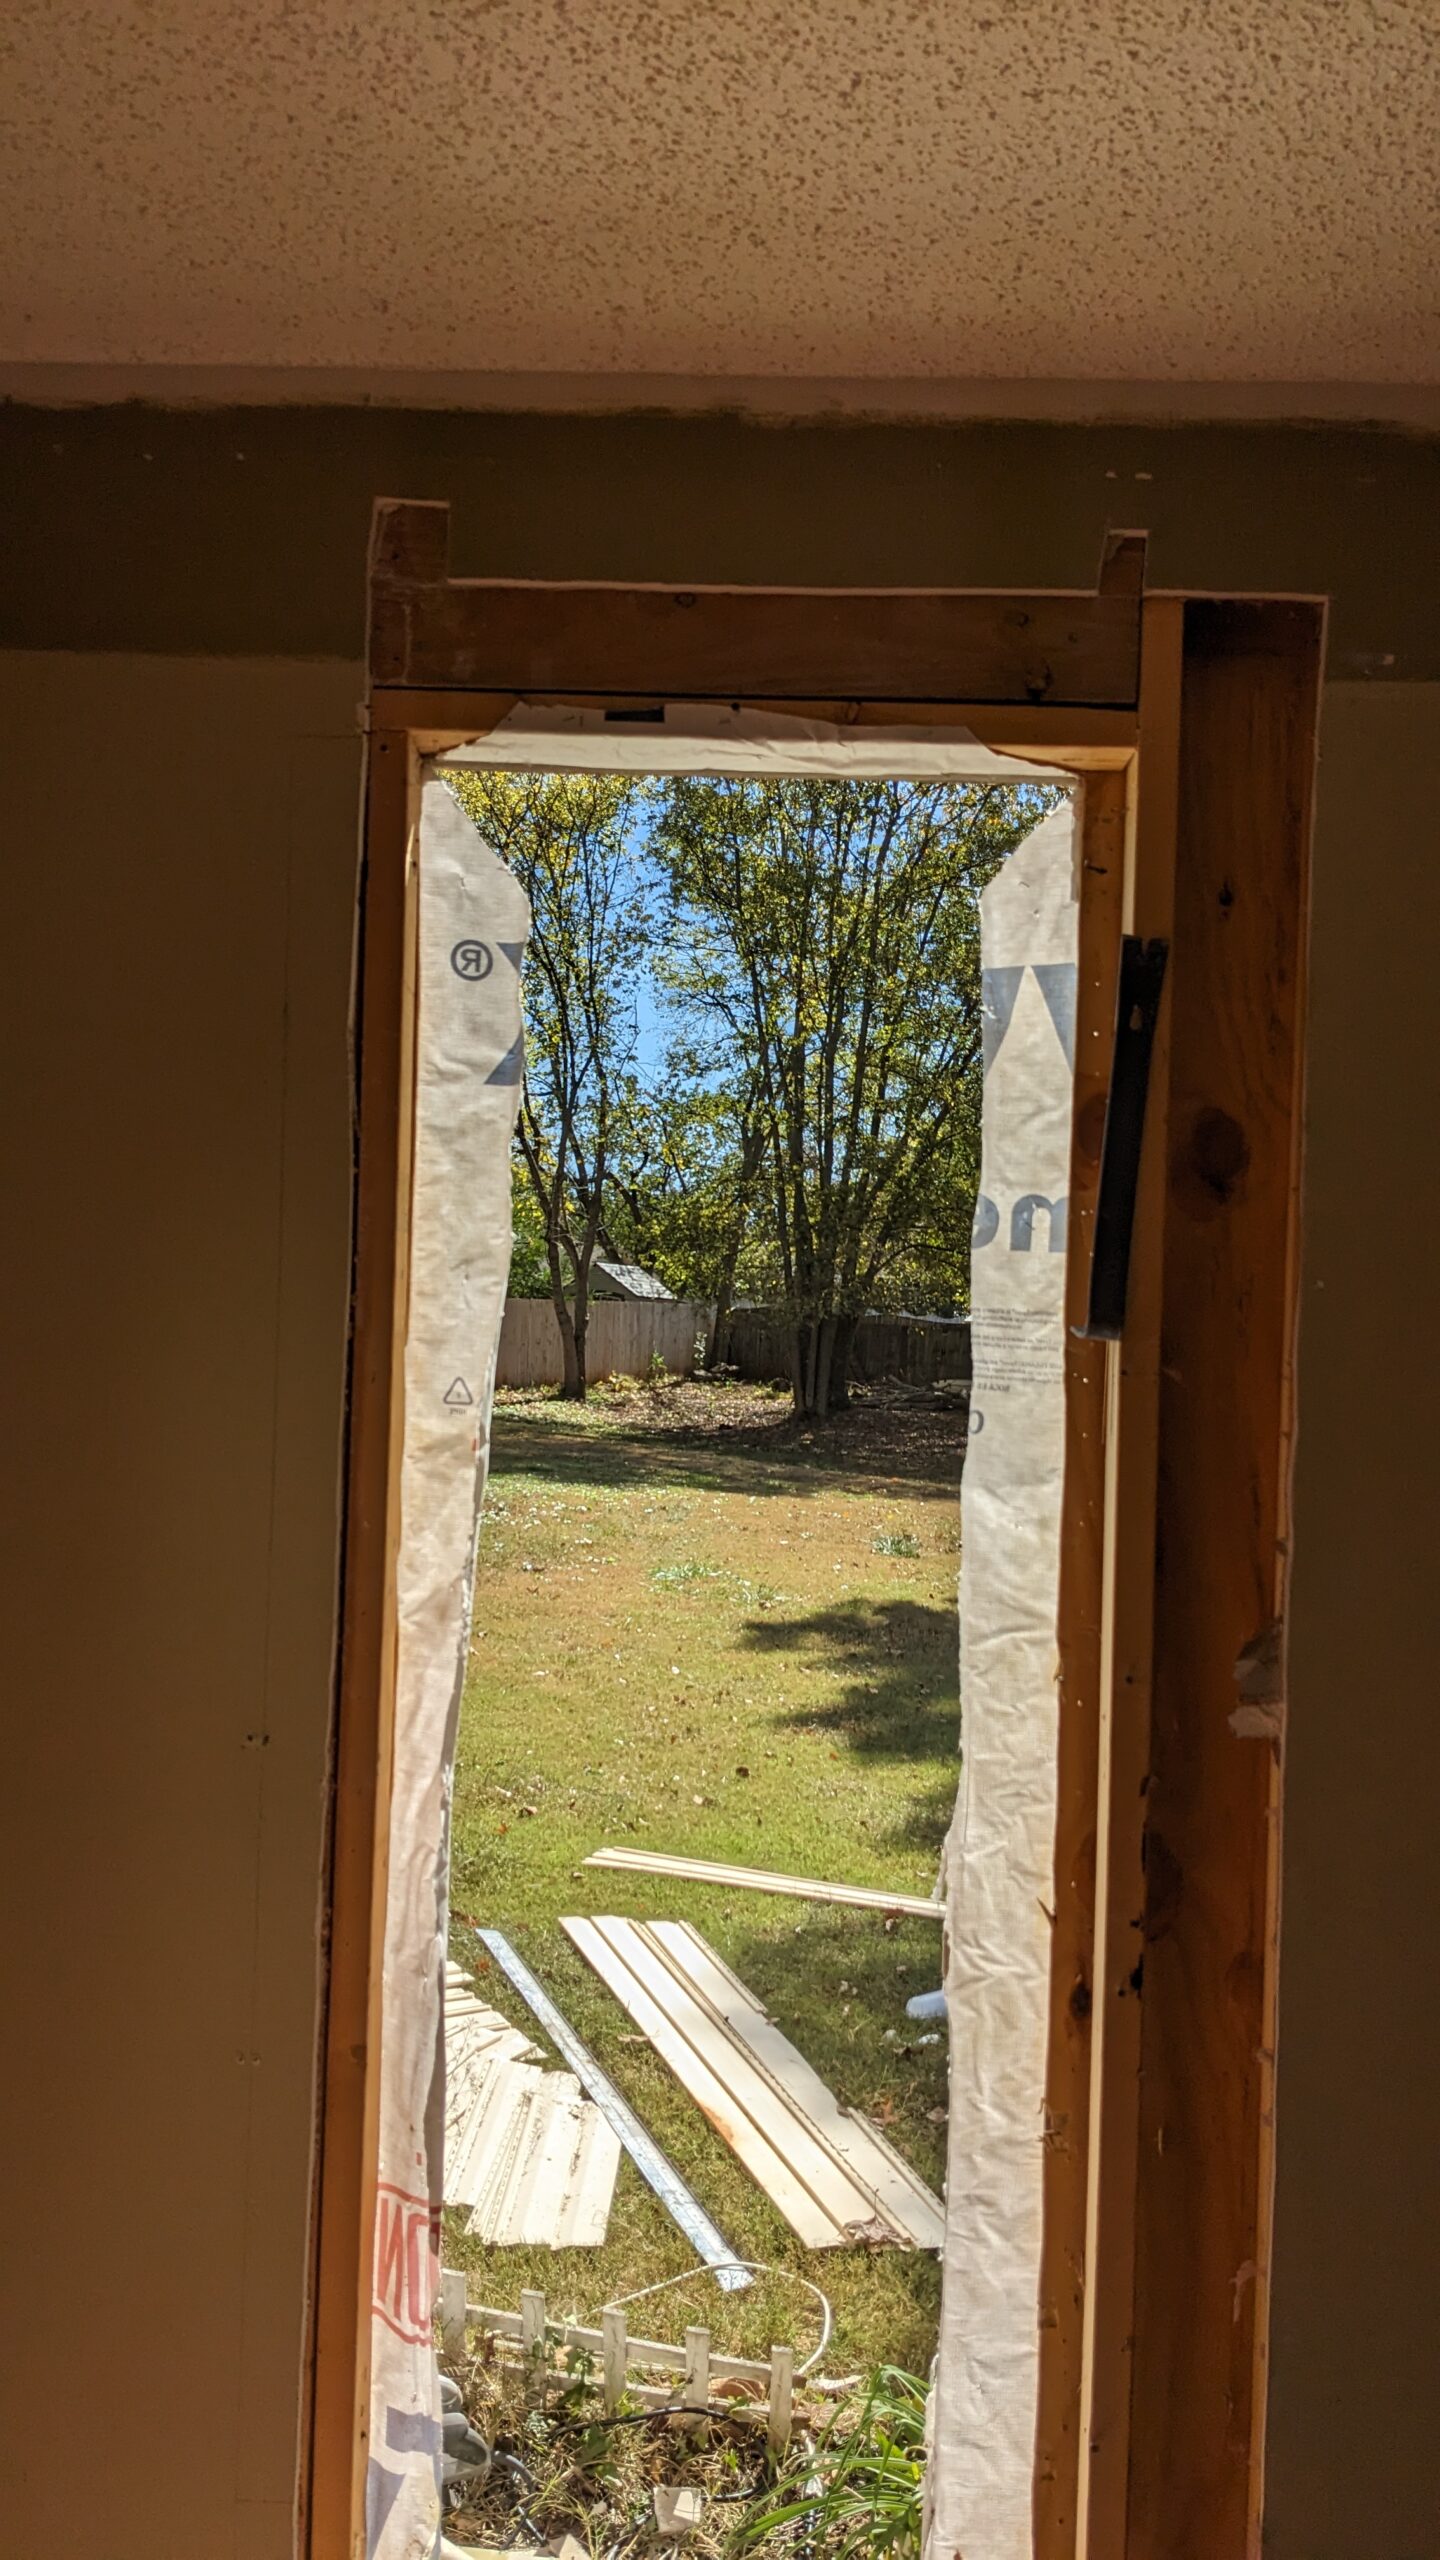
The other frustrating part was that they used a 2x12 as a header that went all the way up to the top plate. I intended on using a 2x6, and fill from there to the top plate with cripple studs and insulation. So there was a lot of drywall removal I didn’t originally intend on. And pulling out two layers of 2x12 was pretty difficult at that height without much leverage or anything to push against.
Eventually I decided to plan out where the studs and headers would go, drill holes in the corners all the way through, then connect the dots with a straight edge.
From here I used a circular saw with the depth set ~1/16" less than required for the original siding. I want to cut through it without tearing through the Tyvek. I ended up prying the siding off, then using a cordless oscillating saw to gingerly clean up the rough edges.
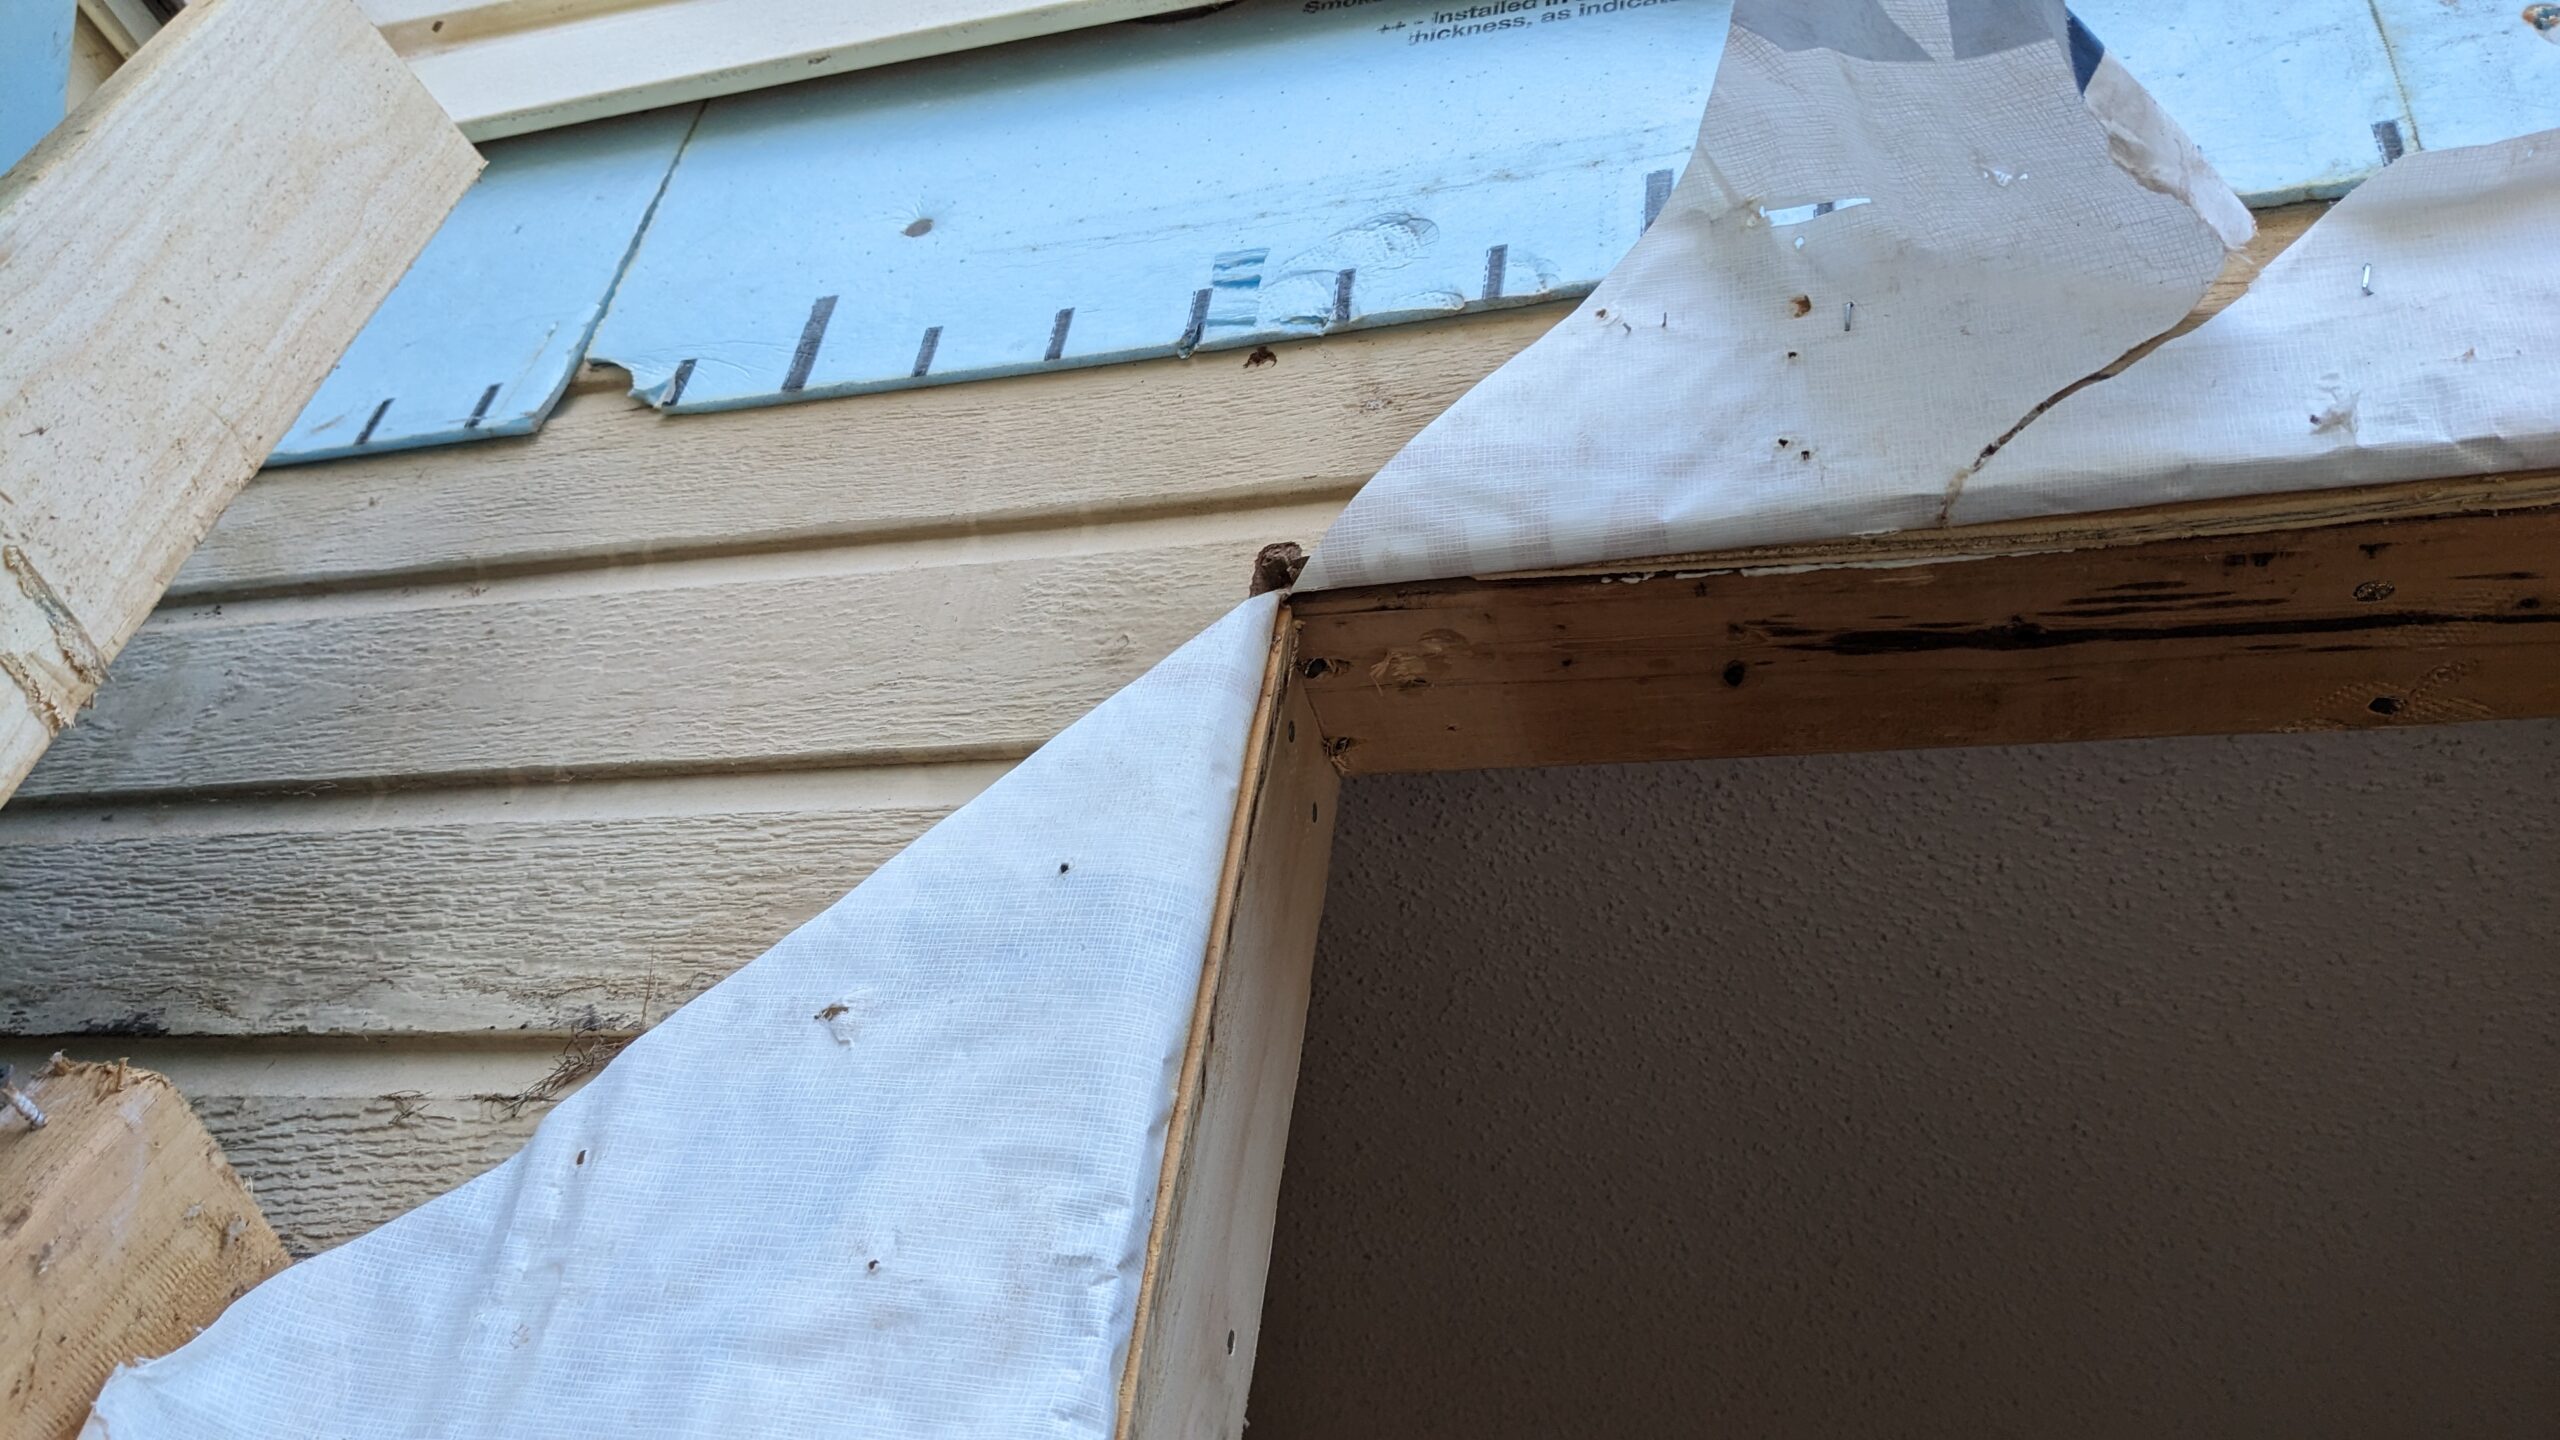
All of my layers are peeled back. Edges are straight and not ragged. Ready to start framing and layering the flashing.
Framing:
I don’t have a lot of photos from this stage. It’s so straightforward a middle schooler who knows how to measure and use a saw can generally do this with a little bit of direction from an adult. But I’ll try to explain my best to make up for the lack of photos.
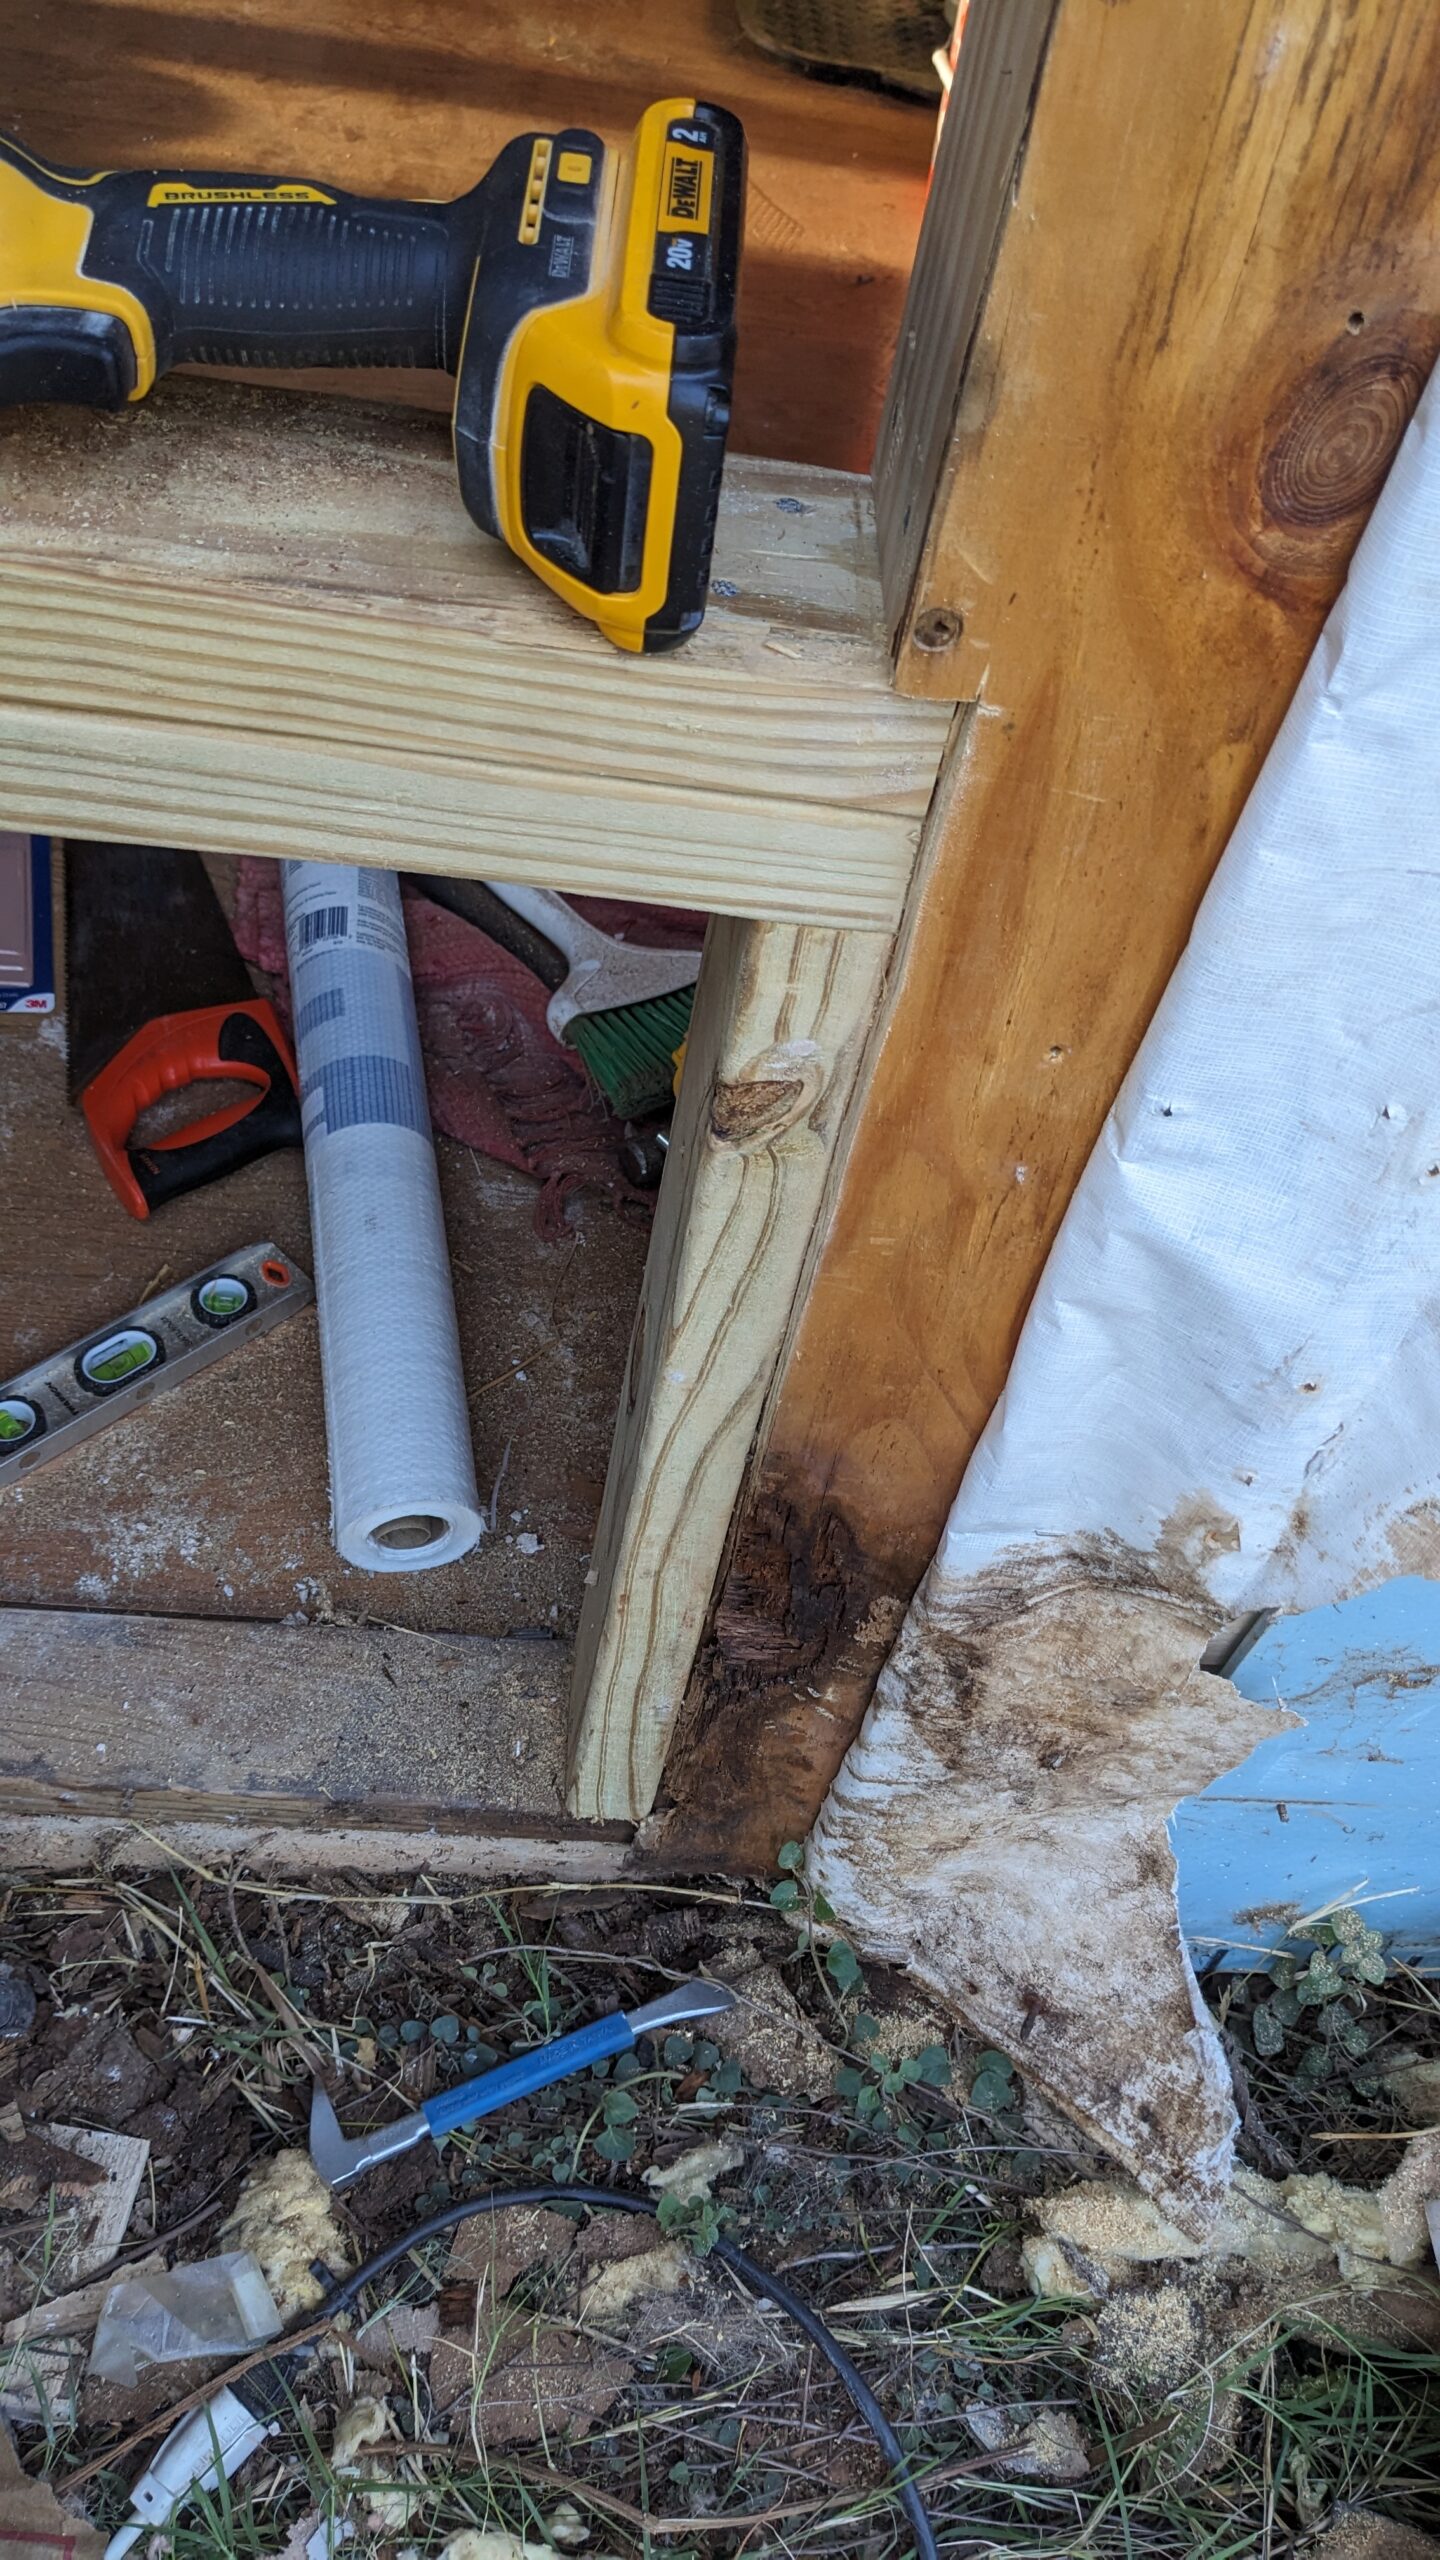
I used treated 2x4s for everything below the bottom edge of the window. You don’t want to use brand new lumber that’s still wet at the store. Use something that’s been sitting to dry for a week or so or adhesives won’t stick to it well. Also put something on it as it dries to prevent twisting, bowing, etc.
These are toe nailed in. I usually start with a ceramic coated deck screw at first to get a corner set in place once it’s flush. Then finish off with hot dipped galvanized nails. The copper salts used in pressure treated lumber will destroy the steel in regular nails in short order.
If you can, put a small bevel on the cripple and jacks underneath the sill. This will help water run outwards instead of back into the house. I went about 3 degrees, and marked each to make sure I installed them properly. I also used a double sill, just in case something were to rot in the future, there might be a little more rigidity left over.
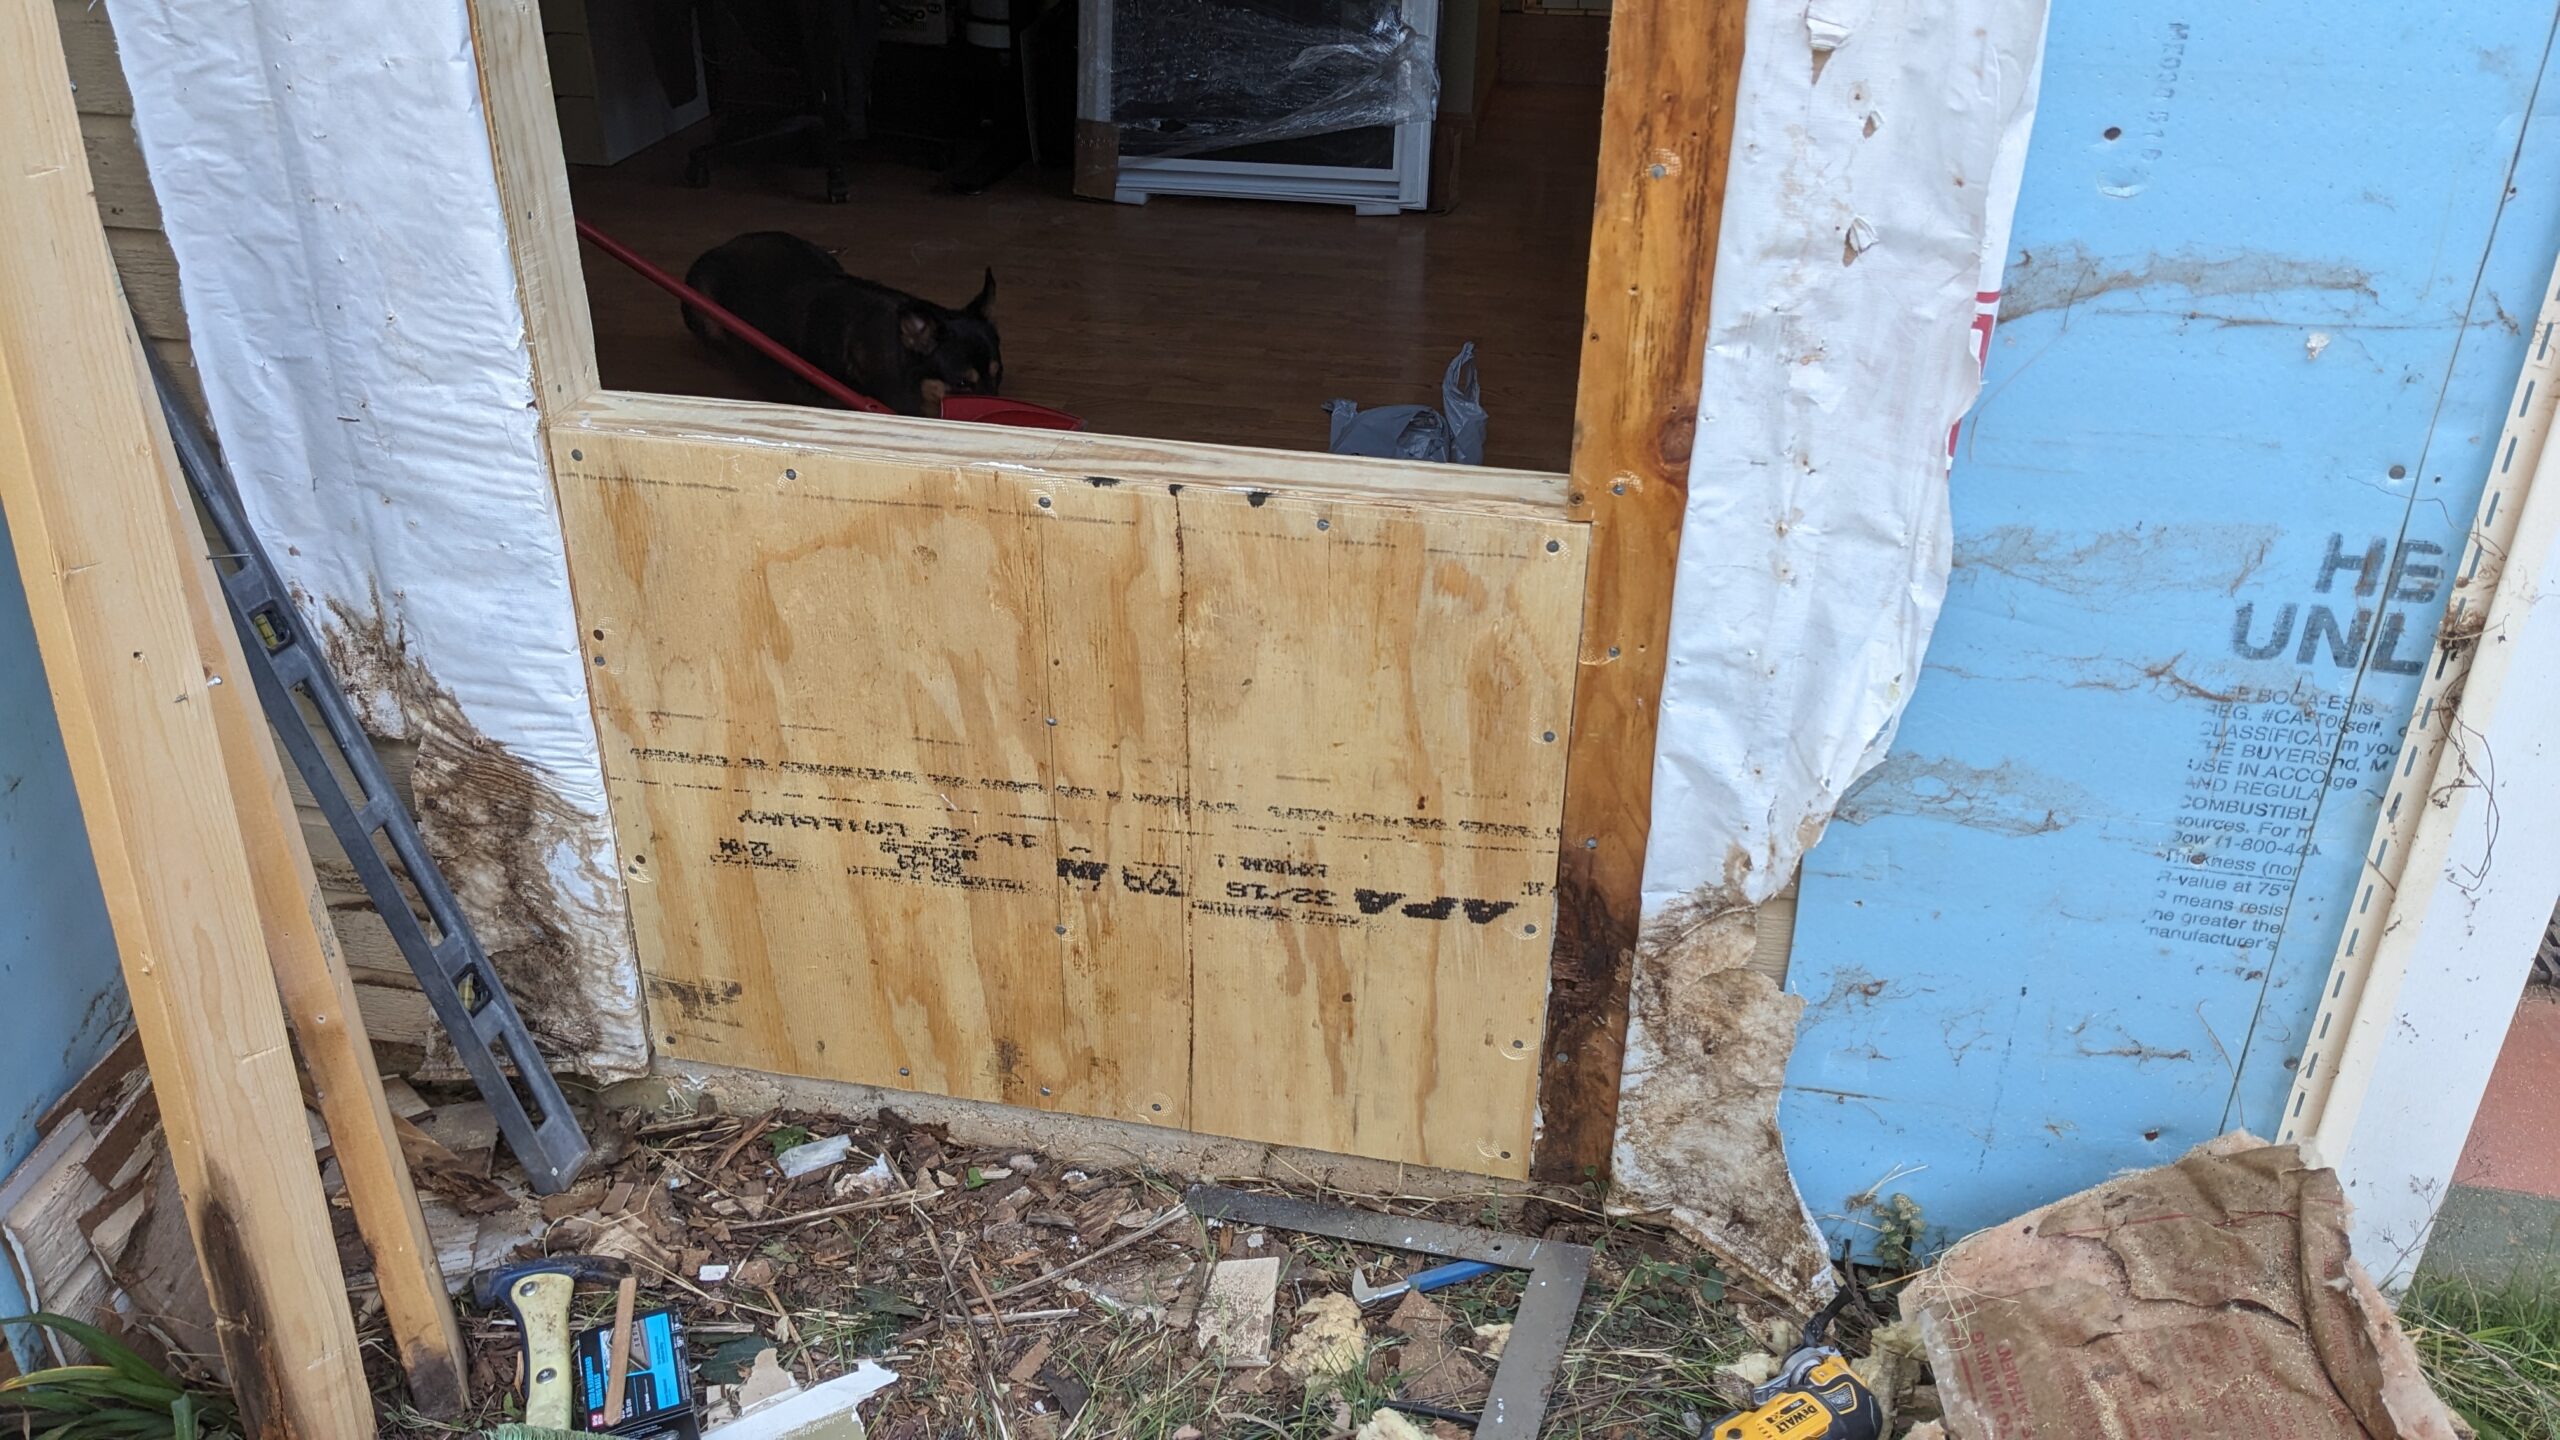
I used 1/2" construction grade plywood to close everything in and match the original sheathing thickness. I ultimately want house wrap on top of the original siding layer rather than underneath it, but this existing housewrap will be tied into the window flashing as elegantly as I can first.
I could have added a 1/2" furring strip to my framing, and gotten a bit of extra insulation in there. But wasn’t quite sure how to work the two layers of housewrap into that in a way that worked. So 2 layers of plywood were used to mimic the existing setup.
There are no photos of the header. I think by that point it was late in the evening of day 1 and I was pretty pissed off. But I used 2x6 with some scrap OSB between them to get my 3.5" total thickness. Then filled above that with something like 6" long cripple studs up to the top plate.
Flashing:
Not too many pictures of this process either, at least not at the initial stage. It was already starting to get dark out, and I was about 9 hours into the project at this point. And my fingers had liquid flash on them, so I was hesitant to touch my phone.
I used a tube of Prosoco Red Guard (or R-Guard) to coat the corners of the new rough opening, along with a few inches towards the outside. I bought a 3-pack of plastic spreaders for bondo, and used that to spread it out. They were still a bit soft for that, and if I were doing a lot of this I would use a metal putty knife and just clean it up afterwards with a wire wheel.
The existing housewrap had the bad spots trimmed off, corners cut, and was pushed into the R-Guard while it was still wet. I don’t think this is in accordance with the manufacturer’s instructions. But I don’t think this peculiarities of this particular remodel are covered either. So we’re using some good engineering judgement and common sense. There’s no way I could do it worse than the previous folks.
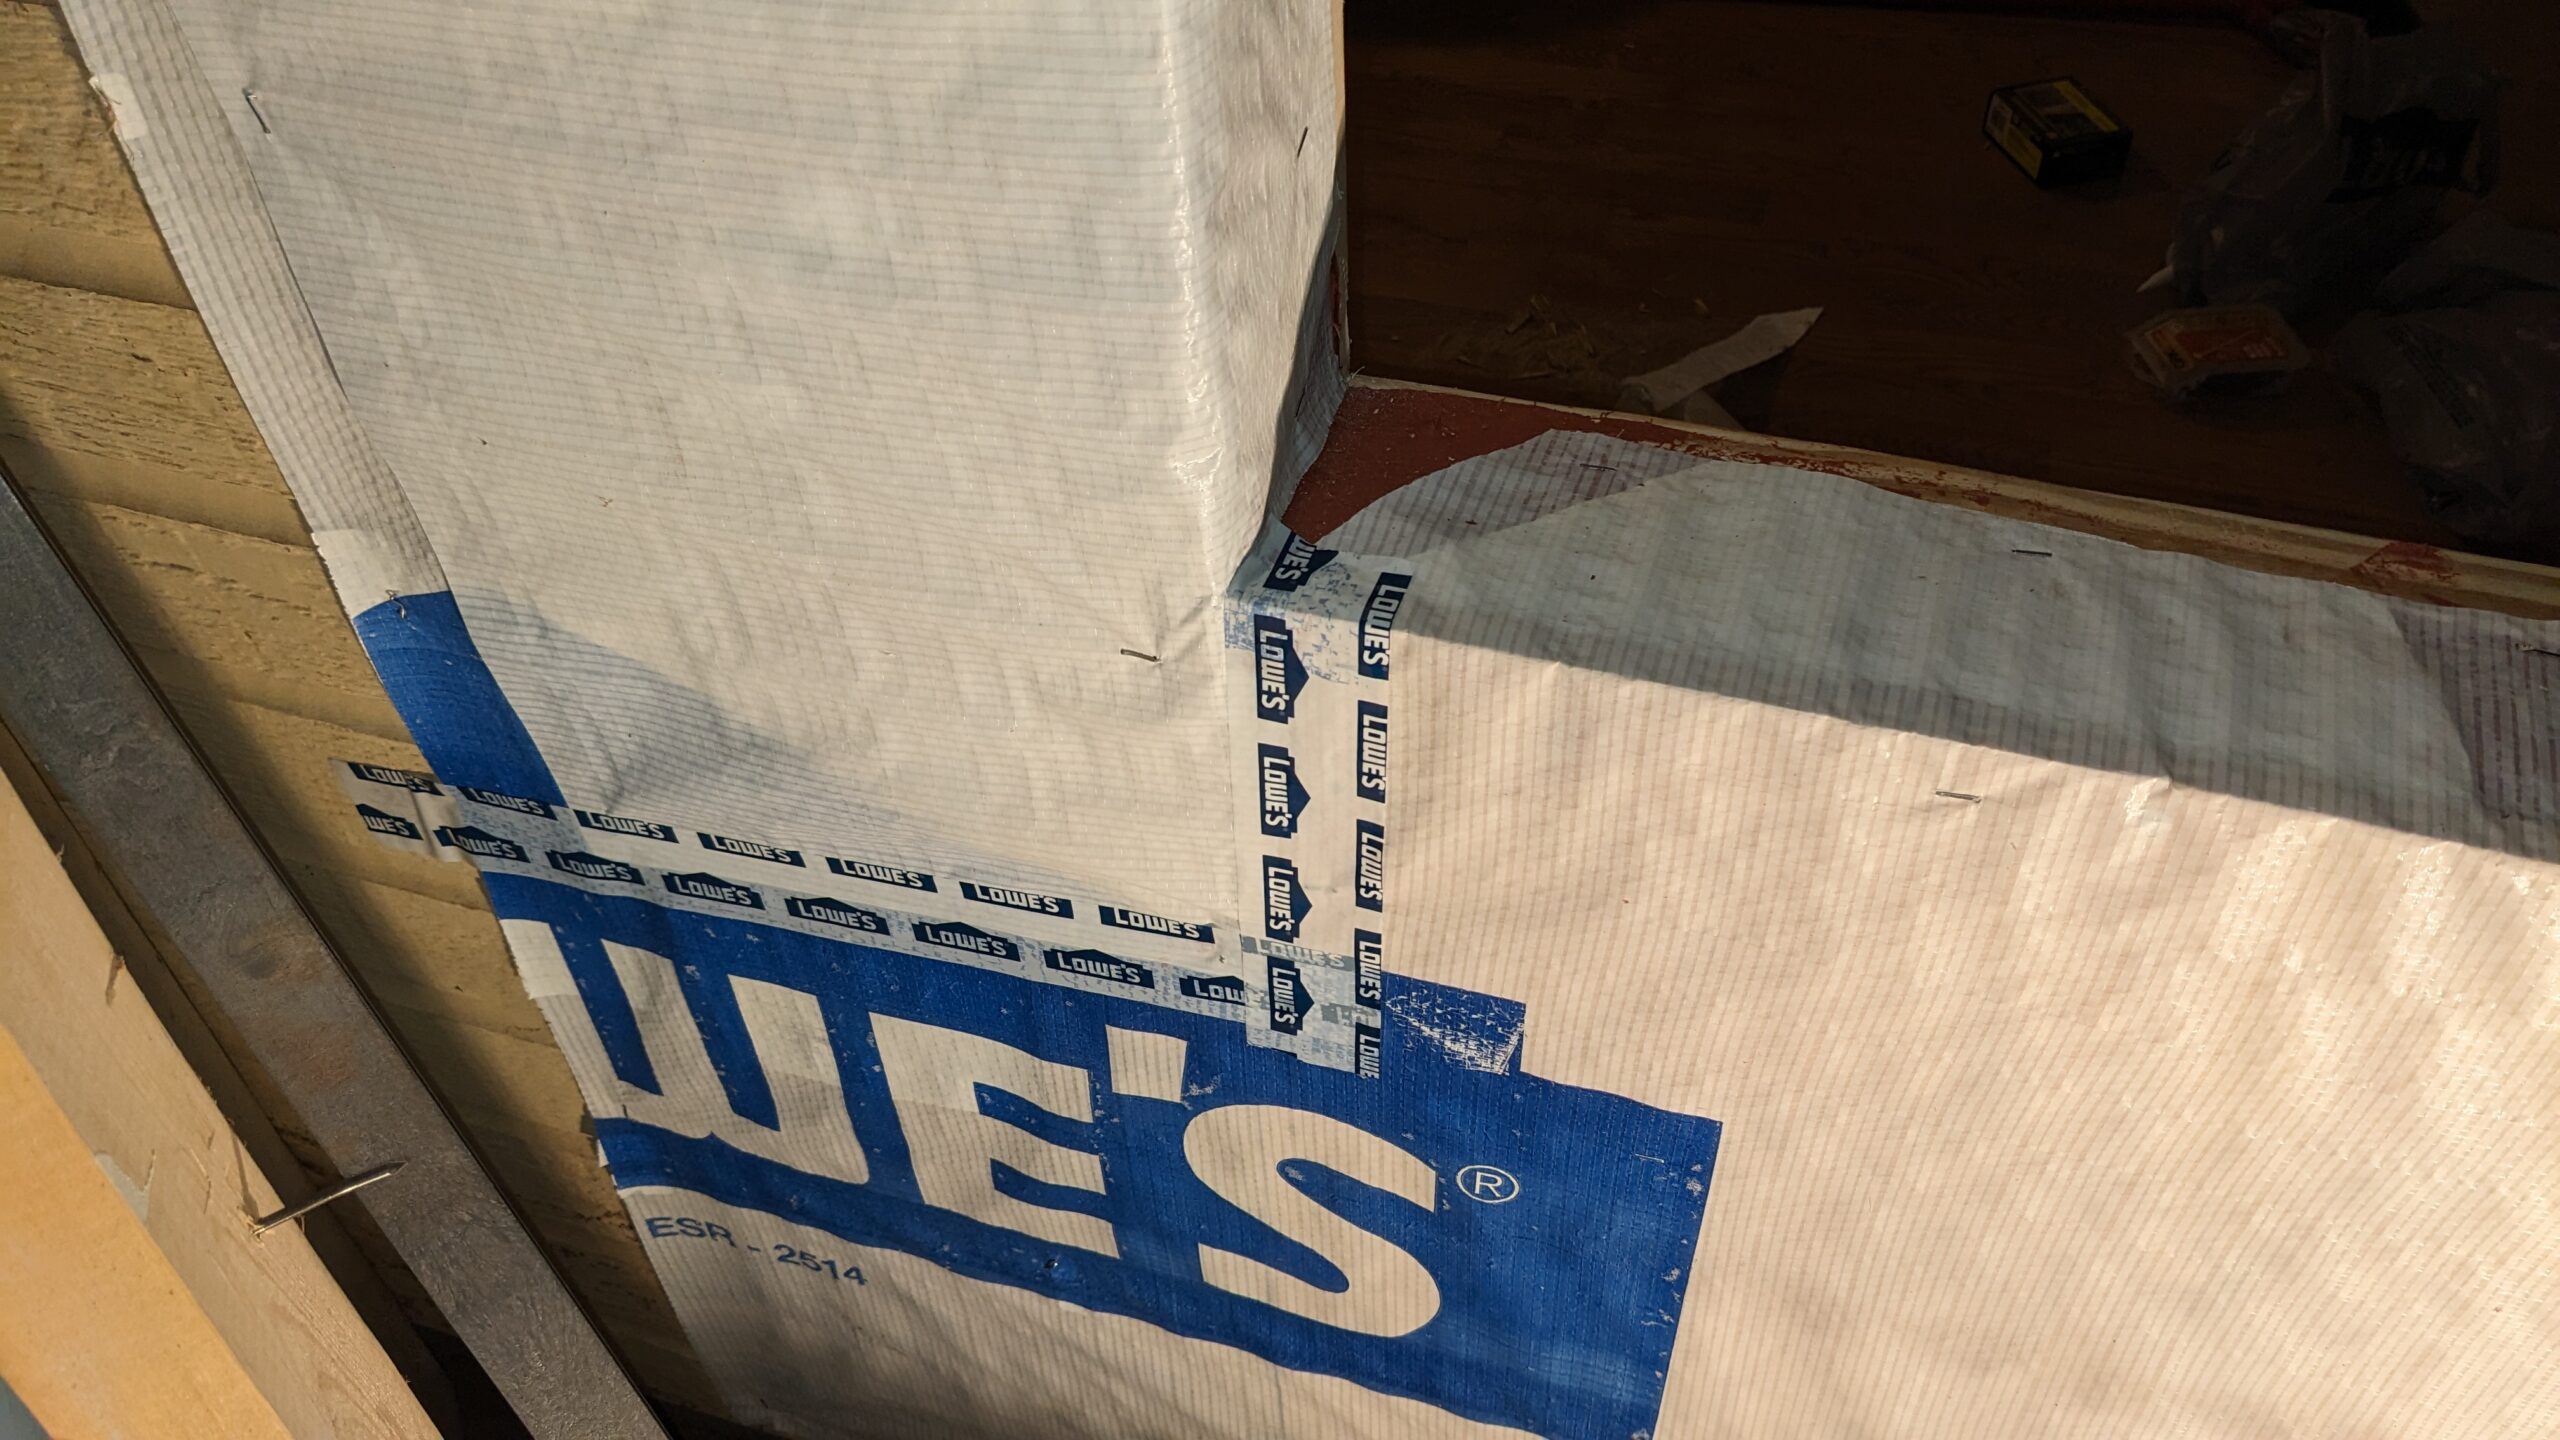
More plywood was used to fill where the rotten siding was, and a strip of additional housewrap was laid down over it. I put the bottom edge right against the foundation and used the full width, cutting in the corners at 45 degrees like before. Getting it as far back as I reasonably could into the corner, then overlapping and taping upwards.
I wanted the area immediately around the window to be covered, but the siding was going a pretty good job shedding water as intended over the large open areas. So I only focused on the spots immediately adjacent to the seams where we had problems before.
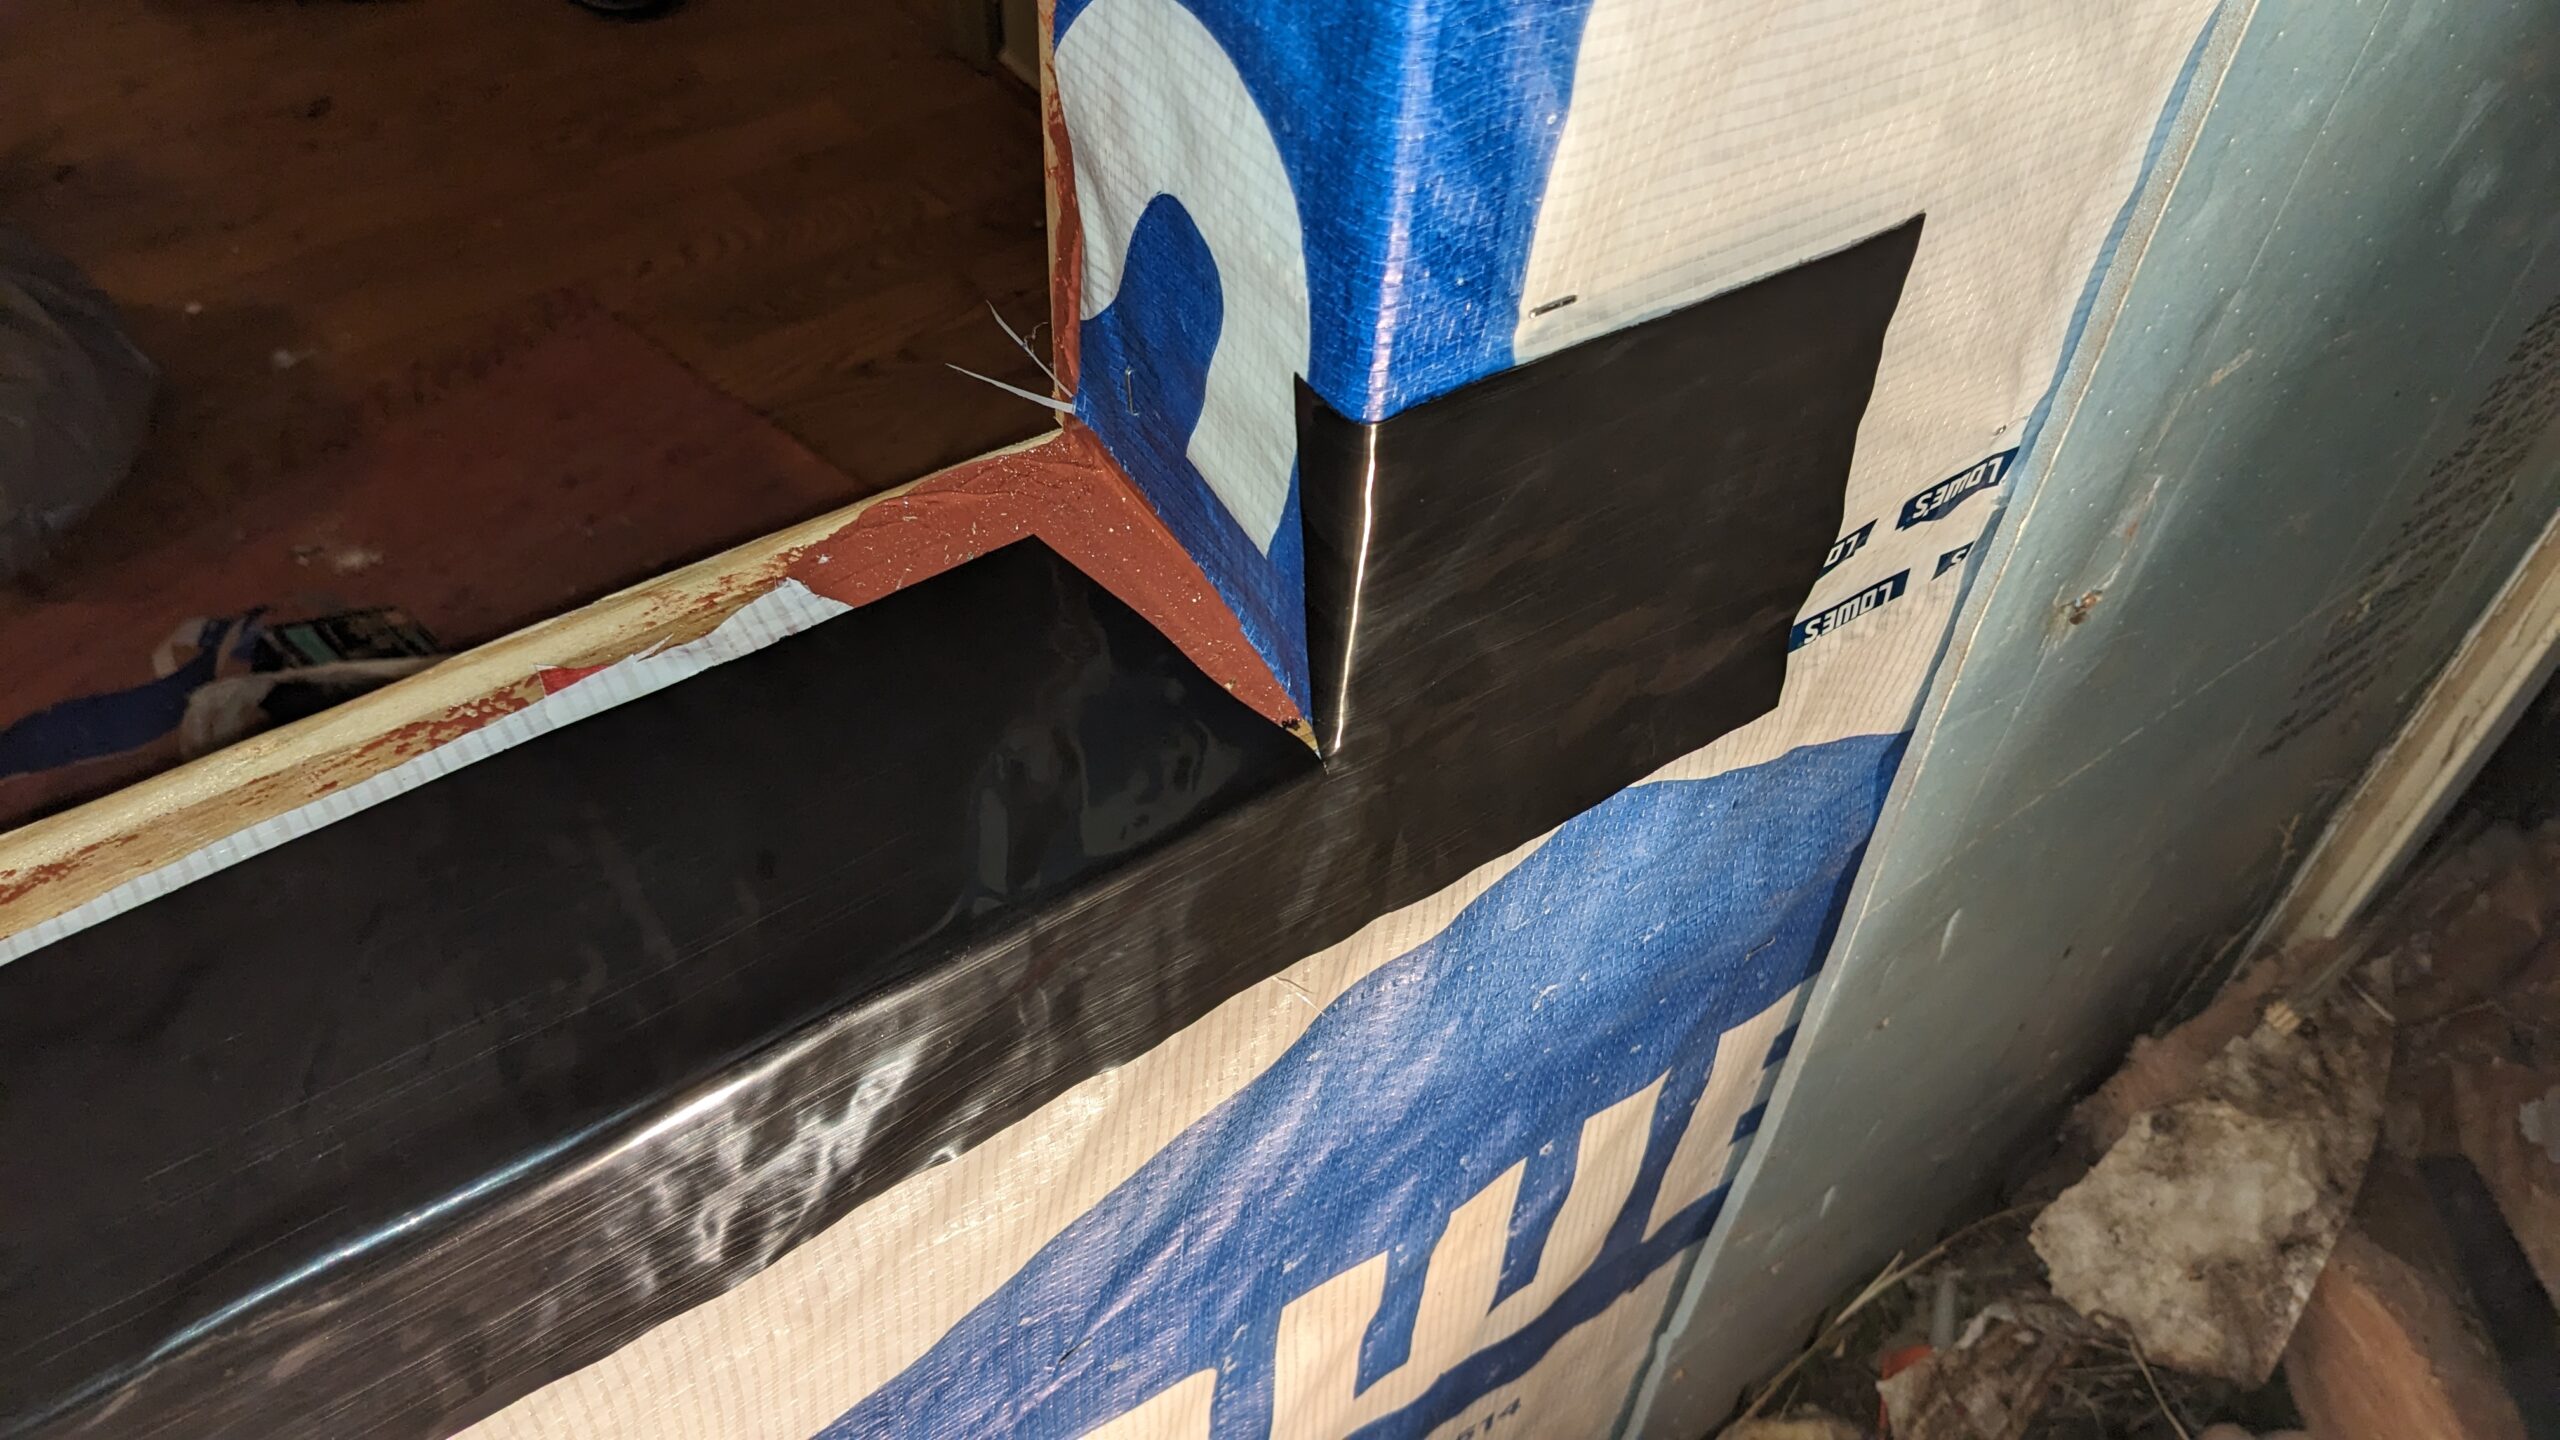
With 3 layers of different water barriers already, I just used the flashing tape sparingly in the pan. This is Reliabilt 4" wide flashing tape. It’s rubber (black, for UV protection) with asphalt adhesive on the back. One 33’ long roll is more than enough to do both of the windows for me.
Window Install:
It’s about 9pm on the first day at this point. I’ve given the liquid flash only 90 minutes to dry (40 minutes minimum before it’s no longer tacky) before plowing forward with the rest. But it’s the weekend before halloween and will be almost freezing outside overnight, and there’s a possibility for rain. So I really need to get this dried in before bed. And I don’t want to mess around with adhesive not sticking on morning dew tomorrow.
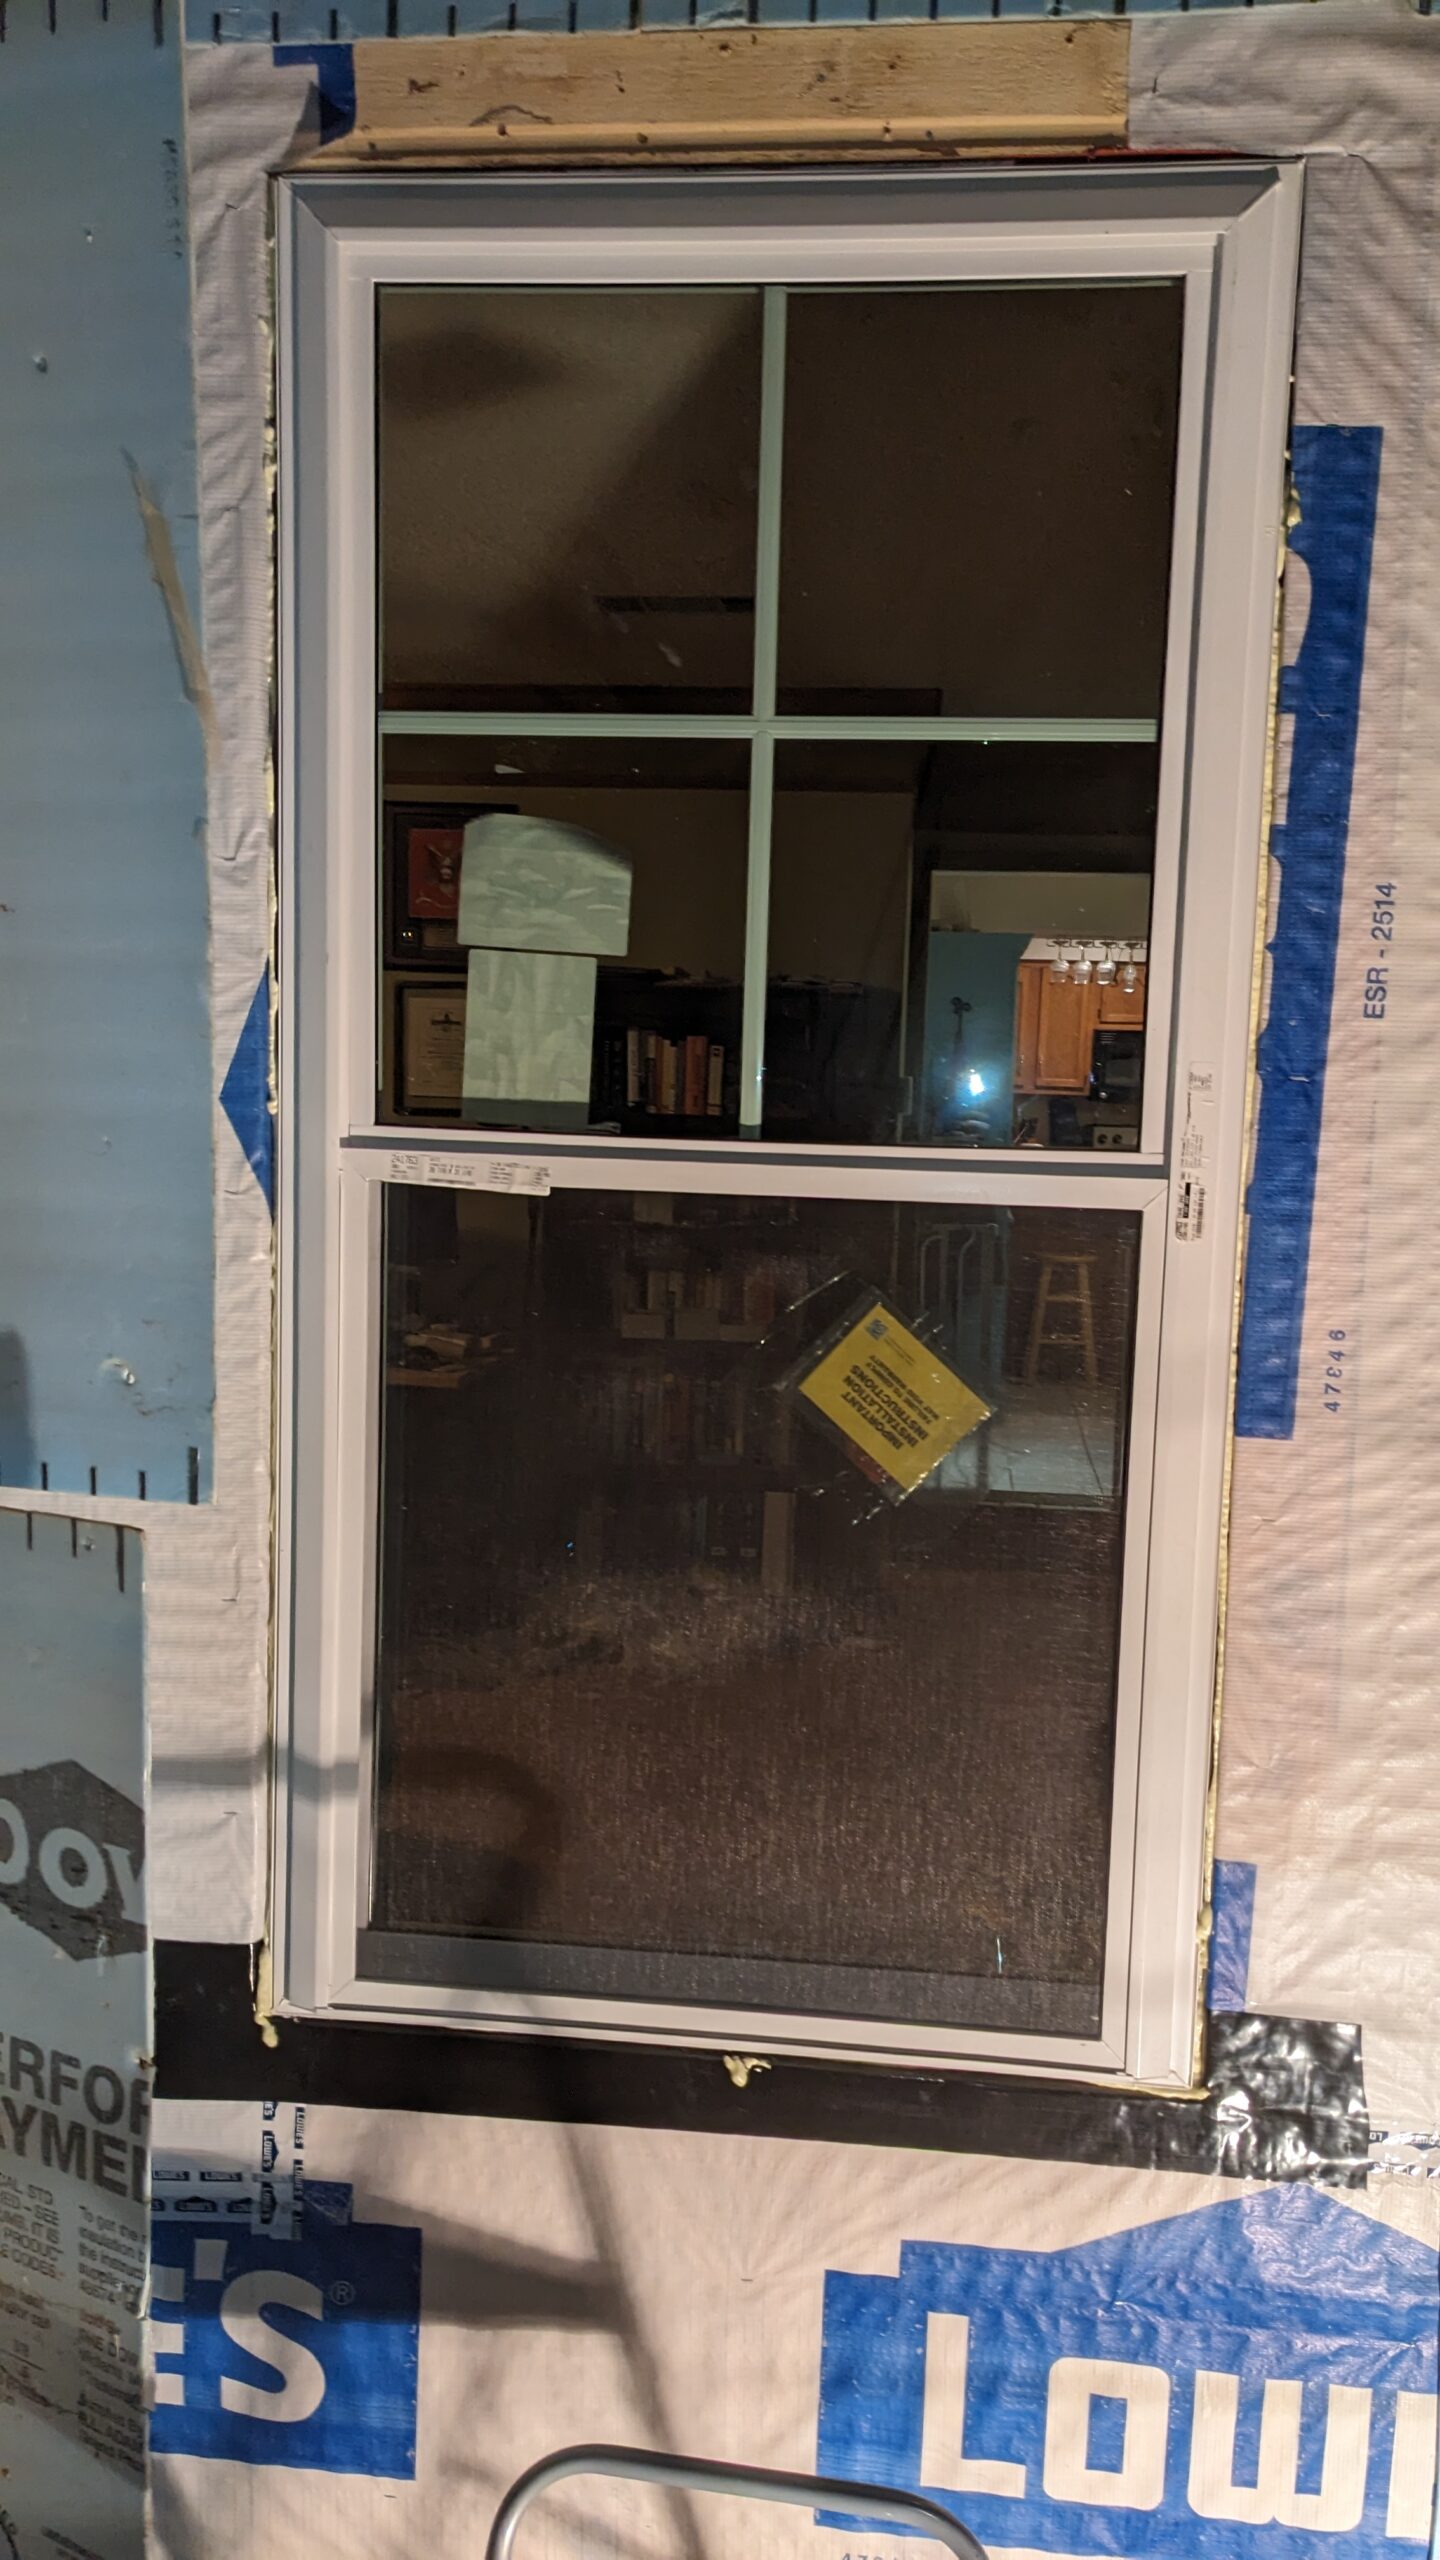
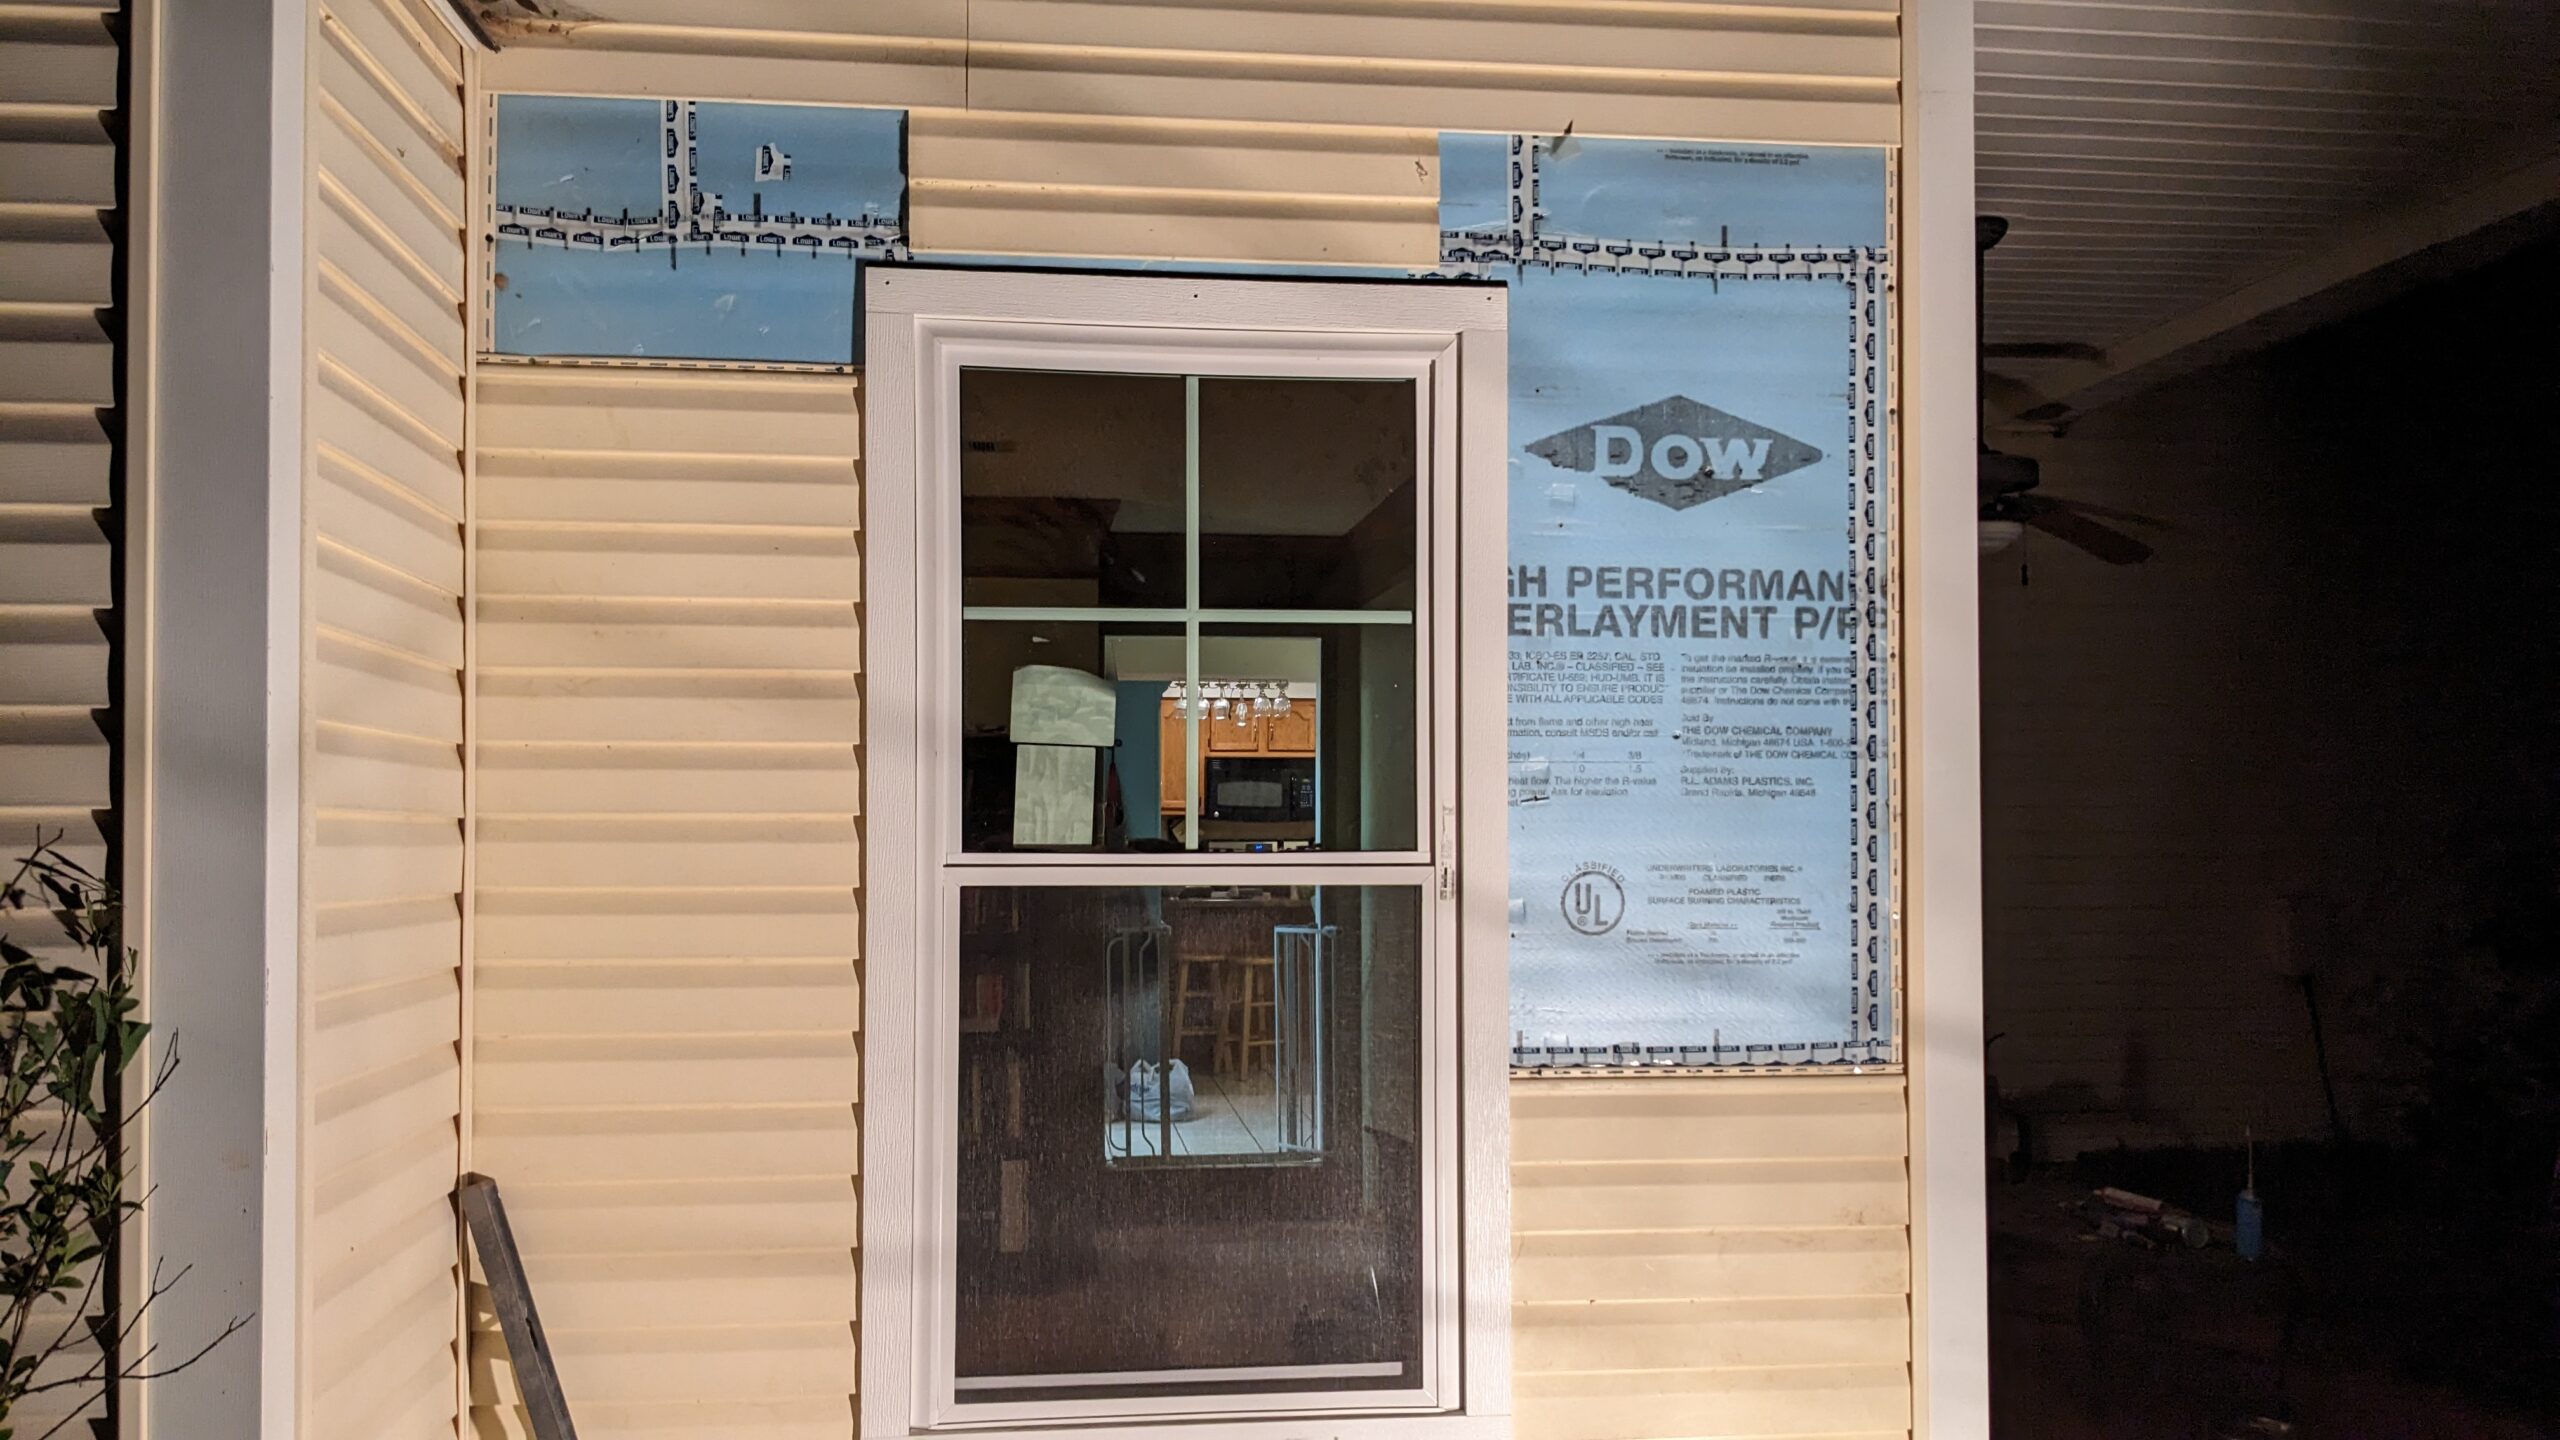
The actual window in place finally. If it wasn’t already apparent, this is a few inches shorter and a few inches wider than what I had. And it’s vinyl with fused seams. So there should be no leaking or rotting on this thing. It came with screws to hold it to the jack studs on each side, but I bought my own with white low-profile heads, and chromate finish (screwing into non treated lumber, which should be fine here).
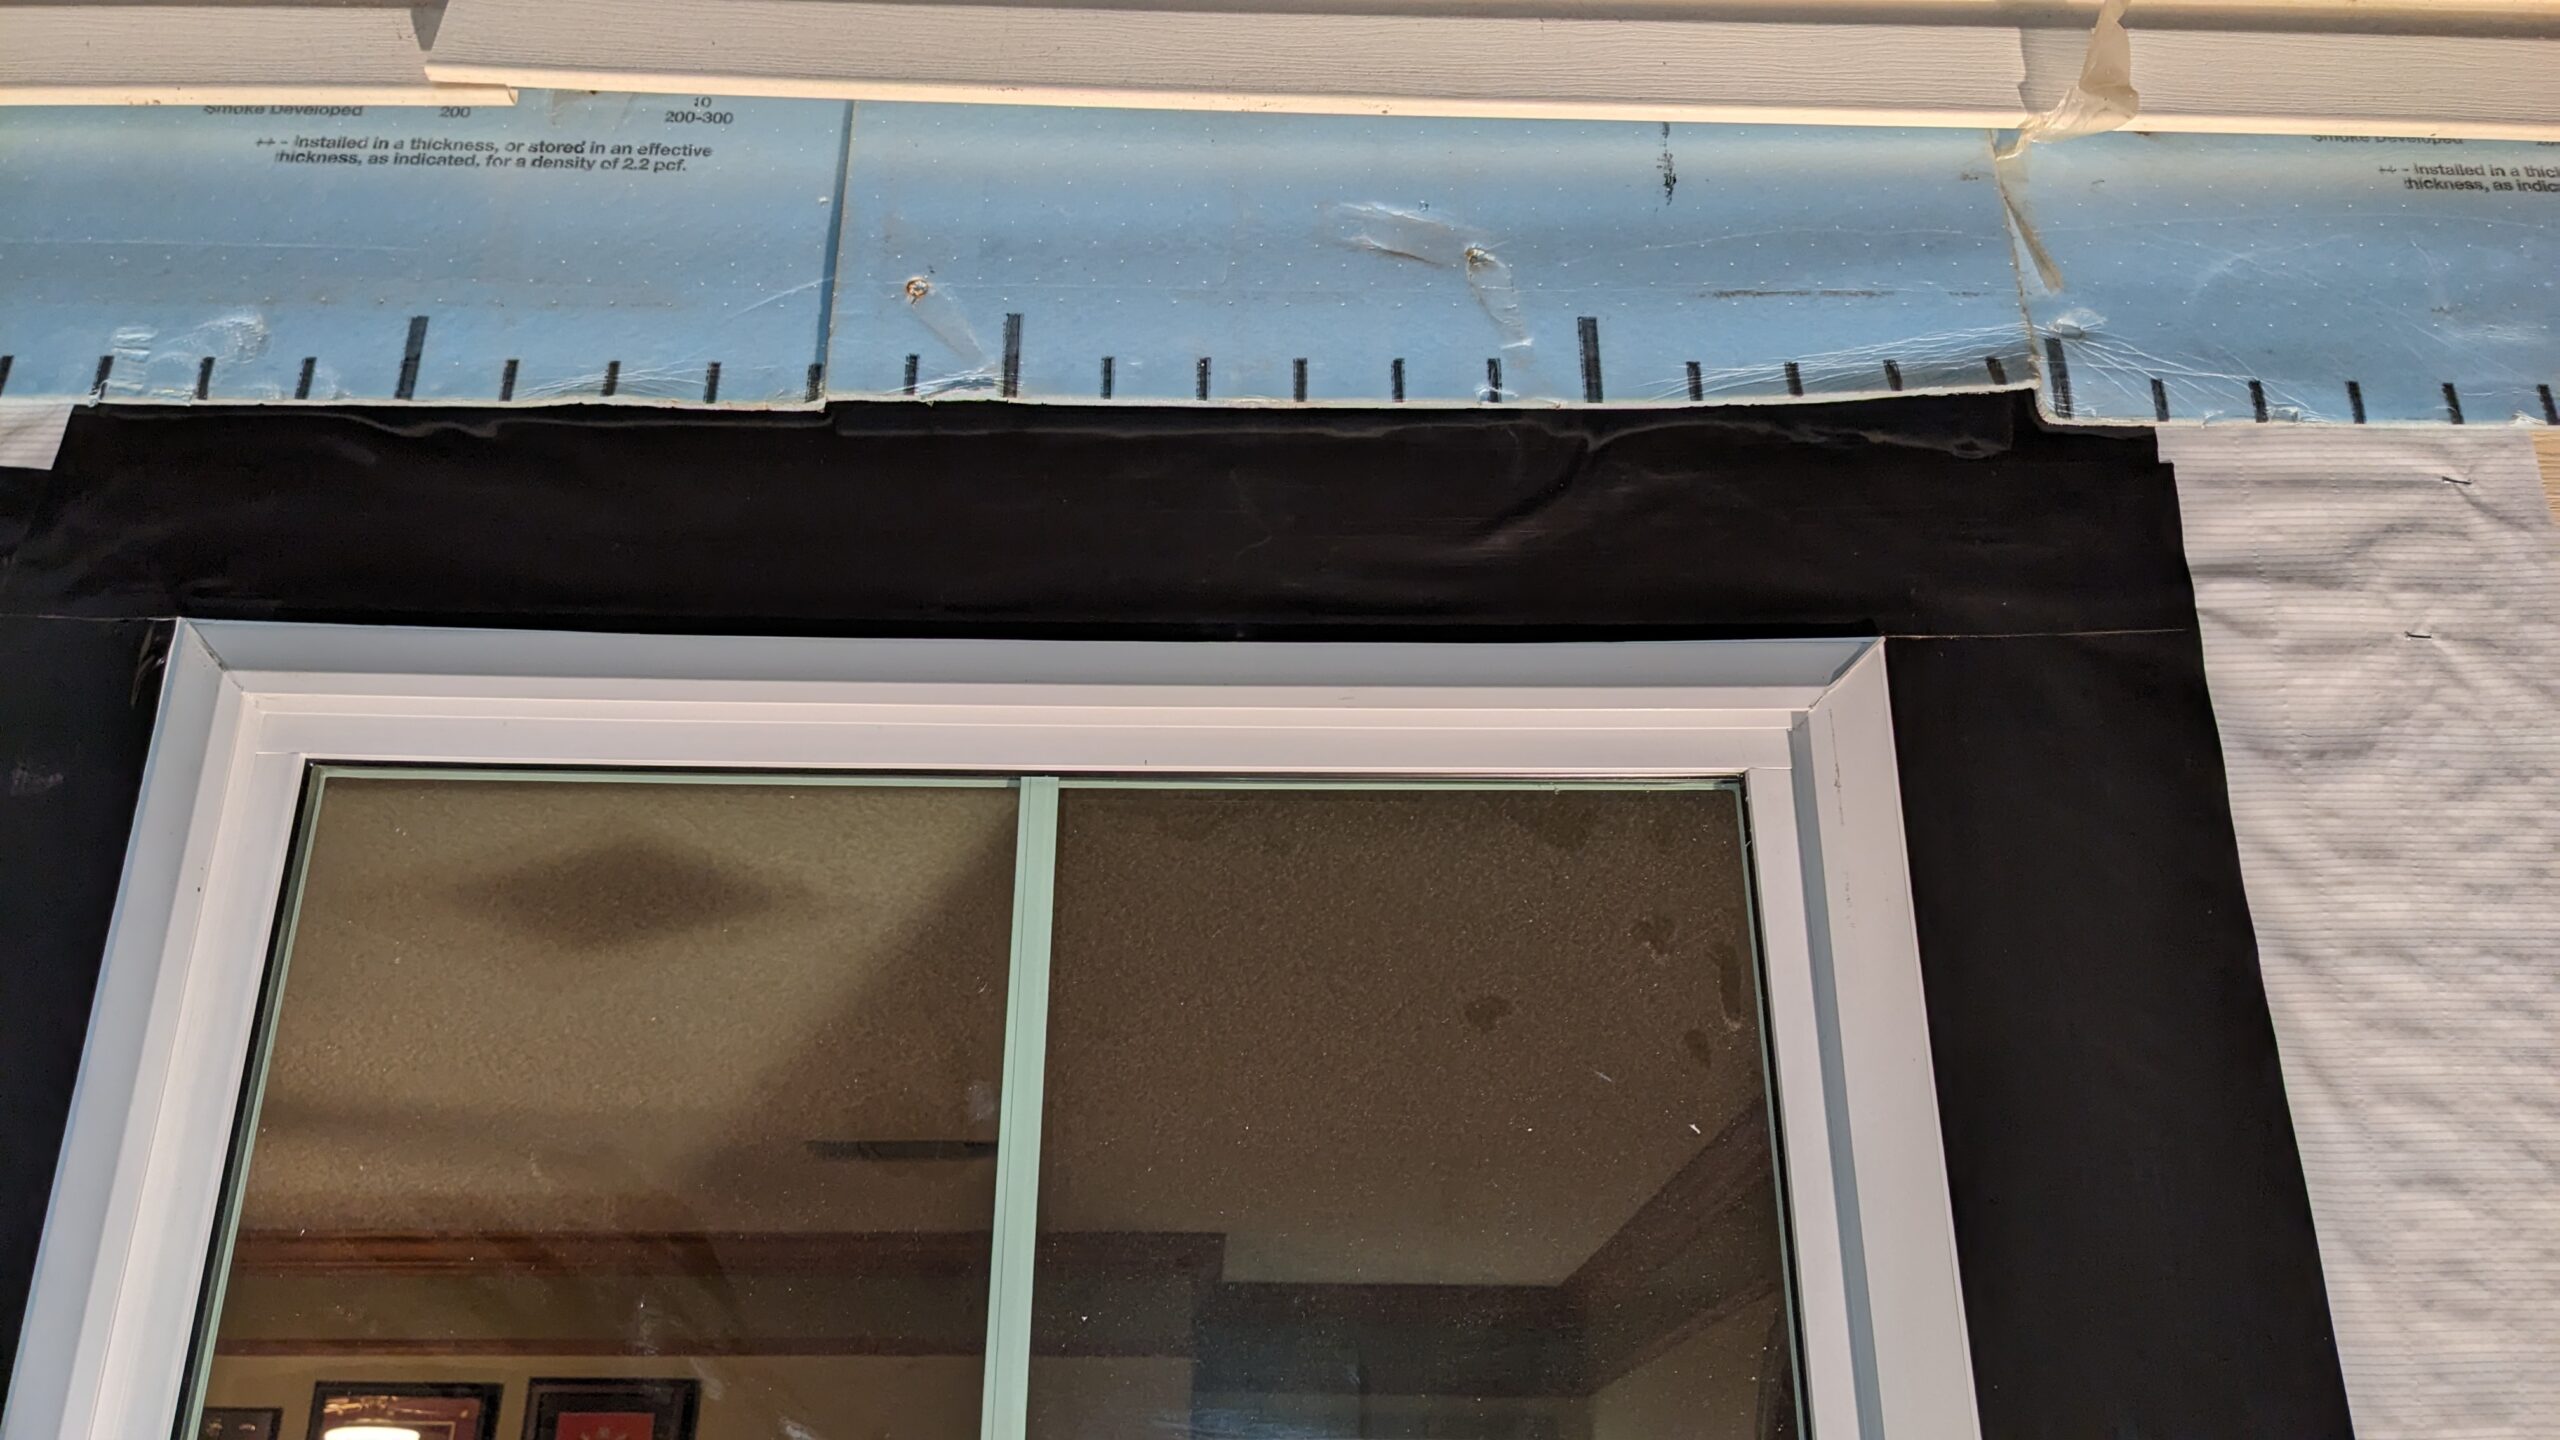
Between the last photo and this one, a final strip of housewrap was laid on top and tucked under the siding as far as possible. Stapled and taped. Then flashing tape was laid down on the sides and top. Some low-expansion closed cell spray foam was sprayed into the gap between the casing and rough opening, which is another layer of protection against water intrusion.
That’s it for the first day. I’m giving the adhesive overnight to see if it sticks, and sleeping soundly knowing that rain isn’t getting in easily at this point.
Outdoor reconstruction:
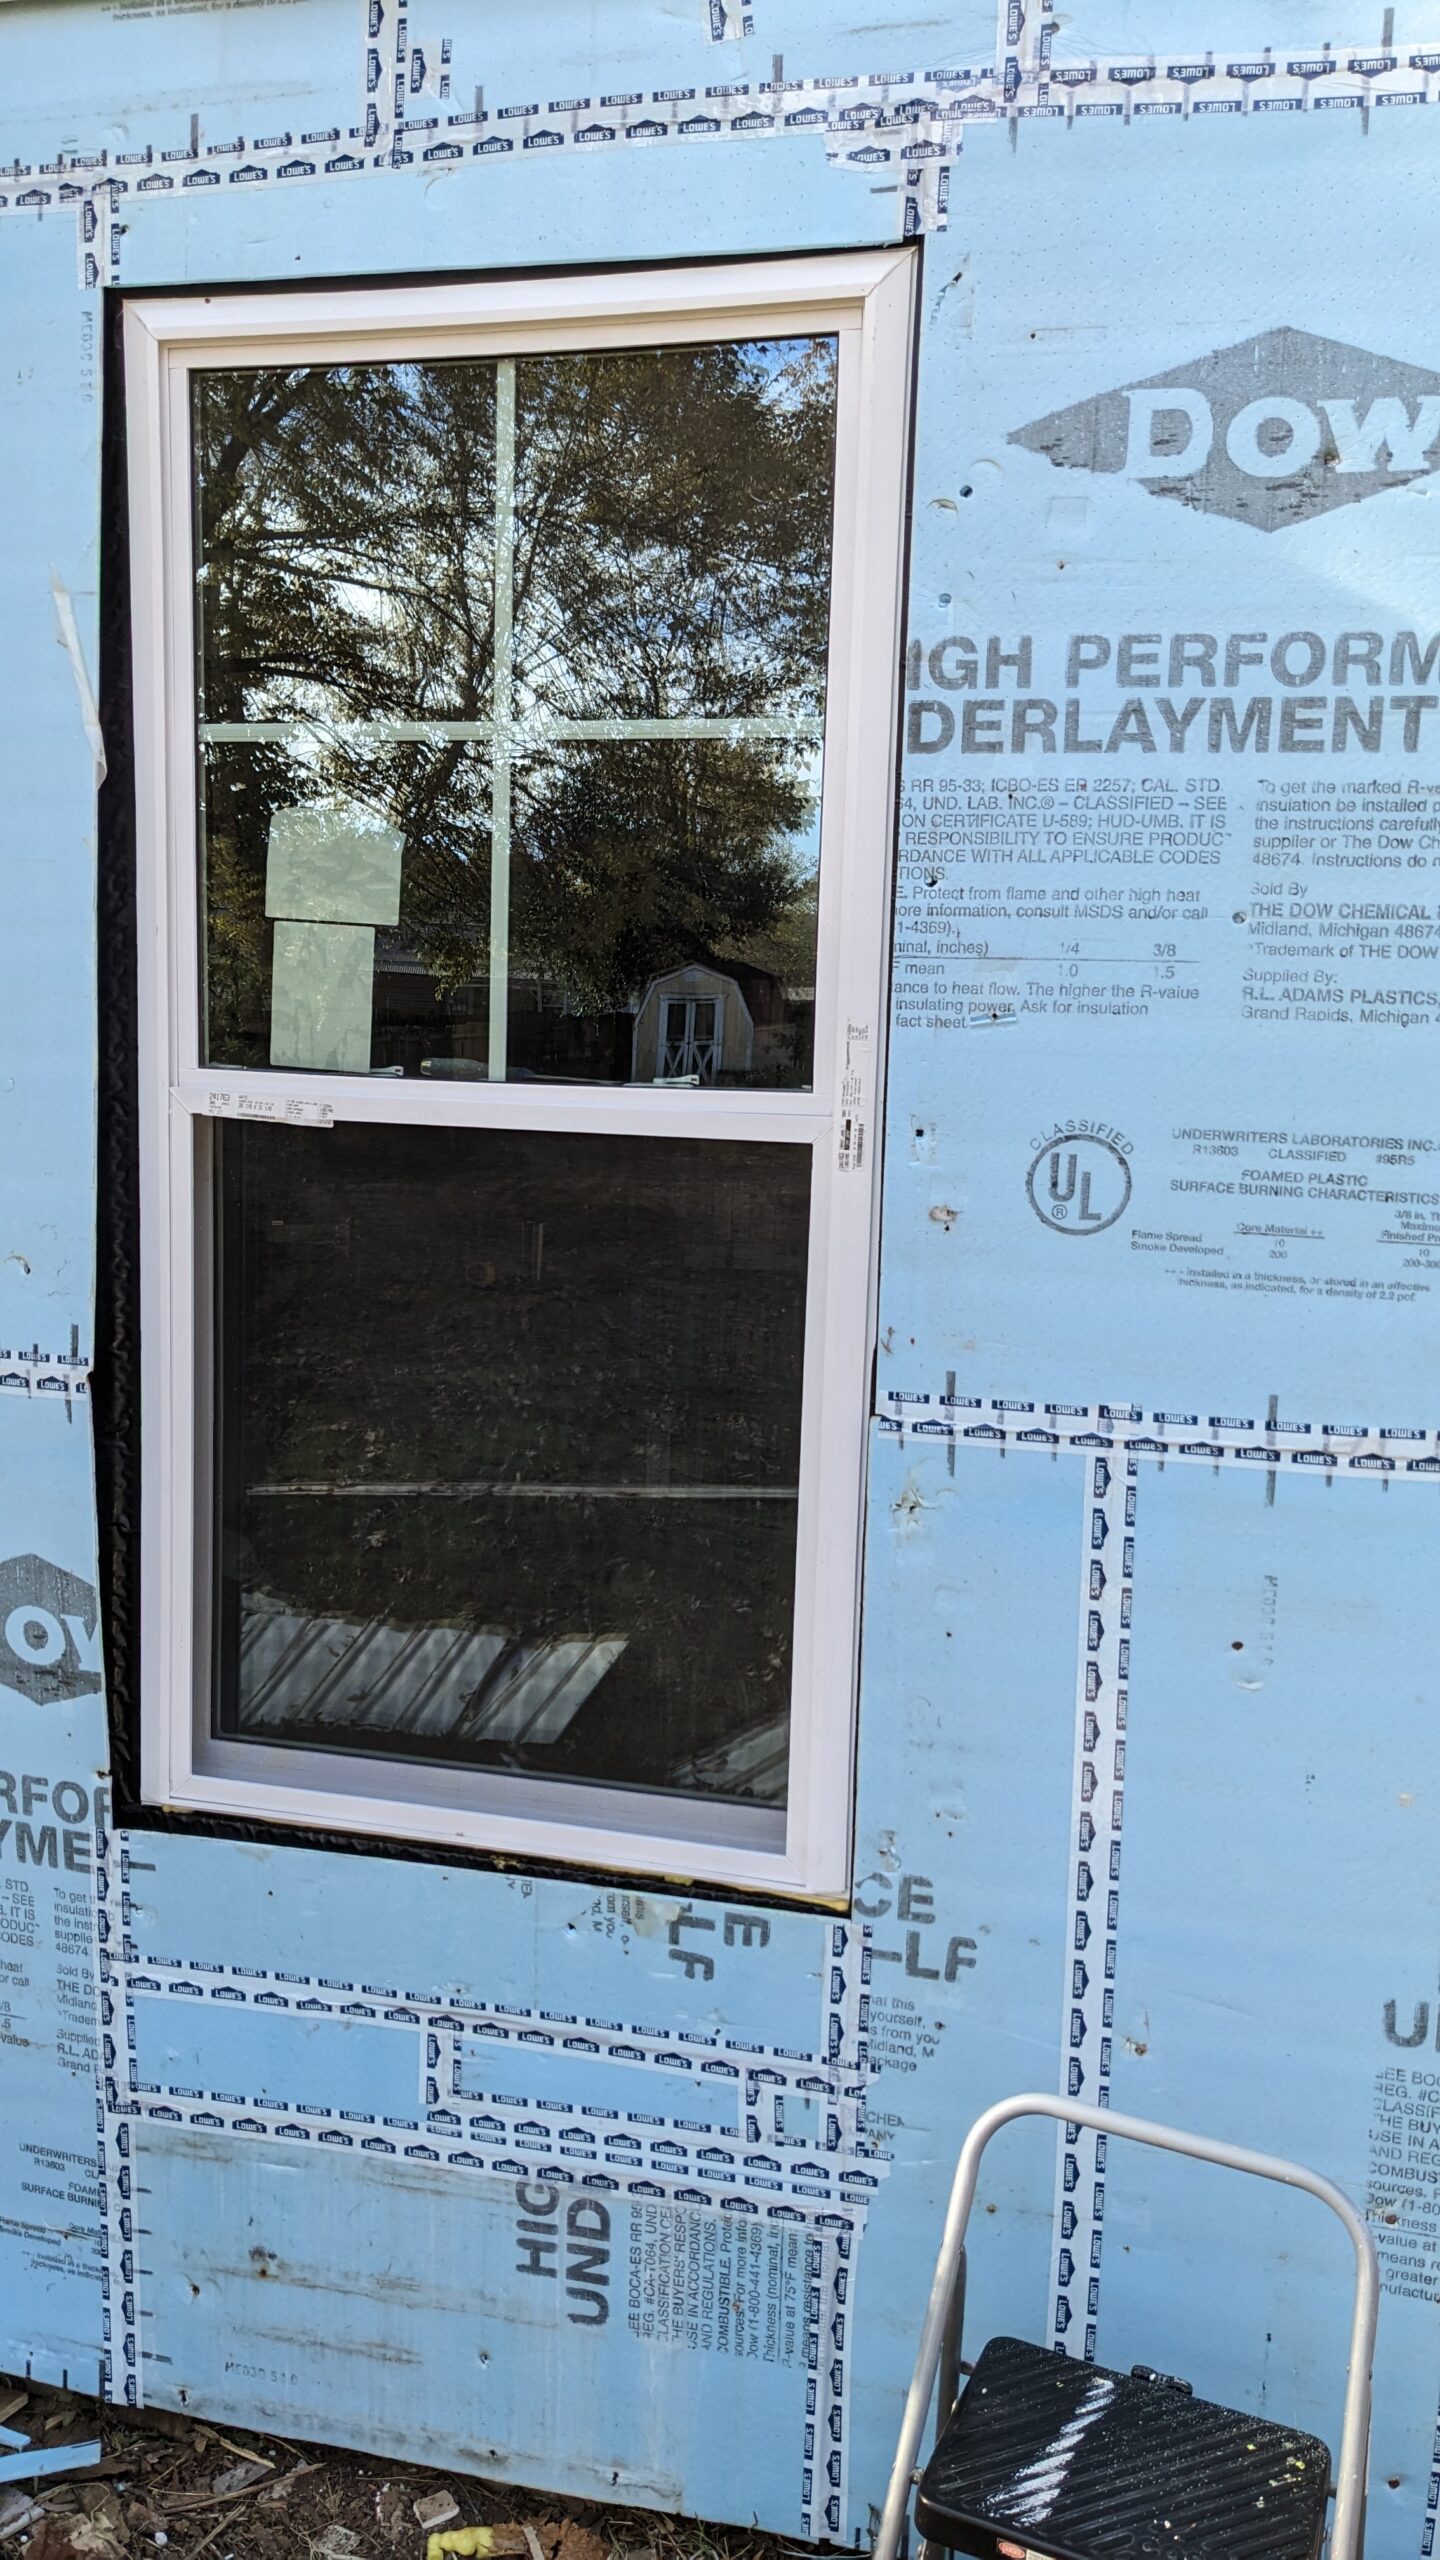
The faced side of this is supposed to be perforated and serve as a liquid barrier, but let water vapor escape. The manufacturer instructions say it’s a water barrier, but say nothing about taping seams.
Originally it wasn’t taped, and personally I don’t think it was a very good water barrier with 1/8" or larger gaps at all of the seams. So I used the existing pieces as best I could with the new hole size and taped up the seams just like I did with the housewrap.
Since I’m reusing it, I wiped it all down along the seams with a clean rag to help the tape stick. Also start the tape at the bottom and layer it the same way you would with flashing. Some of the nail holes ripped open when removing, so those got a bit of tape as well. And everything along the bottom is open, so liquid can drain out freely if needed.
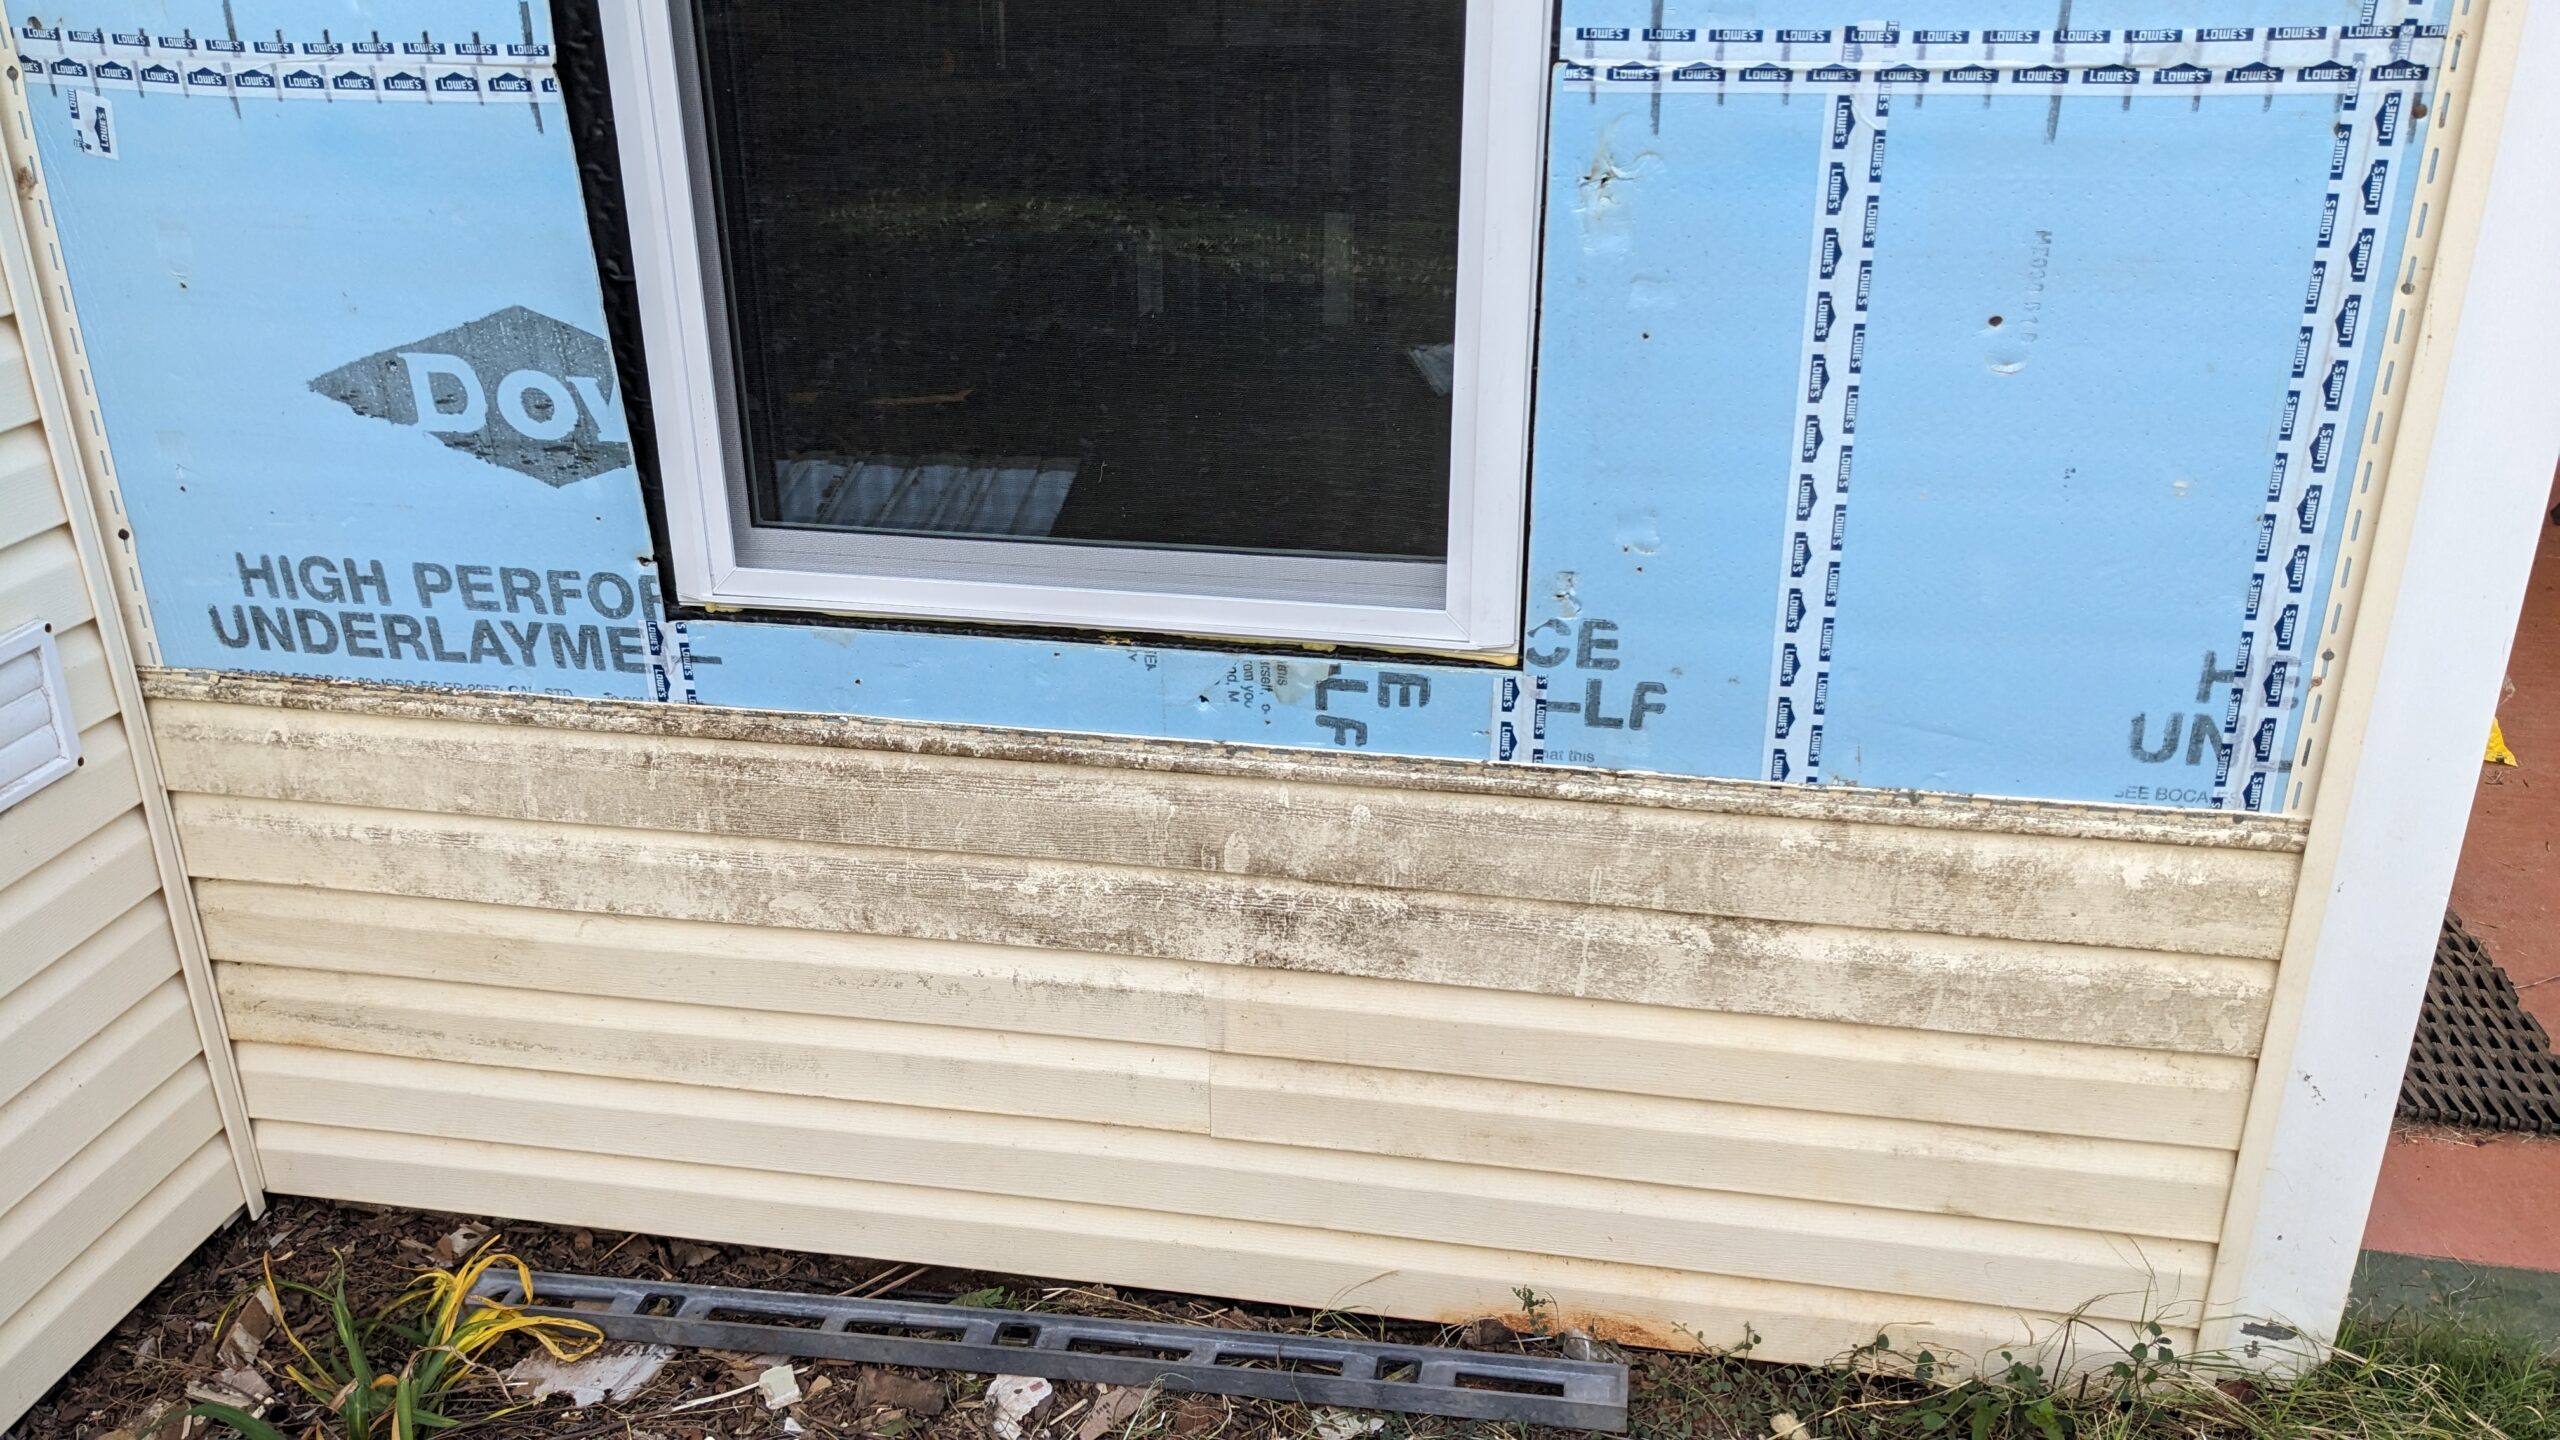
Since the new window is shorter, there’s extra space to make up with siding. I had one single 10’ stick left over from the siding contractor (which needs to be cleaned up with some bleach and a stiff brush) that I used, and the pieces along the sides will have a few inches trimmed off to make up for the extra width of the new window.
The exterior casing never matched the other windows from the original construction of the house. So I used PVC board to mimic that. I also wanted to minimize the use of J-channel where the siding interfaced with the window. So I used the casing for that as well.
There’s a lot going on in this photo, which might require more detail photos when I get back home. The bottom edge will have the siding tucked into it and happened to land on the thinnest part of the siding. So it’s about 1/4" deep and 1" wide. The sides have a 5/8" x 5/8" rabbet cut into them (the siding is 5/8" thick) where the siding will be tucked right into it.
The top of the casing is beveled at 5 degrees. The bottom is beveled as well, but only between the left and right verticals. The joints are glued with clear PVC cement, and pocket screwed on the back to help pull everything together. This stuff cuts great with a plane or wood chisel, so it’s easy to fine tune the fit.
I used an off cut to measure down from the existing siding on top. The spacing doesn’t quite work, so I will use a single piece of J-channel on top to keep water from shedding directly behind the casing.
Pro tip: Don’t tighten down the screws of the casing yet. Just hold it in place. The lengths of siding between the window and edges were so short that they were hard to bend into place without cracking them. So the extra clearance will save your siding and fingers, then you can tighten it down at the end. I didn’t use any sealant on the casing edges, because I was pretty confident in my flashing coupled with a fully vinyl window.
The finished product. Night of day 2. The rest of the interior repairs can take as long or as short a time as I want. But I had work the next morning, and it was about to get cold.
Interior Reconstruction:

Again, not a whole lot to see here. Pack with insulation, vapor barrier, sheetrock, tape and mud, then paint.
You can see in this photo how an existing king stud was to the left of the double gang box, and another was just to the left of the rough opening. So this window size worked wonderfully. I will probably wait until spring to replace the other window, so we’ll see if that side works out the same way…

Tape/mud/sanding complete. The top strip is primed, and the bottom is painted.
Trim:

The jambs inside will mostly be stained to match existing windows in that room. I bought a number of stains that seemed like they might work, and none did. So I created a ledger on a post-it and used an eye dropper to mix my own stain in an old glass jar. Each time I fine tuned it I kept track of the overall proportions with a tally for each color.
Once it looked right on the scrap piece of wood, I used a turkey baster/brine injector with graduations on it to mix a bigger batch with the same proportions. I didn’t want to do 35 eye droppers of one, 25 of another, etc. Small variations in my squeezes could create a sort of tolerance stack up, and throw things off wildly. So I ended up just using the mL measurements and a sharp eye to do a single squeeze of each to match the proportions on my ledger.

The finished pieces, which match closely with the floor, baseboard, and existing window casings.

Dry fitting. The head and side jambs are stained with polyurethane. The stool, apron, and casing will be the same dark green that they started as.

Stool is green. Jambs are stained, to include the reveal. The dog is back in his favorite spot again.

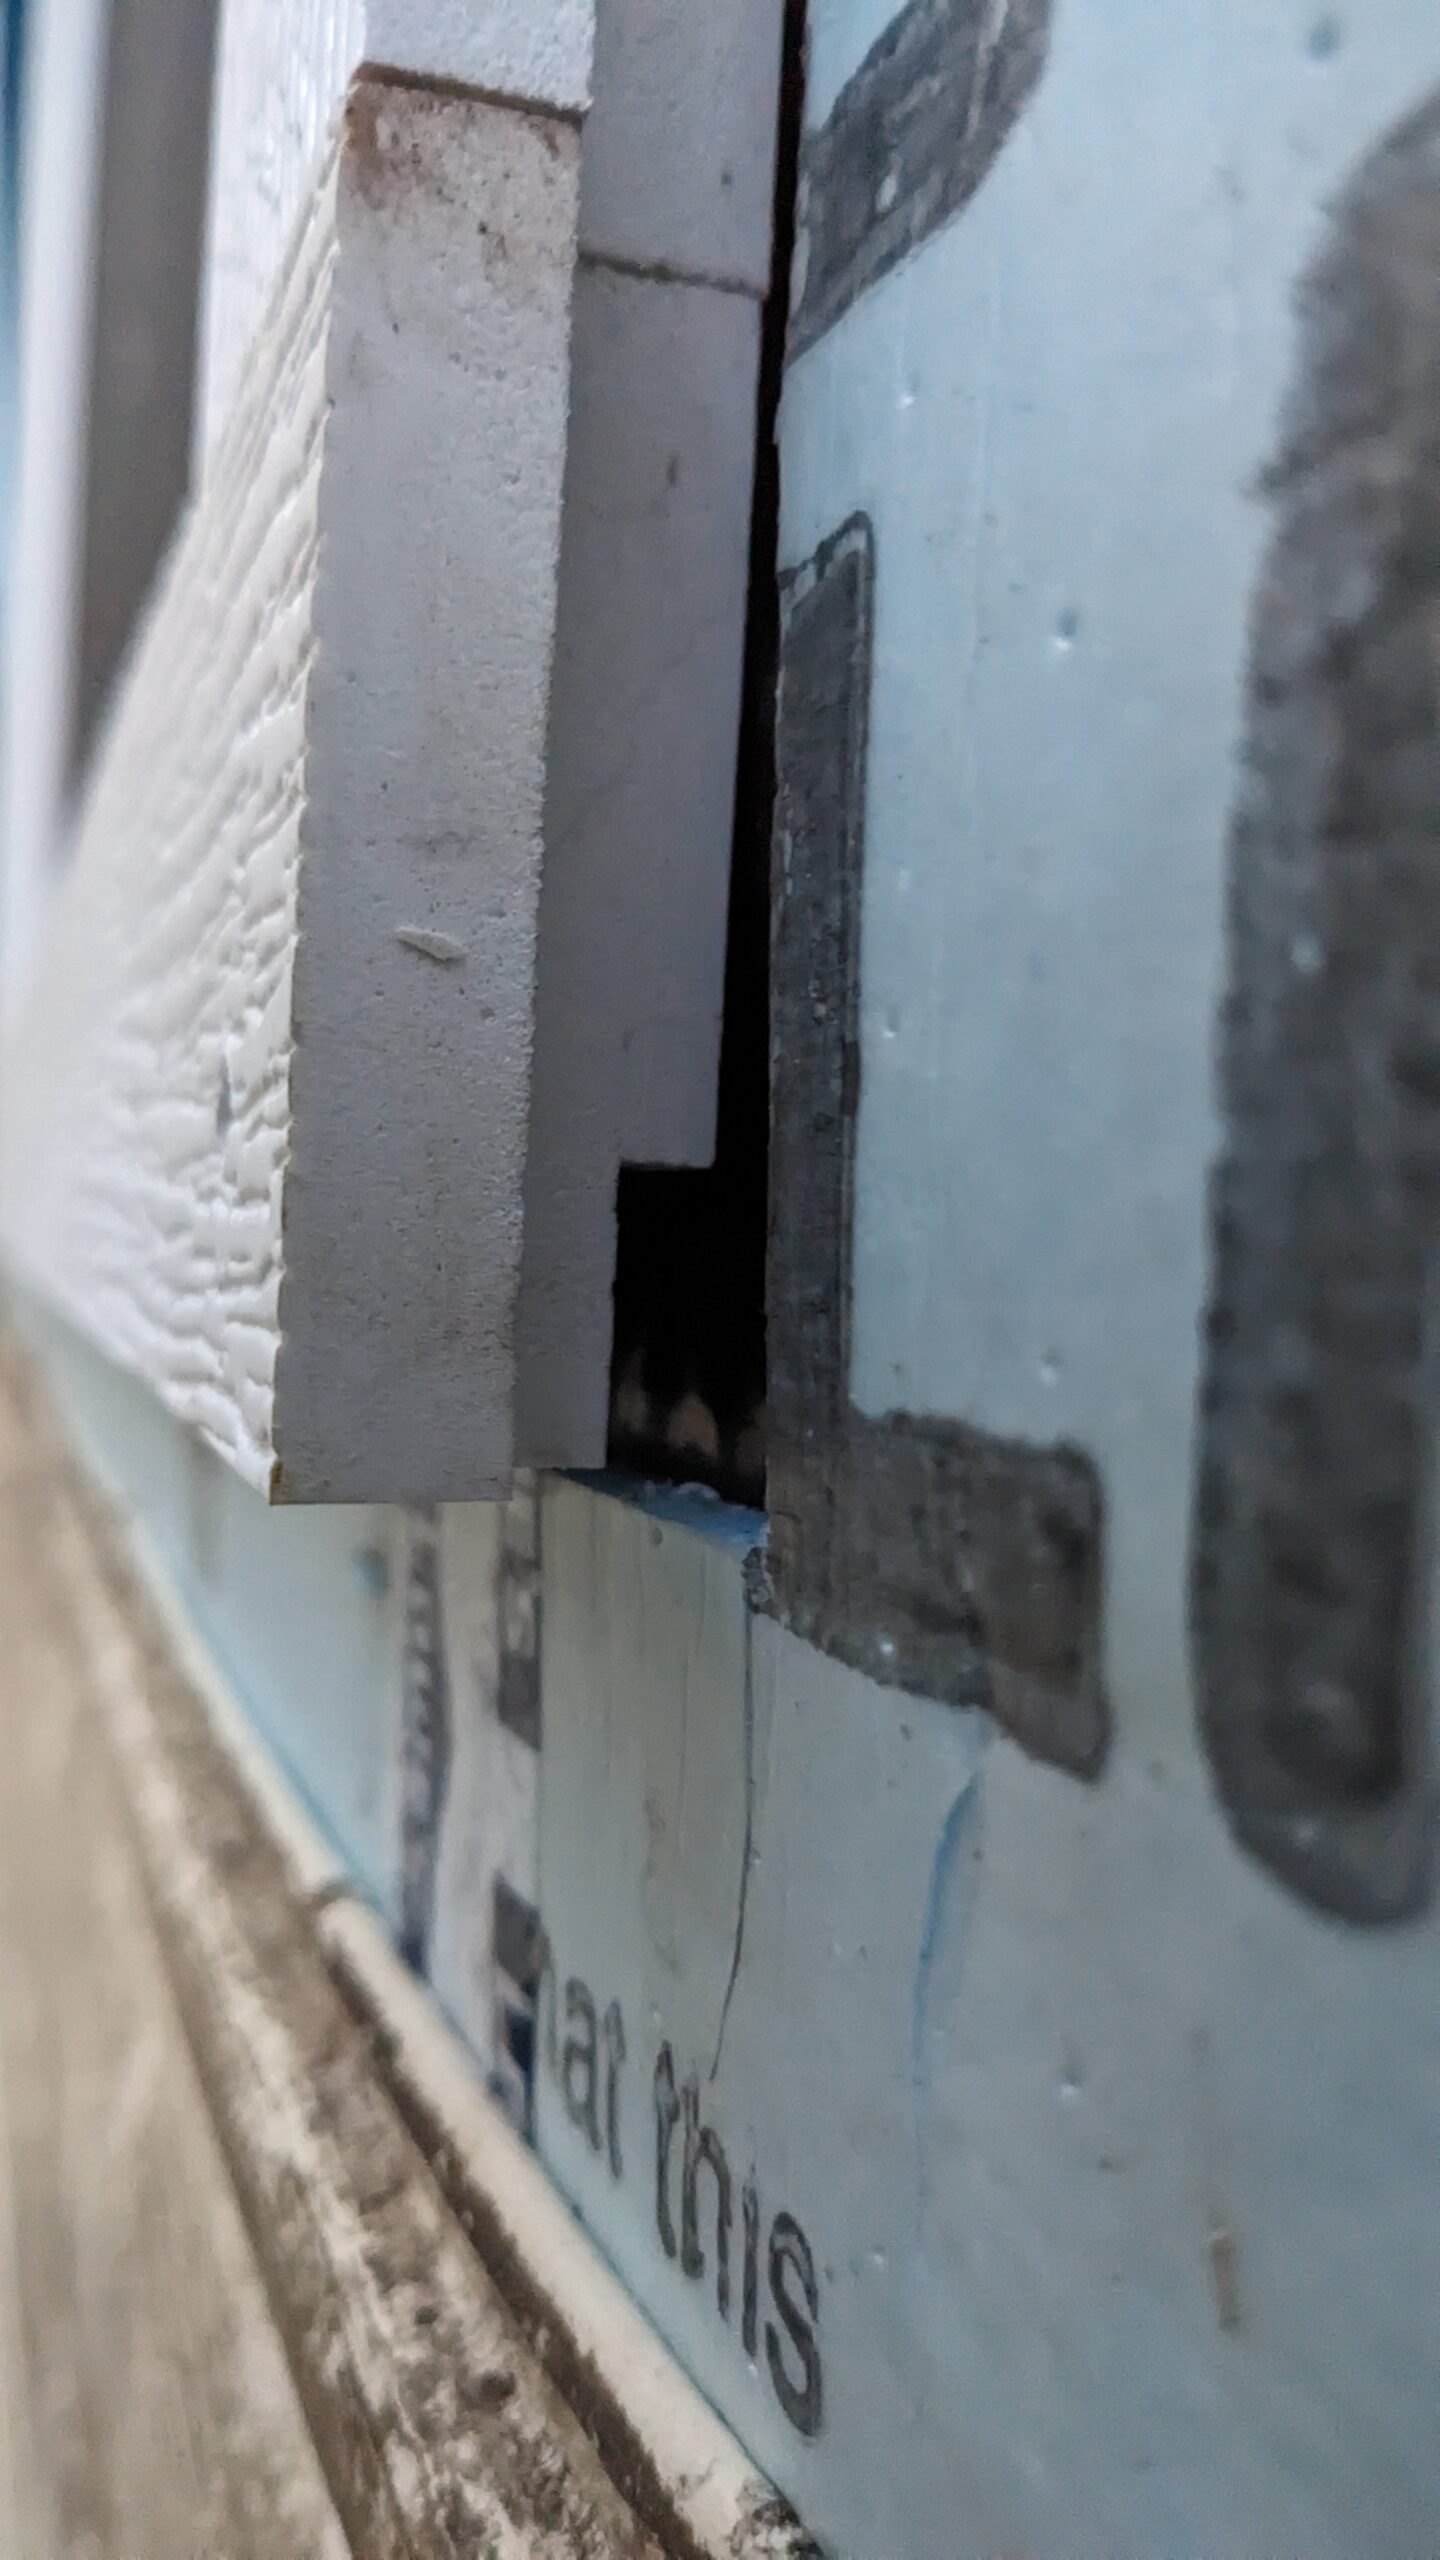
Same at the top. Ignore that bit of adhesive I need to use some Goo Gone on.

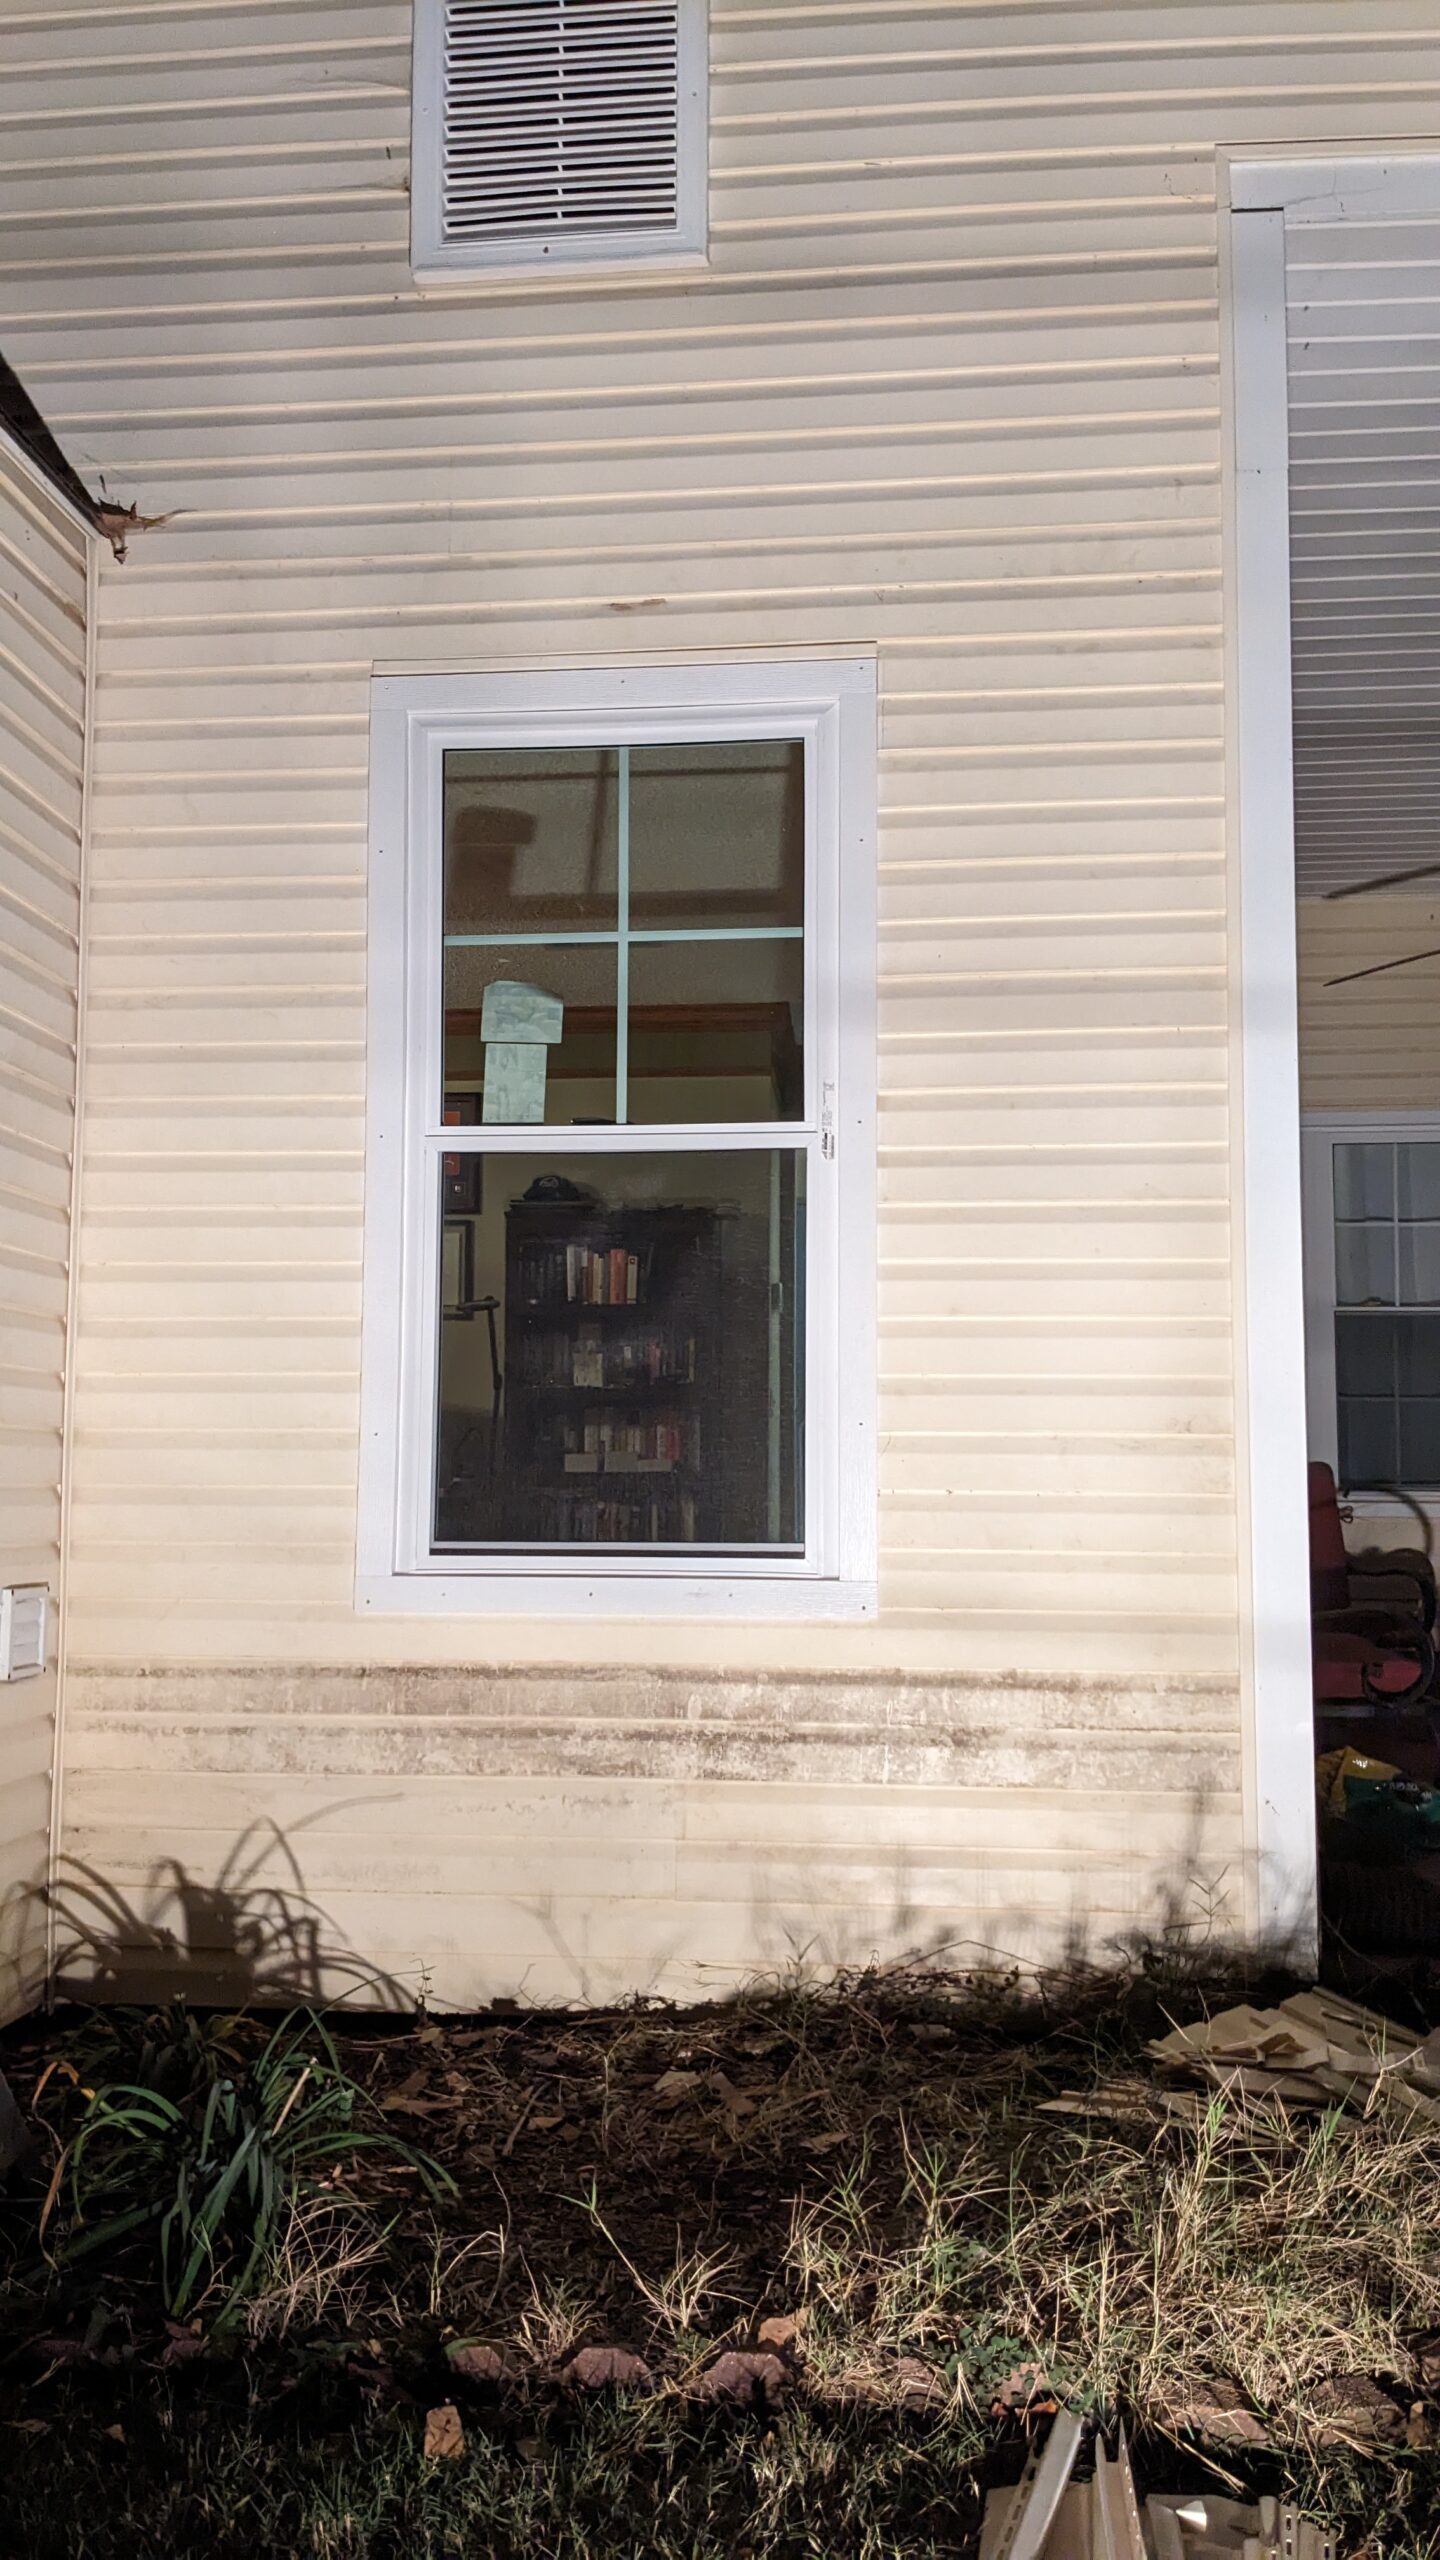
Back to normal. No more drafts. No need to get nervous about falling through the old window if you lean up against it.