This will cover the process of uploading OpenWRT 23.05.0 onto an Aruba AP-105 wireless access point to circumvent the need for an expensive Aruba hardware controller and licenses.
You’ve gotta run what you brung:
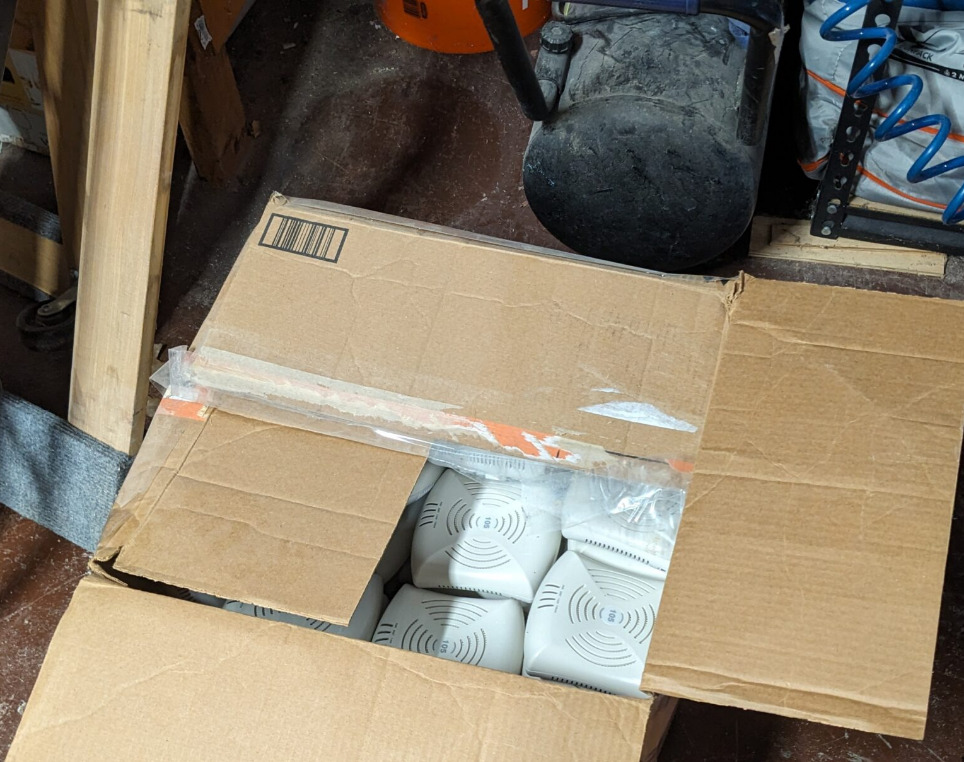
A long time ago, I bought an entire pallet of IT equipment from UT Chattanooga, stacked 6ft high. I wanted some specific items (my nice Cisco 3650CX, other PoE switches, 10x UPSes, etc.). One of the boxes in there contained 40+ Aruba AP-105s. I didn’t know much about them so I held onto them, as one does.
The instant access points (IAP-105) don’t require a controller, but these ones (AP-105) do. And licensing is not cheap. Ultimately I bought 2x TP-Link Omada WAPs, a router, and a switch to work together and have been fairly happy with the Omada ecosystem so far.
But these things were pretty robust in their time, and I think they’re still fairly good. They can be used with PoE (not PoE+) and have 10/100 speed hardwired, or you can use a 12V 1.25A wall-wart (1.7mm ID, 4mm OD, ~9mm plug length) and have full gigabit speed. They have 2x radios of 802.11n (wifi 4) so 2x 2.4GHz and 2x 5GHz antennas. It can give me 300Mb/s per antenna, 2x2 MIMO, which should be plenty for casual activities. They have a cast aluminum or magnesium base, good thermal management, plenty of compute and RAM onboard, multiple ways to wall/ceiling mount, etc.
Part 1, in memoriam:
So in the non-existant part 1, I installed OpenWRT onto a single one of them to test it out. This was in 2021 before I was documenting my exploits. At the time the only way to do that was to manually dump the ROM, modify it to get u-boot, and re-flash the new firmware onto it.
This was done with a IC test clip (Pomona 5252 for this application), a breadboard, and a spare RPi-3B using the I2C interface. I’m not going to go into great detail, it’s covered here very well already.
- Disassemble the device
- Attach test clip
- Use RPi to dump the ROM into a .img file
- Make sure you have the MAC address documented and OpenWRT install .img containing the unsigned bootloader portion
- Use
ddcommand to write over selected blocks of the original image with the new bootloader - Upload the new image back to ROM
- Disconnect test clip, setup TFTP server on 192.168.1.66 with the upgrade .img
- Plug in a console cable
- Power up the AP and watch it get u-boot, download the new software, and install OpenWRT permanently
Obviously that’s a lot of time and work for each device, so I walked away and the other 40+ have remained in the cardboard box in my garage ever since.
So why are you writing this post, stupid?
I have multiple friends and coworkers who have sprawling houses. And almost everyone I know uses the modem+router+switch+WAP that their ISP supplies. No matter how good they say their antennas are on the new Google/whatever router, they can’t overcome the laws of physics, and your teenager on the far side of the house isn’t going to be able to do their online chemistry quiz without migrating closer to the router. Wireless mesh systems exist, but they are far inferior to wired backhaul for a number of reasons (latency, wireless network being saturated, giving up an antenna for the backhaul connection, etc.)
To my surprise, OpenWRT’s page said that as of the 22.03.5 release, getting an unsigned bootloader is no longer required. So I should be able to setup a TFTP server and update them one at a time with no disassembly or special equipment besides a USB-serial console cable that every managed switch has used since the ’90s.
The process:
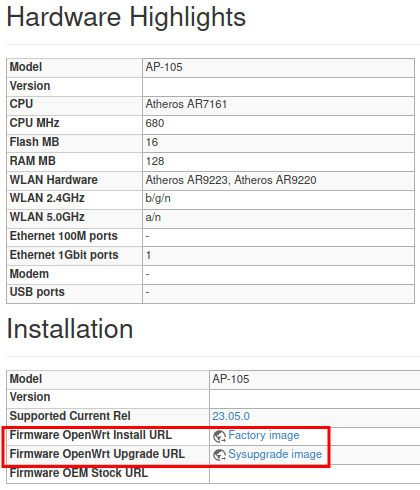
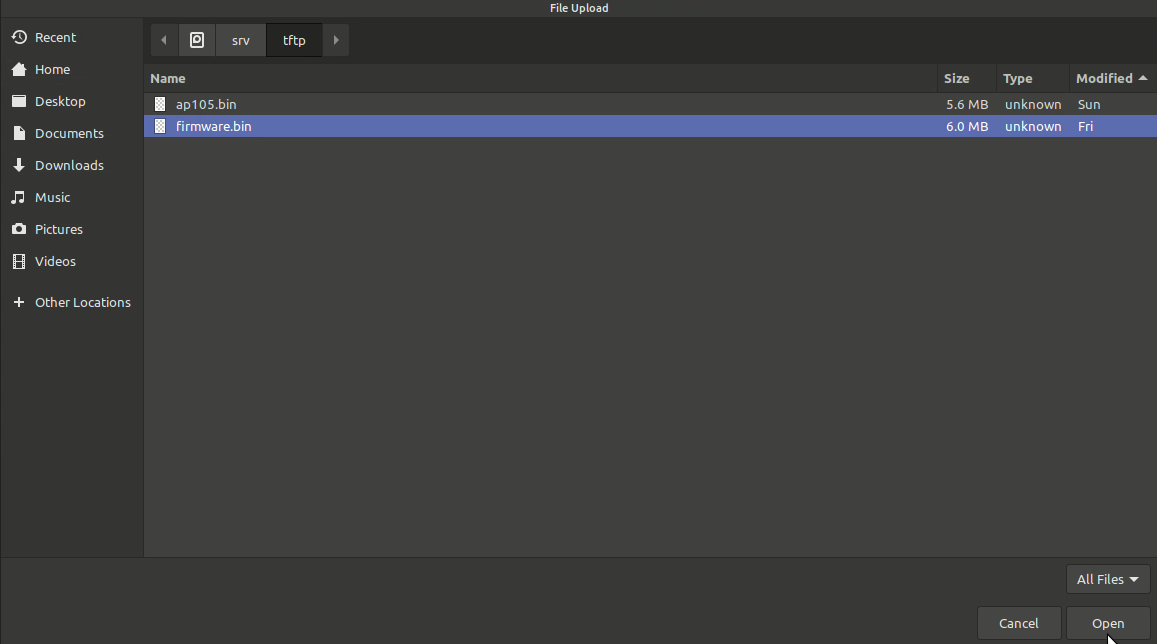
First I went to OpenWRT’s website for my device and downloaded the factory image and system upgrade image. I’ll be setting up TFTP on my laptop, so copy them into /srv/tftp as ap105.bin and firmware.bin.
Next, get a TFTP server running. I’m using linux mint, so tftpd-hpa seemed like a popular option. You can find tutorials for that easily. Just setup the root directory as the folder from the step above. Make sure the files are readable by the TFTP daemon, which they should be by default (mine started as 664 permissions because they were in ~/Downloads)
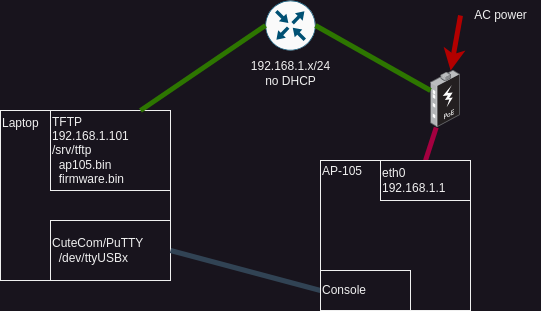
Set your TFTP server to the same subnet as the AP. The AP will default to 192.168.1.1 at certain stages. So I’m not going to fight that, and set my laptop to 192.168.1.101. Some commands later on will reference that IP.
*You should turn off DHCP if you’re using a router between the two devices. When flashing multiple devices, plugging in a new AP will cause a new DHCP lease to be generated, and it will generally just give you extra ICMP traffic to troubleshoot potentially. Static IPs are best for this.
Connect a console cable to the AP and open up the serial data stream. I am using CuteCom because it saves a history of sent commands that can make this faster. You can use PuTTY, the terminal, or the myriad other tools available.
Plug in network and power cables. I’m using a PoE injector, because it’s simpler for me. You can use a wall wart for power, but then you have 3x cables to swap over each time.
So here’s the setup:
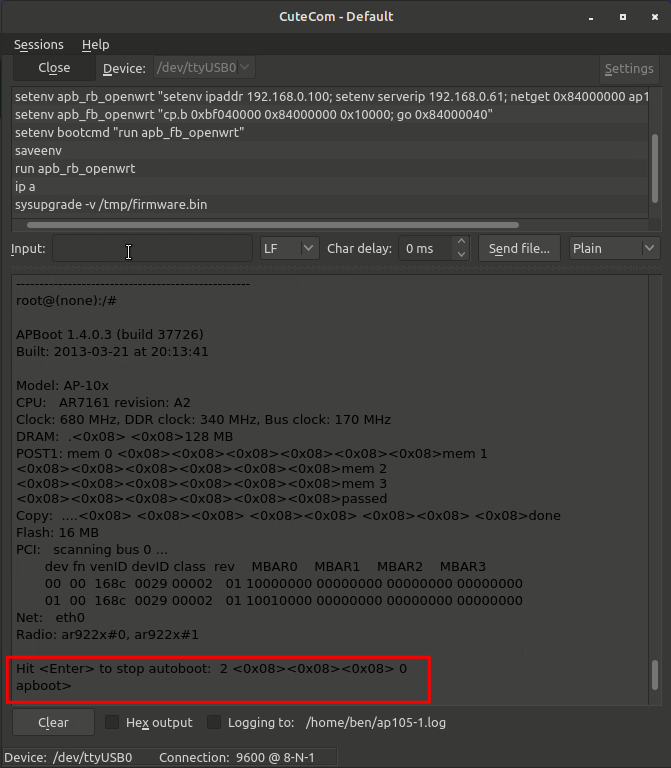
Once you power on the device watch your serial monitor for Hit <Enter> to stop autoboot: 2..1..0... You only have 3 seconds to grab that before it continues. It will scan for PCI devices immediately prior, which takes a few seconds. This is your cue to get ready.
Once you interrupt autoboot, the terminal will display apboot> as the prompt. If you take too long with no input, the watchdog process will jump back into autoboot. I believe it’s a 60 second timeout. So be ready with the following commands. Or you can just send a blank line to extend your time.
I wrote earlier about the IP of the TFTP server and of the AP itself. You will see those in the first command below, along with the name of the install file. If any of those are different for you, modify those to match your setup.
apboot> setenv apb_rb_openwrt "setenv ipaddr 192.168.1.1; setenv serverip 192.168.1.101; netget 0x84000000 ap105.bin; go 0x84000040"
apboot> setenv apb_fb_openwrt "cp.b 0xbf040000 0x84000000 0x10000; go 0x84000040"
apboot> setenv bootcmd "run apb_fb_openwrt"
apboot> saveenv
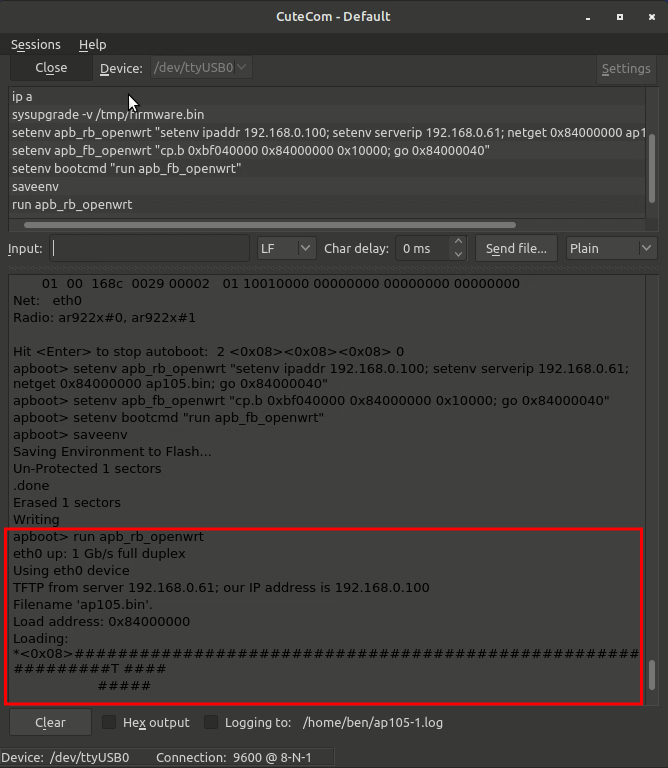
apboot> run apb_rb_openwrt
You’ll notice that the first line is “apb_rb…” and the second and third lines are “apb_fb…” this is not a typo. The first command sets the IP of the device and TFTP server, downloads that install file (ap105.bin) over TFTP to the memory space required, then starts running it at a defined address past the start of that file (0x40 into the file in this case). The second and third lines are defining what to run when the AP inevitably reboots afterwards, which takes that binary and writes it to a specific address. I’m not a computer engineer, this is all the explanation you’re going to get about assembly language and how a processor boots.
If you mess this up, you can use the command printenv to view what you sent. If you’re like me, you typo’d things multiple times, used colon instead of semicolon, forgot spaces, etc. Use purgeenv or factory-reset to undo those changes before starting over at the top. CuteCom will also try and auto-complete for you. If you have typos, you might want to right click the history area and clear those incorrect commands.
If all worked well, you should see a progress bar for the TFTP transfer, then watch the AP eventually reboot.
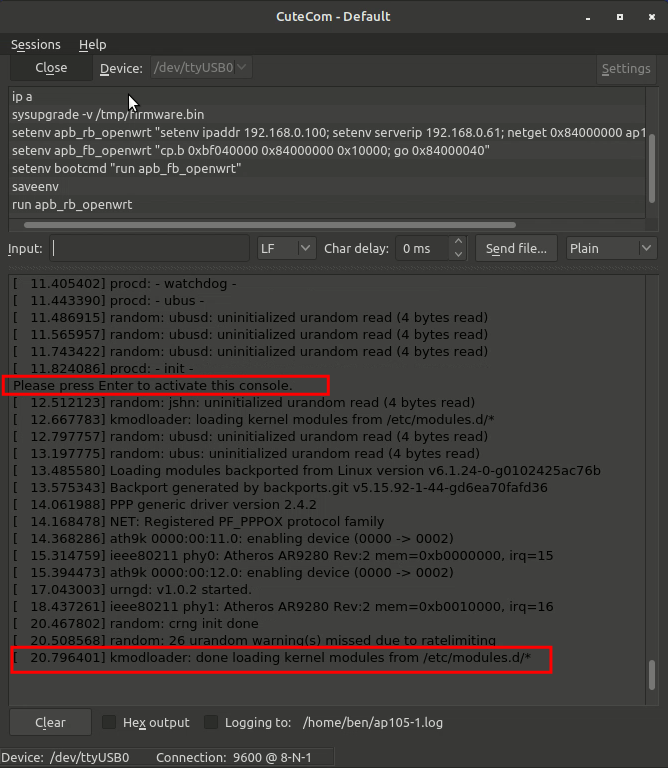
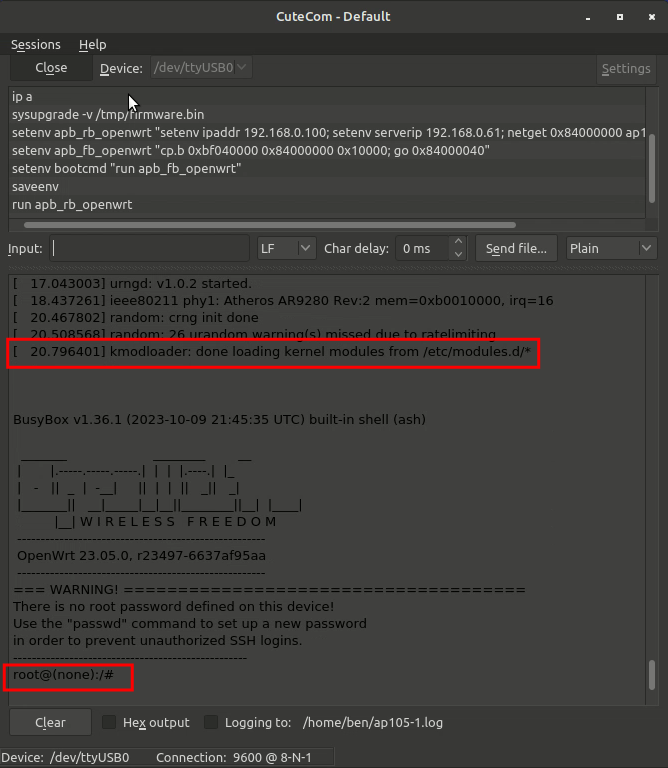
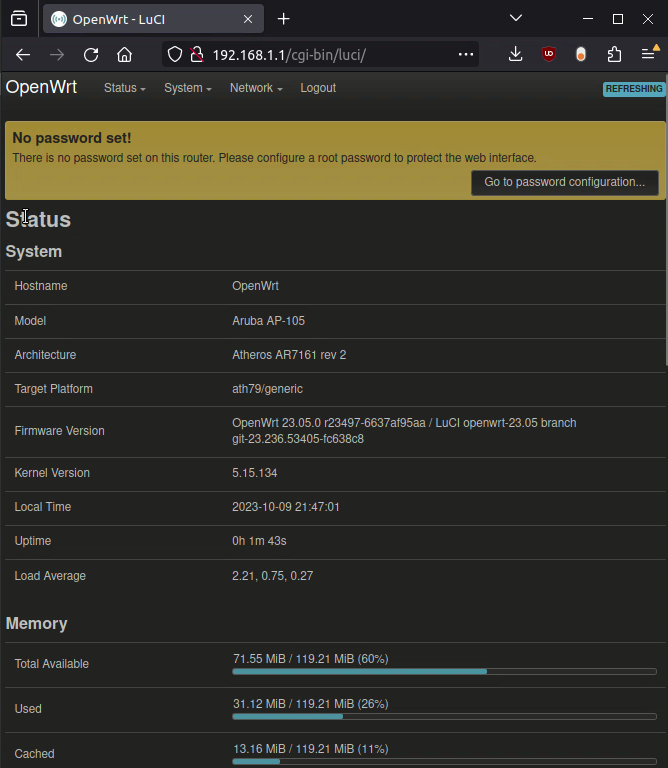
When it comes back on you will see busybox starting up, and the line “Please press Enter to activate this console” followed by some more items, and eventually kmodloader: done loading modules from /etc/modules.d/* At this point you can hit enter and bring up the terminal for busybox which is now running. Your prompt should switch to root@OpenWRT:/#
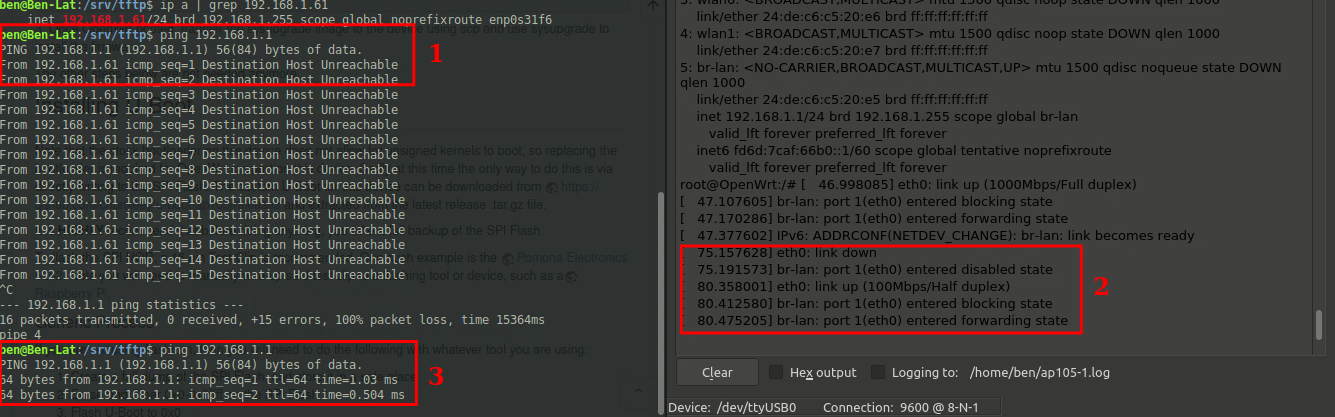
At this point the AP is running OpenWRT, but there are two issues to sort out. 1) the AP starts up with all of its interfaces down. It takes a while for the br-lan and eth0 interfaces to come up. You can unplug the cable from the router (input of PoE injector, NOT the output which will remove power) which should trigger some ARP and ICMP between it and the router. Or you could use some uci commands to manually make changes and commit them. But even that takes a few seconds to work.
The messages below are what you’re looking for. You’ll see the interface go down, come back up, then go to forwarding state. You can check with “ip a” to see if your interfaces are correct before and after.
Problem 2) is that we’re running in RAMFS right now, so everything is temporary. We need to take the second file (update image) and have it written to the flash memory onboard, which the boot image didn’t have the capability to do on the SPI interface.

There are two ways I’ve found to do that. SCP the update image onto the device.
1: (on laptop with update image ‘firmware.bin’ in same TFTP folder from before ‘/srv/tftp’)
scp /srv/tftp/firmware.bin root@192.168.1.1:/tmp
or (on AP via serial interface)
update -v /tmp/firmware.bin
I did this initially on 6x devices and then after booting a few times, some were still not persistent, but then some were.
The second way has been 100% consistent.
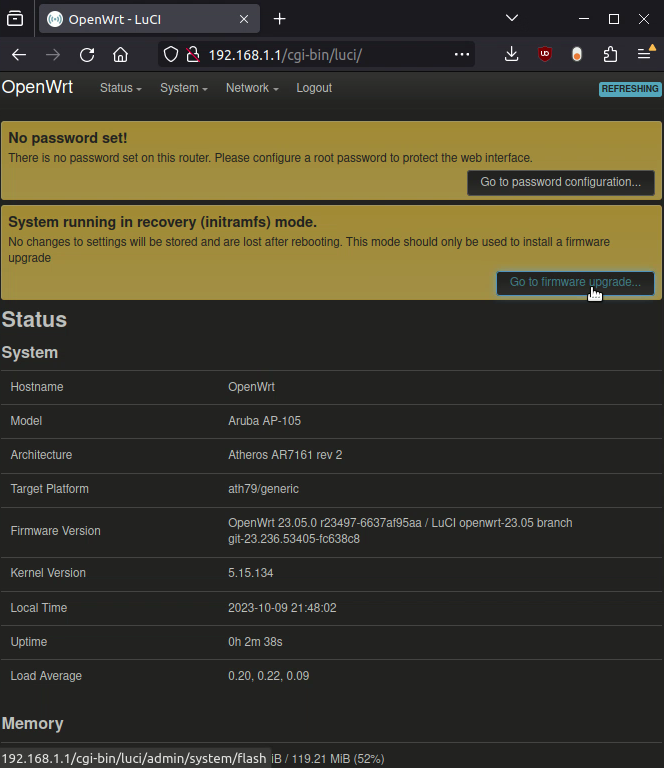
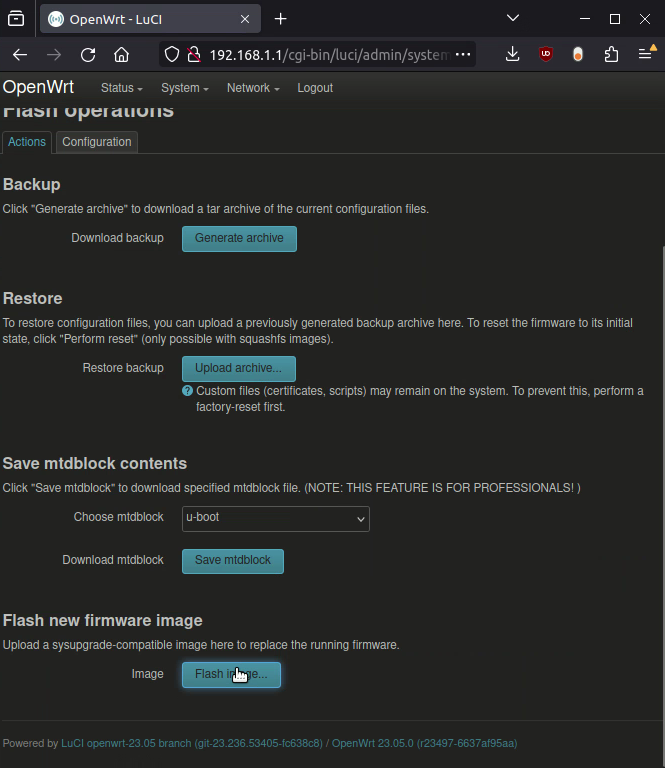
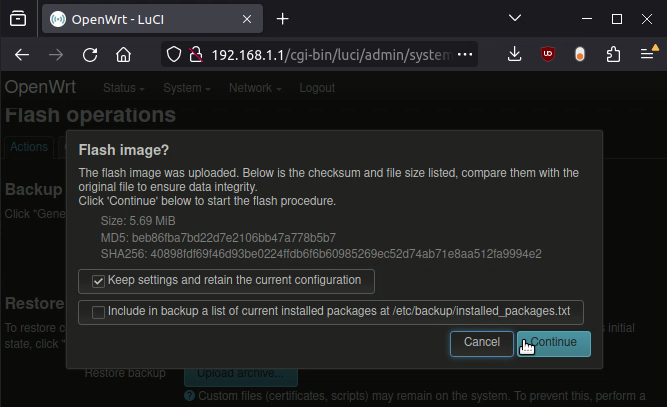
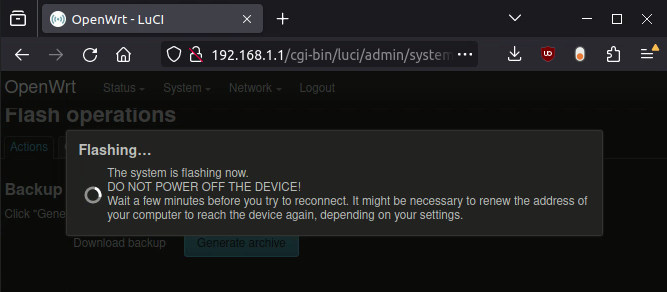
2: Use the web GUI to upload the file with your browser. As soon as you login to the web GUI, one of the two messages will alert you that you’re in initramfs mode, and that changes will be lost. It gives you a link directly to the firmware update page, where you should send it your update binary (the 2nd file on the OpenWRT page for your device)
Final Notes:
At this point you are done with firmware and can start over on a new device (my case) or start configuring OpenWRT, which I will deal with later.
Once I eliminated typos and could scroll through previously used commands, I got this whole process down to 4:42 per device. A lot of that is waiting for file transfers, booting, and writing files to flash memory. I started by plugging them directly into my laptop, but learned it’s better to have a router in the middle to handle ARP/IGMP/etc. whenever the interface comes up or a cable is plugged in.
This could probably be automated with python easily, but honestly it’s not that time consuming. I watched a movie one evening and did this on the side, and was able to flash ~20x with almost no time/attention. I ended up with over 50x by my final count, and was able to do them between other tasks around the house in 2 days. So writing a script for this isn’t worth it to me.
For now I have 3x as temporary replacements to my existing APs at home, and the 802.11r fast roaming functionality works really well. I will follow up with some iperf3 testing while I traverse the house and see how noticeable the handoffs are to performance.
I also have one device ready to be configured as a vacation access point. I.e. use 2x antennas or eth0 to connect to hotel wifi, then act as a router with the other 2x antennas to broadcast my own SSID that has consistent security (since the Nintendo Switch, etc. can’t get through most login pages) as seen here. Hopefully the next road trip will be better for kids that don’t have cellular data and want to play games with “dumb” devices.