Have you ever had your server fans run at full blast when not needed? Have you ever had the speed ramp up to full blast for 3 seconds, then down for 3 seconds, then back up until the end of time? It’s a very common problem.
The problem:
I did not have this problem at all, I blew dust out of my case and reinstalled it into the rack, and had the pulsing issue. I did add a single 2.5" HDD, so maybe the temperature polling of that single drive changed an averaged value or something. Anyways…
My understanding of what’s happening is that a fan (in my case a Noctua fan meant to run at lower speeds to minimize sound output) wants to run at let’s say 1000rpm. The Intelligent Platform Management Interface (IPMI) has a low-critical level that might be 1500rpm. Once my Noctua fan drops below that speed on its ramp down, it triggers the low-critical level, and the Baseboard Management Controller (BMC) sets all fans to 100% duty cycle.
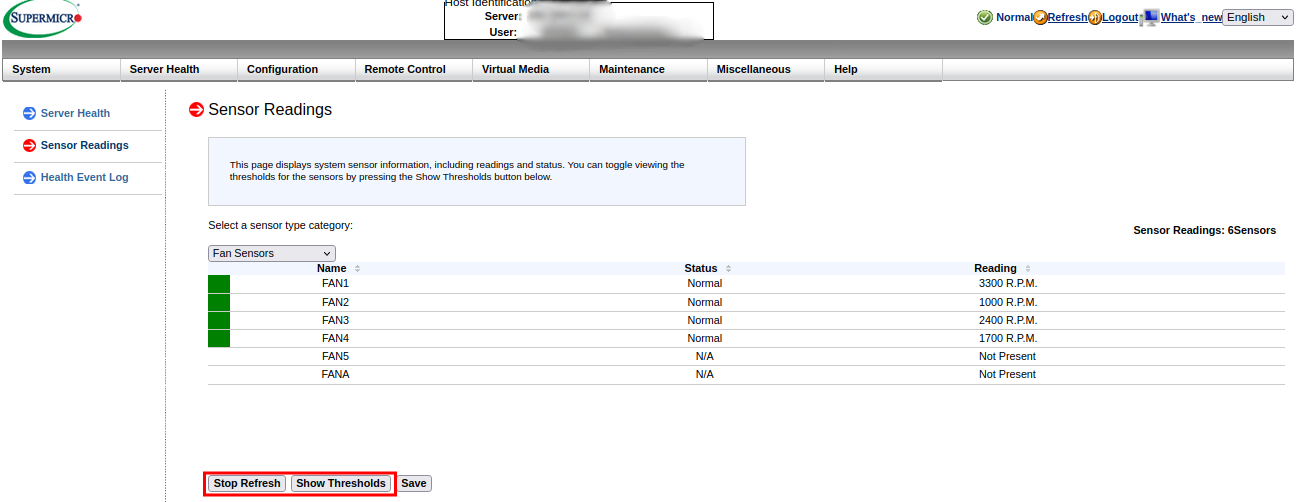
show thresholds and auto refresh are your friend.
I’m not going to explain pulse width modulation here. But it could be useful for a fan that is starting to fail. Let’s say the brass bushing is galling against the steel motor shaft (or there’s dust caked up, or there’s soda spilled on a laptop fan, etc.), and there’s a sticky spot at some clock angle that the fan may be stuck on. Increasing the pulse width temporarily might give it enough extra torque to overcome that sticky spot and continue to spin just fine.
On to the fix already!
Note: I’m using a SuperMicro X10SRM-TF motherboard. This fix should be common for any X9-X11 generation boards.
First you will need a tool to manage your IPMI settings, because these particular settings are not available in the IPMI web interface. I’m using ipmitool, which is frequently the choice in linux. There are other tools for Windows and Mac OS with varying levels of documentation.
$ sudo apt install ipmitool
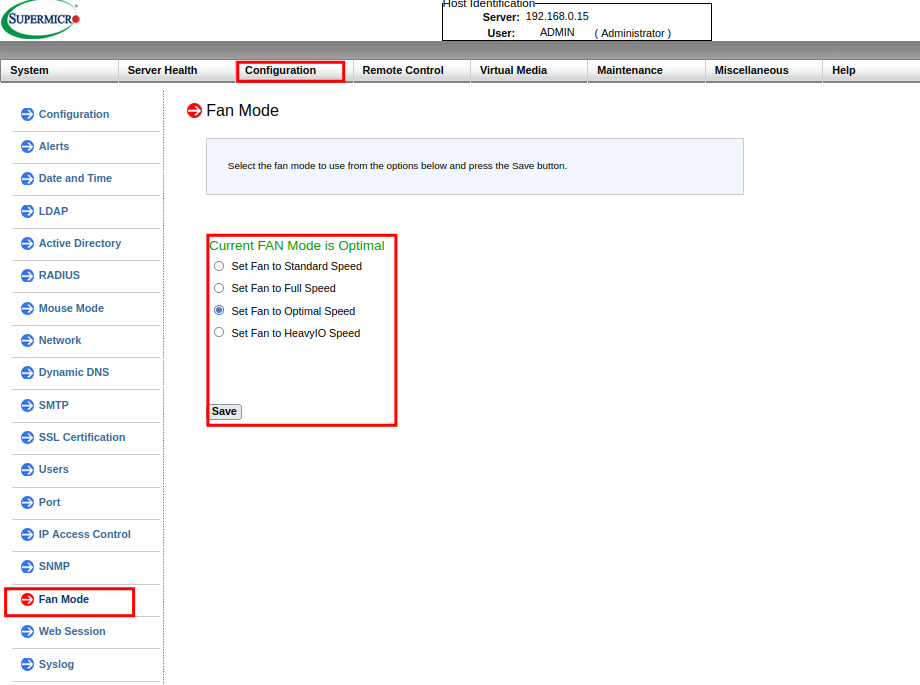 These presets are all you get from the GUI.
I’m connecting remotely over an ethernet interface. You can use serial as well, but I don’t know why you would to be honest.
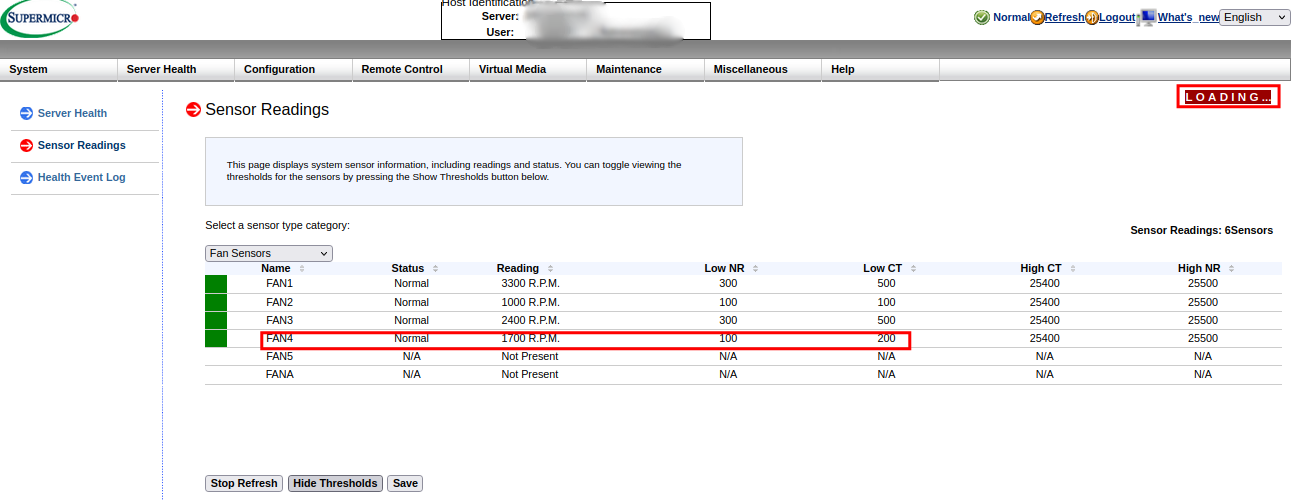
I’m going to take a stab in the dark and for fan 4 choose 100, 200, and 300rpm for low non-recoverable, low critical, and low non-critical, respectively. It will prompt you for your IPMI user password afterwards before it accepts the new values.
$ ipmitool -I lan -U [username] -H [ipmi ip address] sensor thresh FAN4 lower 100 200 300
Password:
This should work after you power cycle. For some reason it didn’t work for me. I think it may have been because the IPMI interface stayed up the entire time since I never removed the power cord.
You could try to remove the power cord if it doesn’t work as intended. But that kind of defeats the purpose of IPMI in the first place, doesn’t it? So we can just reset the BMC which worked for me.
$ ipmitool -I lan -U ADMIN -H 192.168.xx.xx bmc reset cold
Password:
 All looks good from my foxhole!
Final thoughts:
There’s a lot further we could go, but I won’t get into that today. What I really should do is find the specs for each exact fan that I have installed and tailor my values to those.
There’s also a thread over on Serve The Home that shows how to fine tune the fan speed for each fan, for each speed zone. This could be useful if you’re really trying to balance thermal performance with fan noise.
There are also some scripts over on a TrueNAS forum that you can run for some period of time and do a lot of this work for you. But as far as I can see, you have to run the script on the server itself, not over the lan/serial interface through ipmitool.
Thanks to Calvin Bui who had the original post that helped me solve the problem initially. His post is 10 years old, and linked to a nas4free.org forum that is now dead. So I’m capturing it all here again for those of us that use old hardware.