One of our teenage kids likes to flush the toilet handle. Hard. There are video games to get back to, and there is no time for simple pleasantries like making sure things aren’t destroyed (or turning off lights, closing the door, closing the toilet lid, washing hands, etc.)
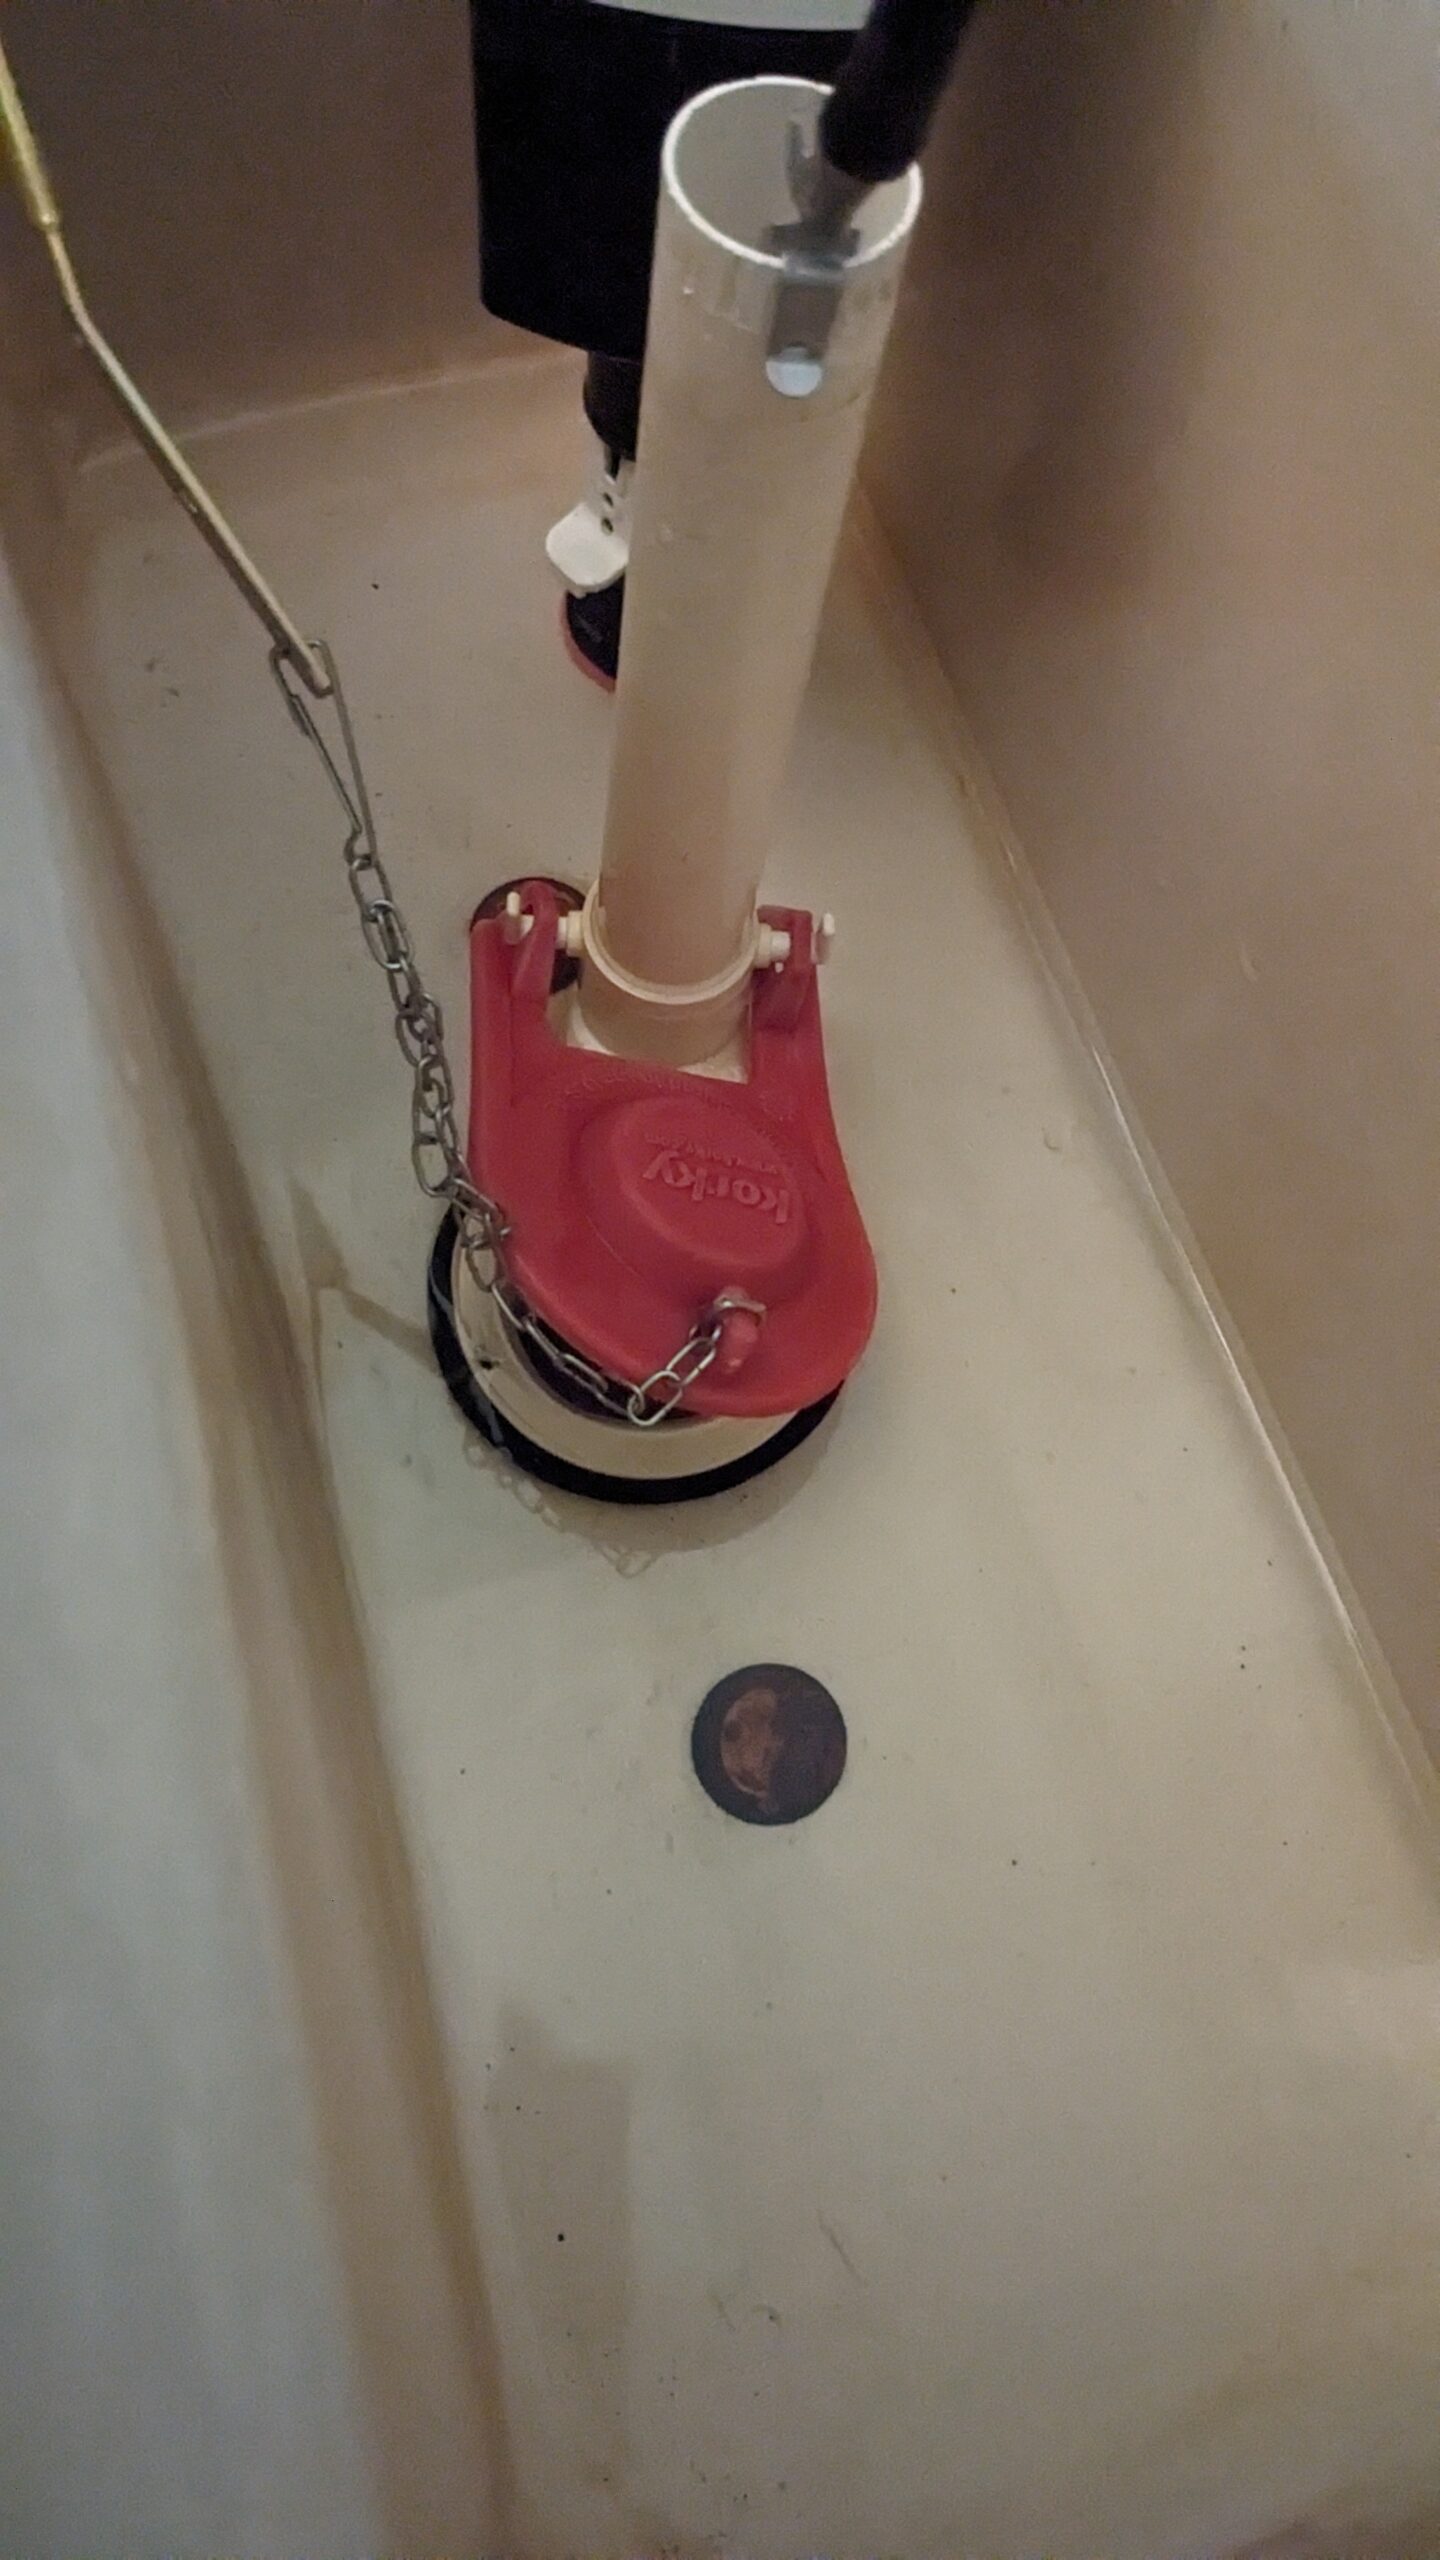
This can be a problem, because the flapper in the toilet rises up with so much momentum that the chain can catch under the flap, the flap never seats closed, and then toilet runs. I’ve adjusted the chain to be just as long as it needs to be with the lever fully down, with no slack.
With city sewer this just causes you to have a high water bill. With septic and a leach field, this causes the water level in the tank/field to rise. When you live on red clay, the average leach field will drop 1" of head in about 42 minutes, from what I’m told by plumbers in the area. When your toilet is dumping 2.2gal/min of water for 90 minutes, the leach field can’t keep up, and it floods your house.
 They realized that even more floor was buckling, and about 3x the floor is now ripped up…
The water mostly stays on top of the LVP flooring in the bathroom, until it hits baseboard. Then it flows under the baseboard, drops to the concrete, and flows underneath the flooring. It soaks into the 2x4 bottom plates of the walls, and into the drywall edges. Once it hits the composite wood flooring, all bets are off. It doesn’t matter how well the top surface of the floor repels water, the bottom of the planks suck it up like a sponge.
When it gets far enough to hit cabinets in the kitchen, those also soak up water like a sponge. it wicks up from the floor and swells the wood fibers. Then you end up with this, which is the inspiration for this post.
 The bottom half is trapezoidal
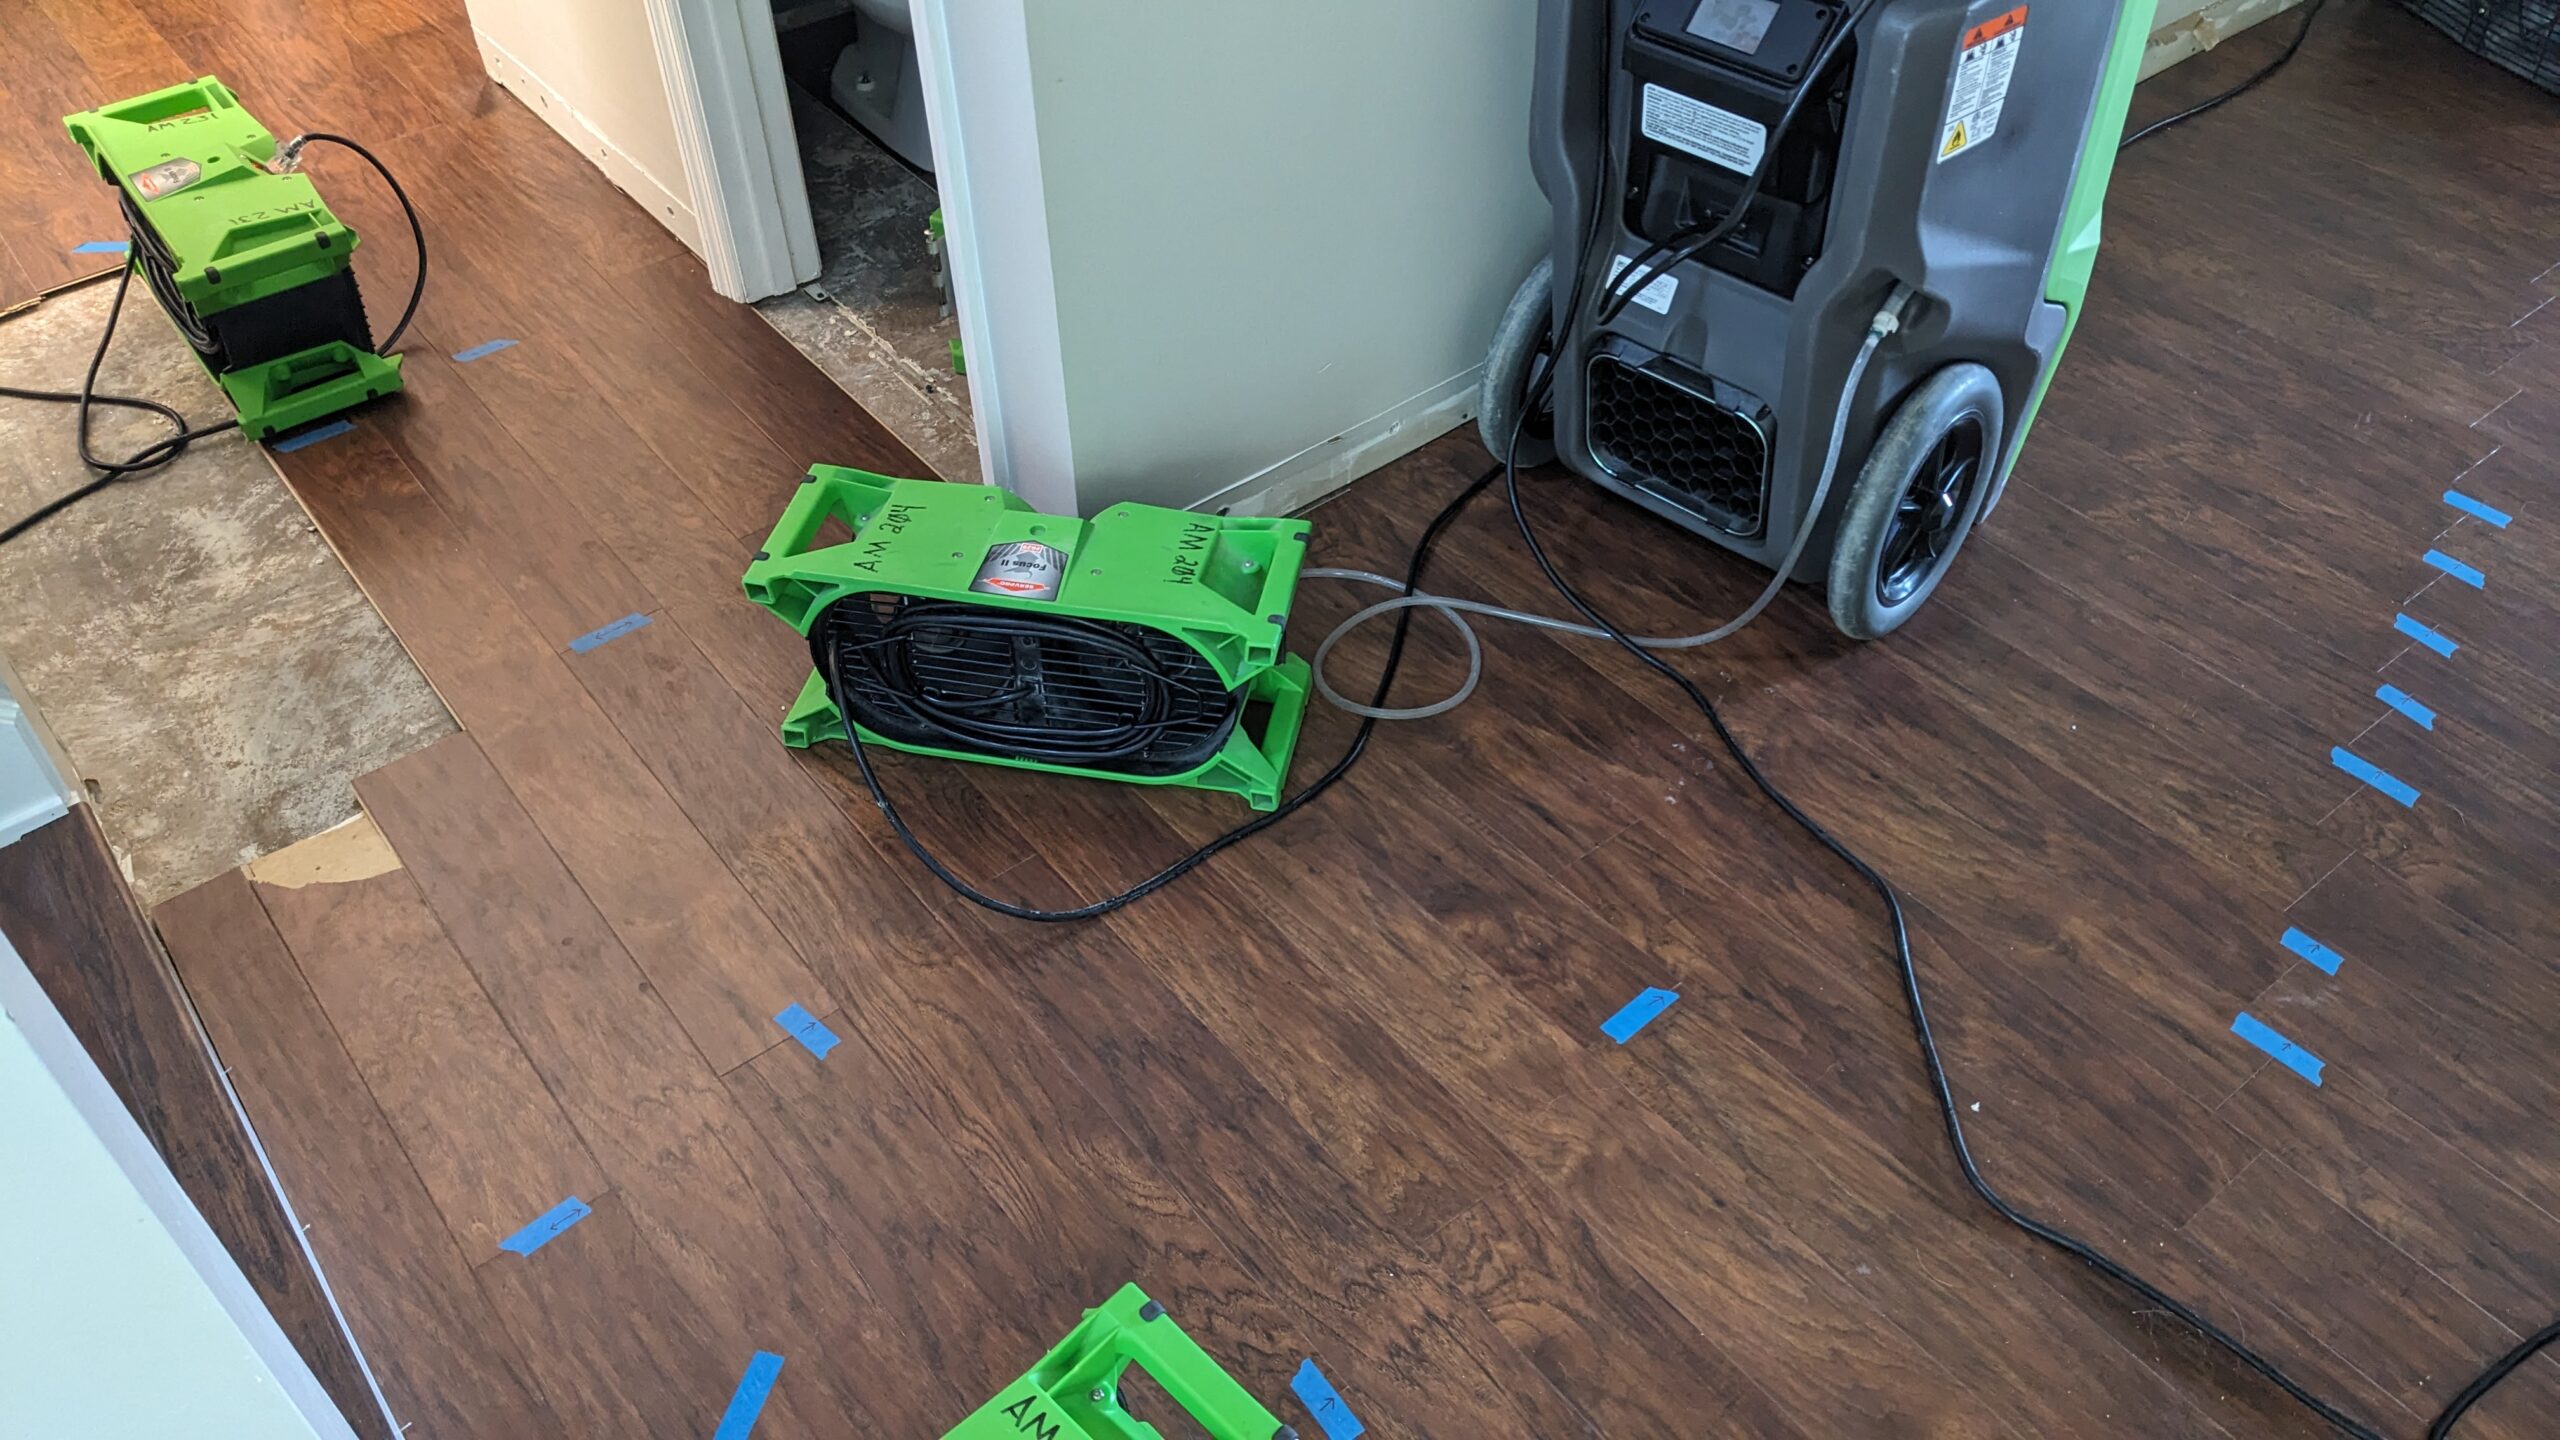
The water remediation company got to the house within 12 hours, and we had soaked/shopvac-ed up as much as we could. As well as pulling some baseboards. They have some nice axial fans with high static pressure (that sound like fans in a data center). But when you blast a cabinet from the outside, it can only do so much. The cabinet has paint/polyurethane/etc. coating it to keep spills from soaking into the wood, because that’s a good design feature. So forced evaporation is only so effective through some latex based enamel paint.
The Solution:
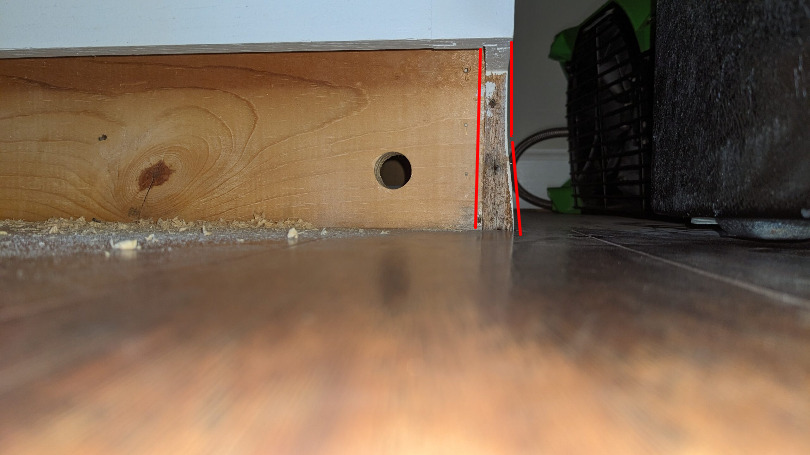
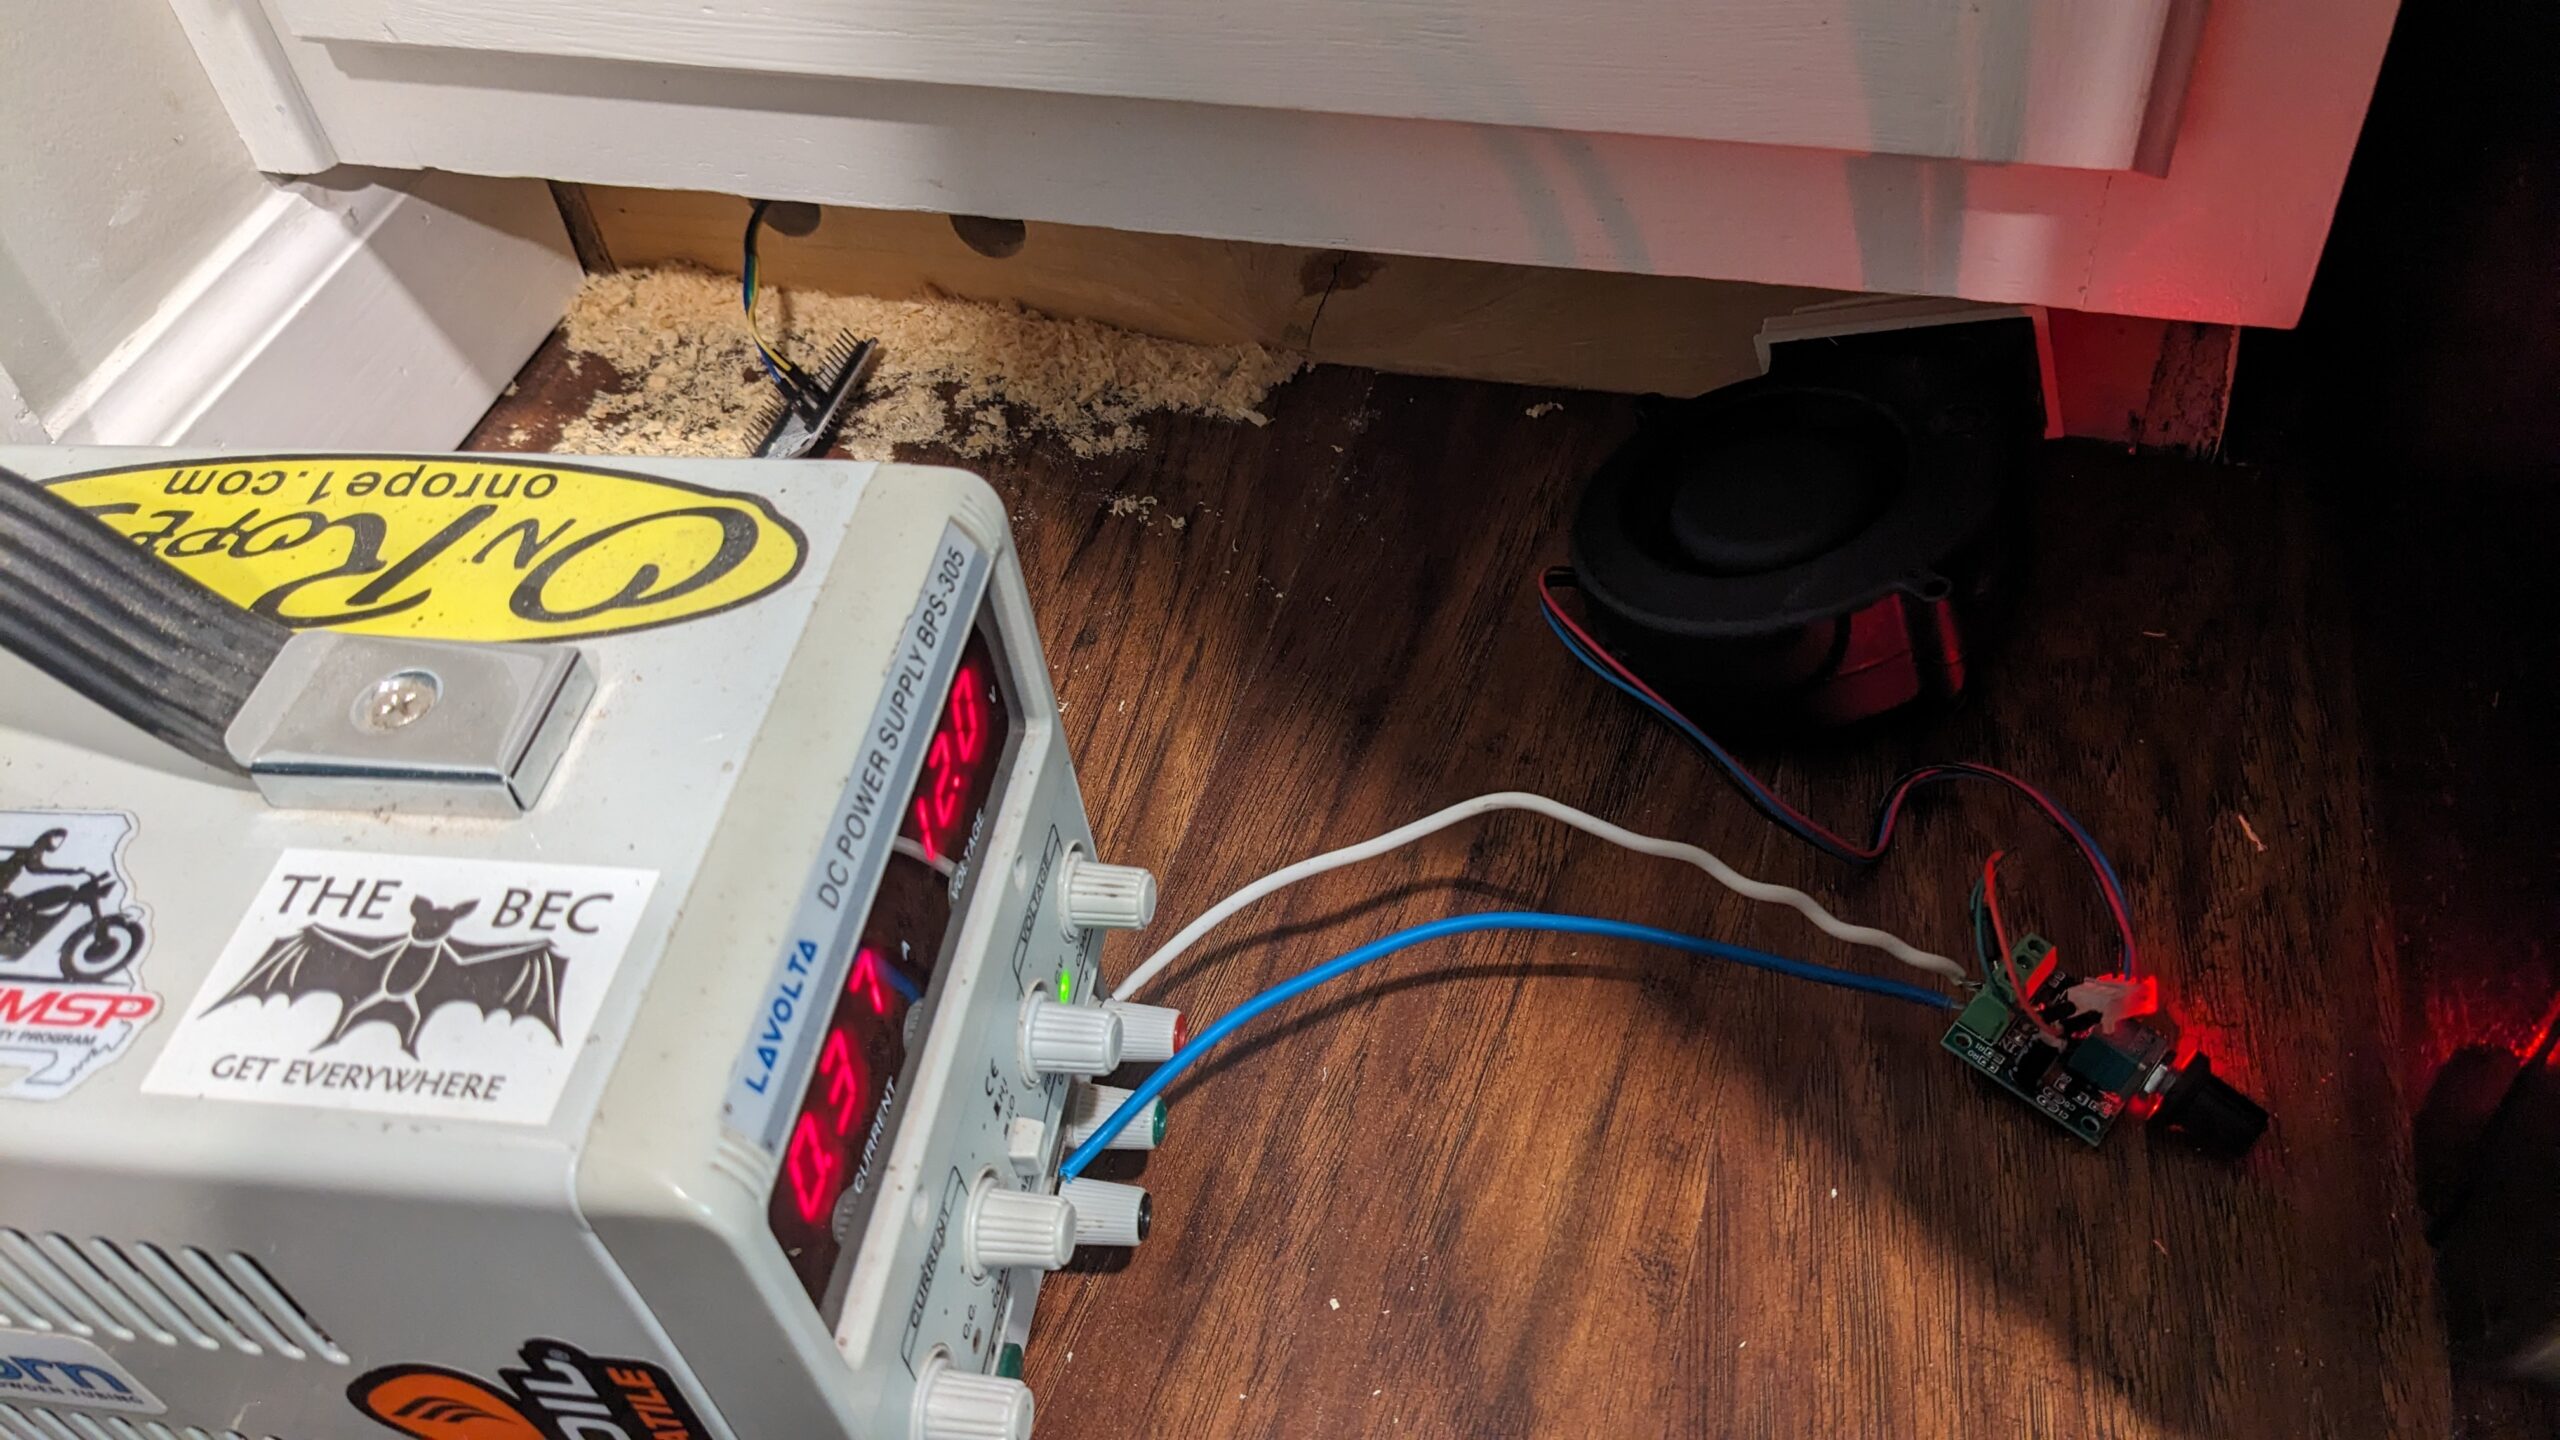
Drill holes into the toe kick of the cabinet, one for inlet and two for exhaust. Not into the pretty veneer or baseboard. Remove those, and drill into the pine board that’s structural. Stay away from edges, similar to how you pass pipes/electrical through floor joists (stay towards the neutral axis if this were a bending moment problem).
Grab yourself a centrifugal fan, since they’re better at creating high static pressure compared to an axial fan. This big chonker from an early 2000’s UPS I scrapped should work well.
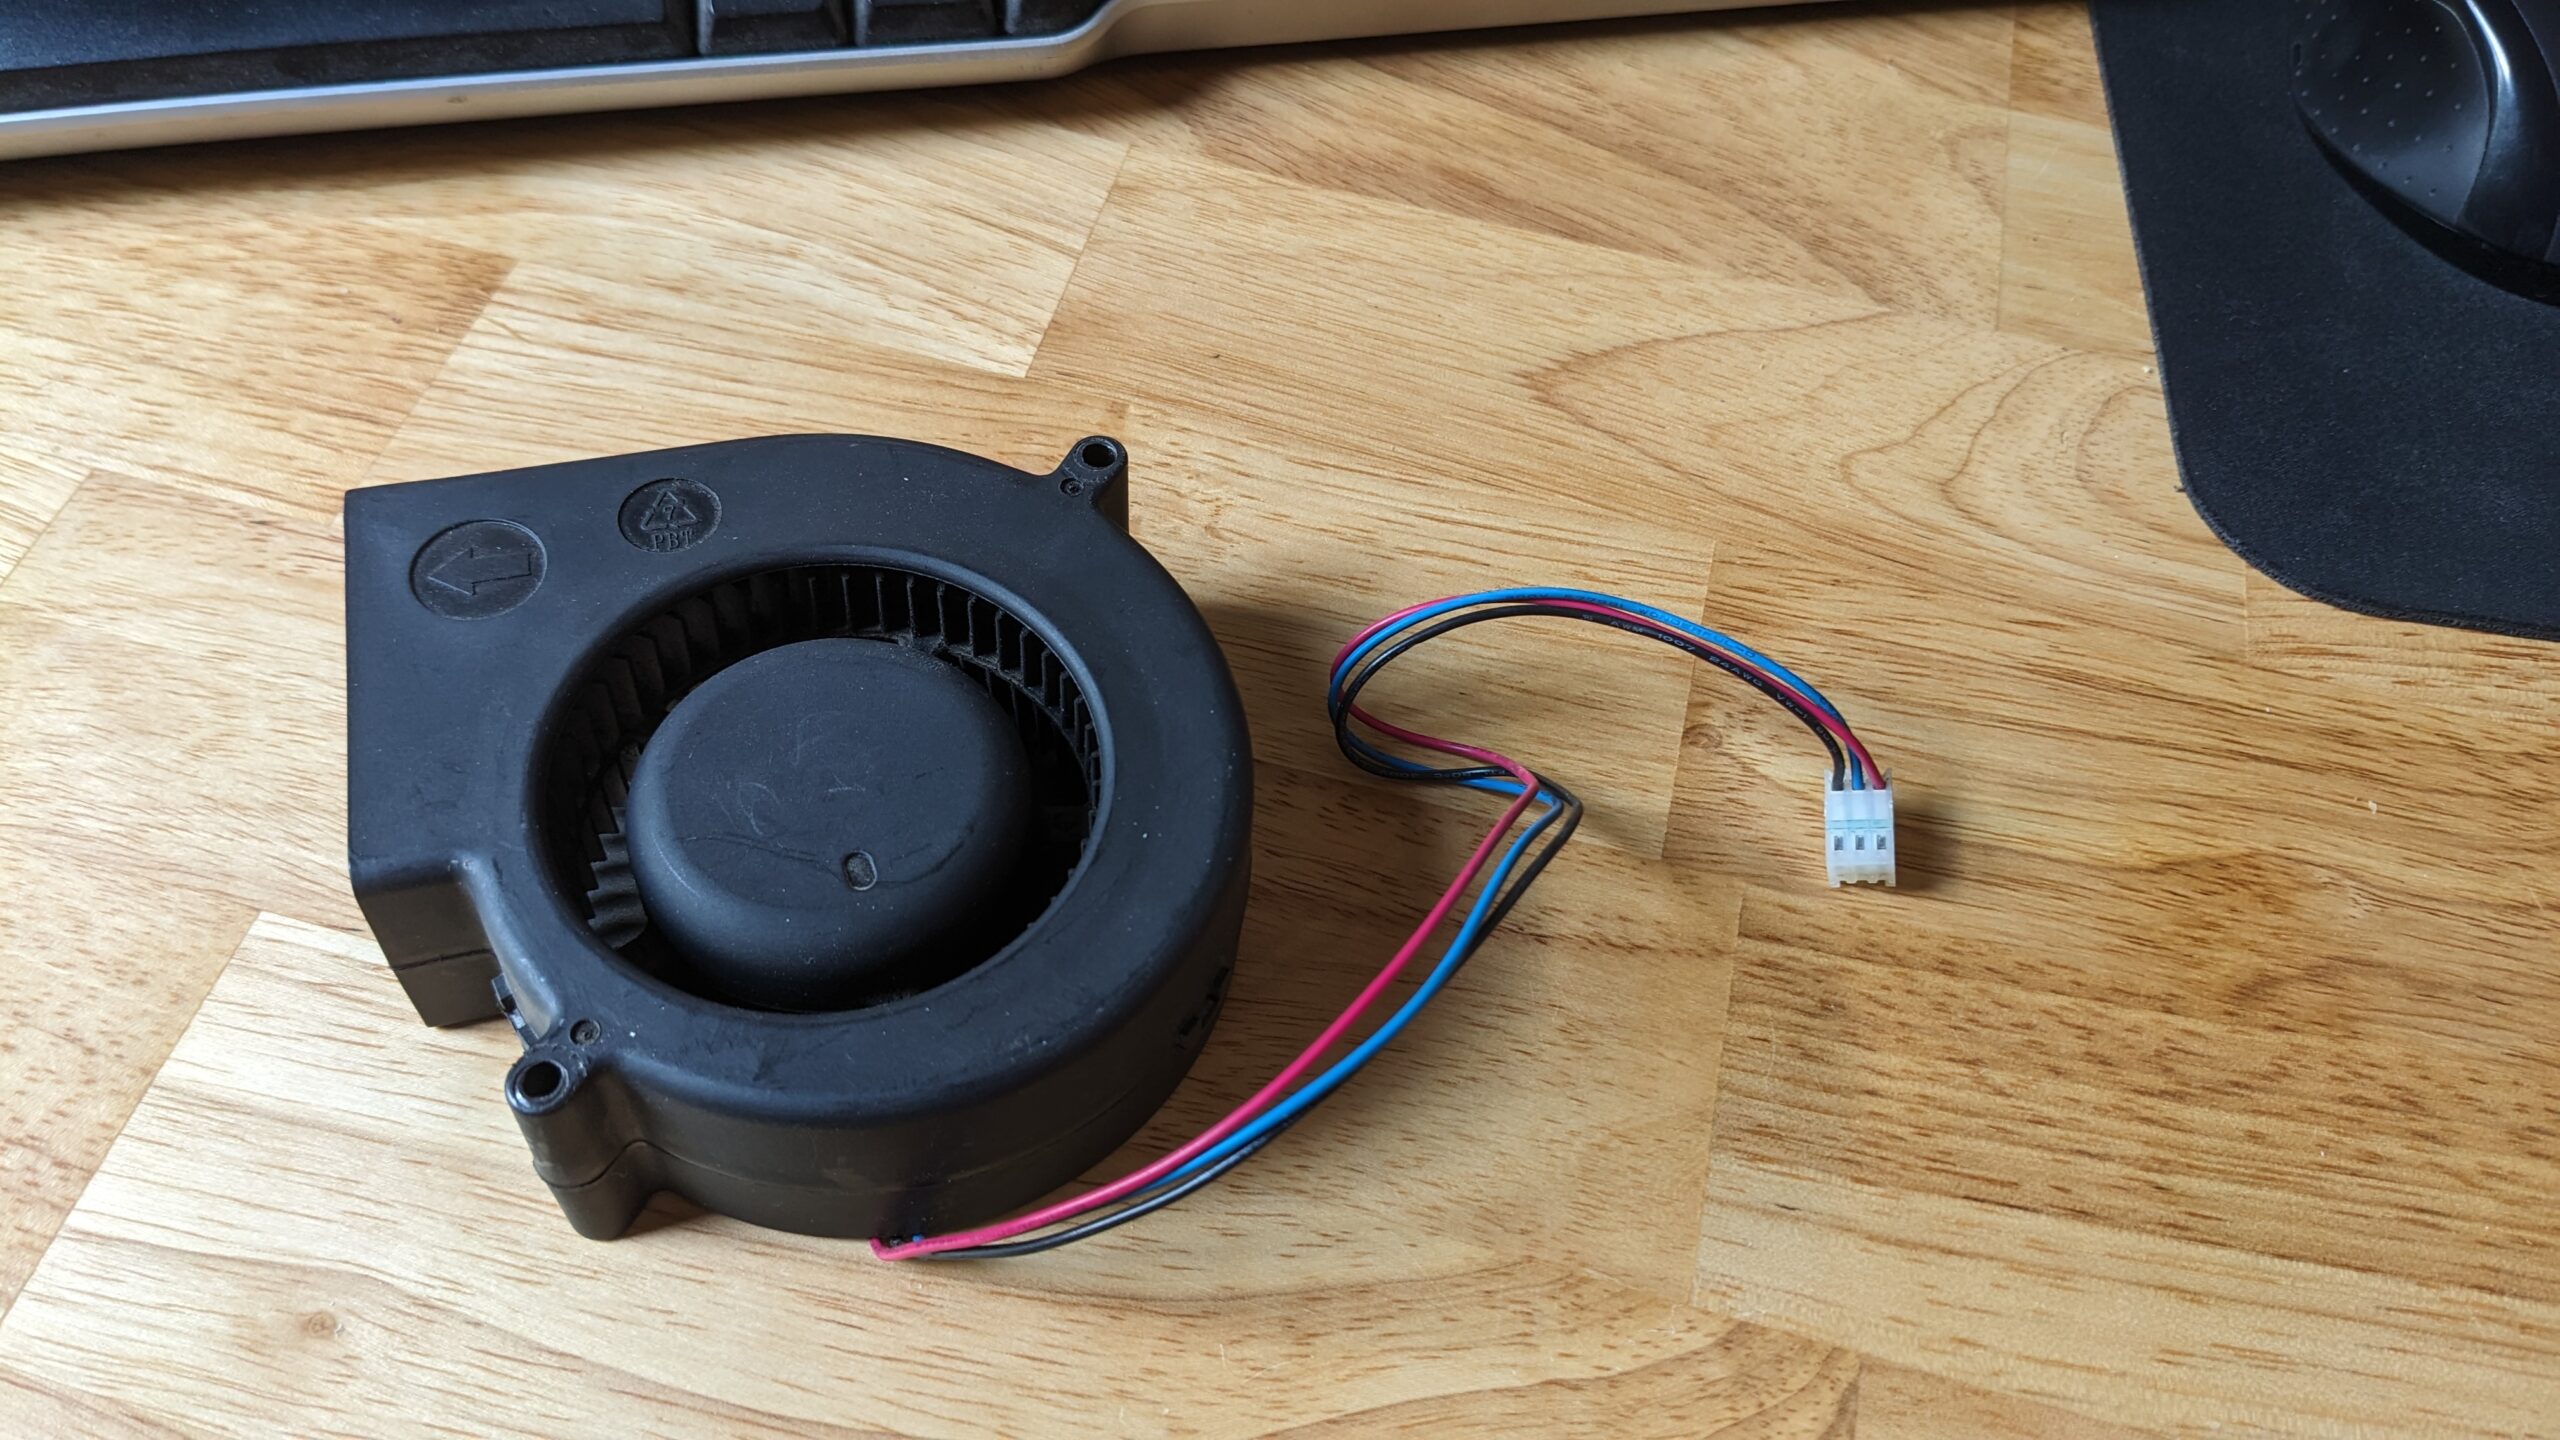
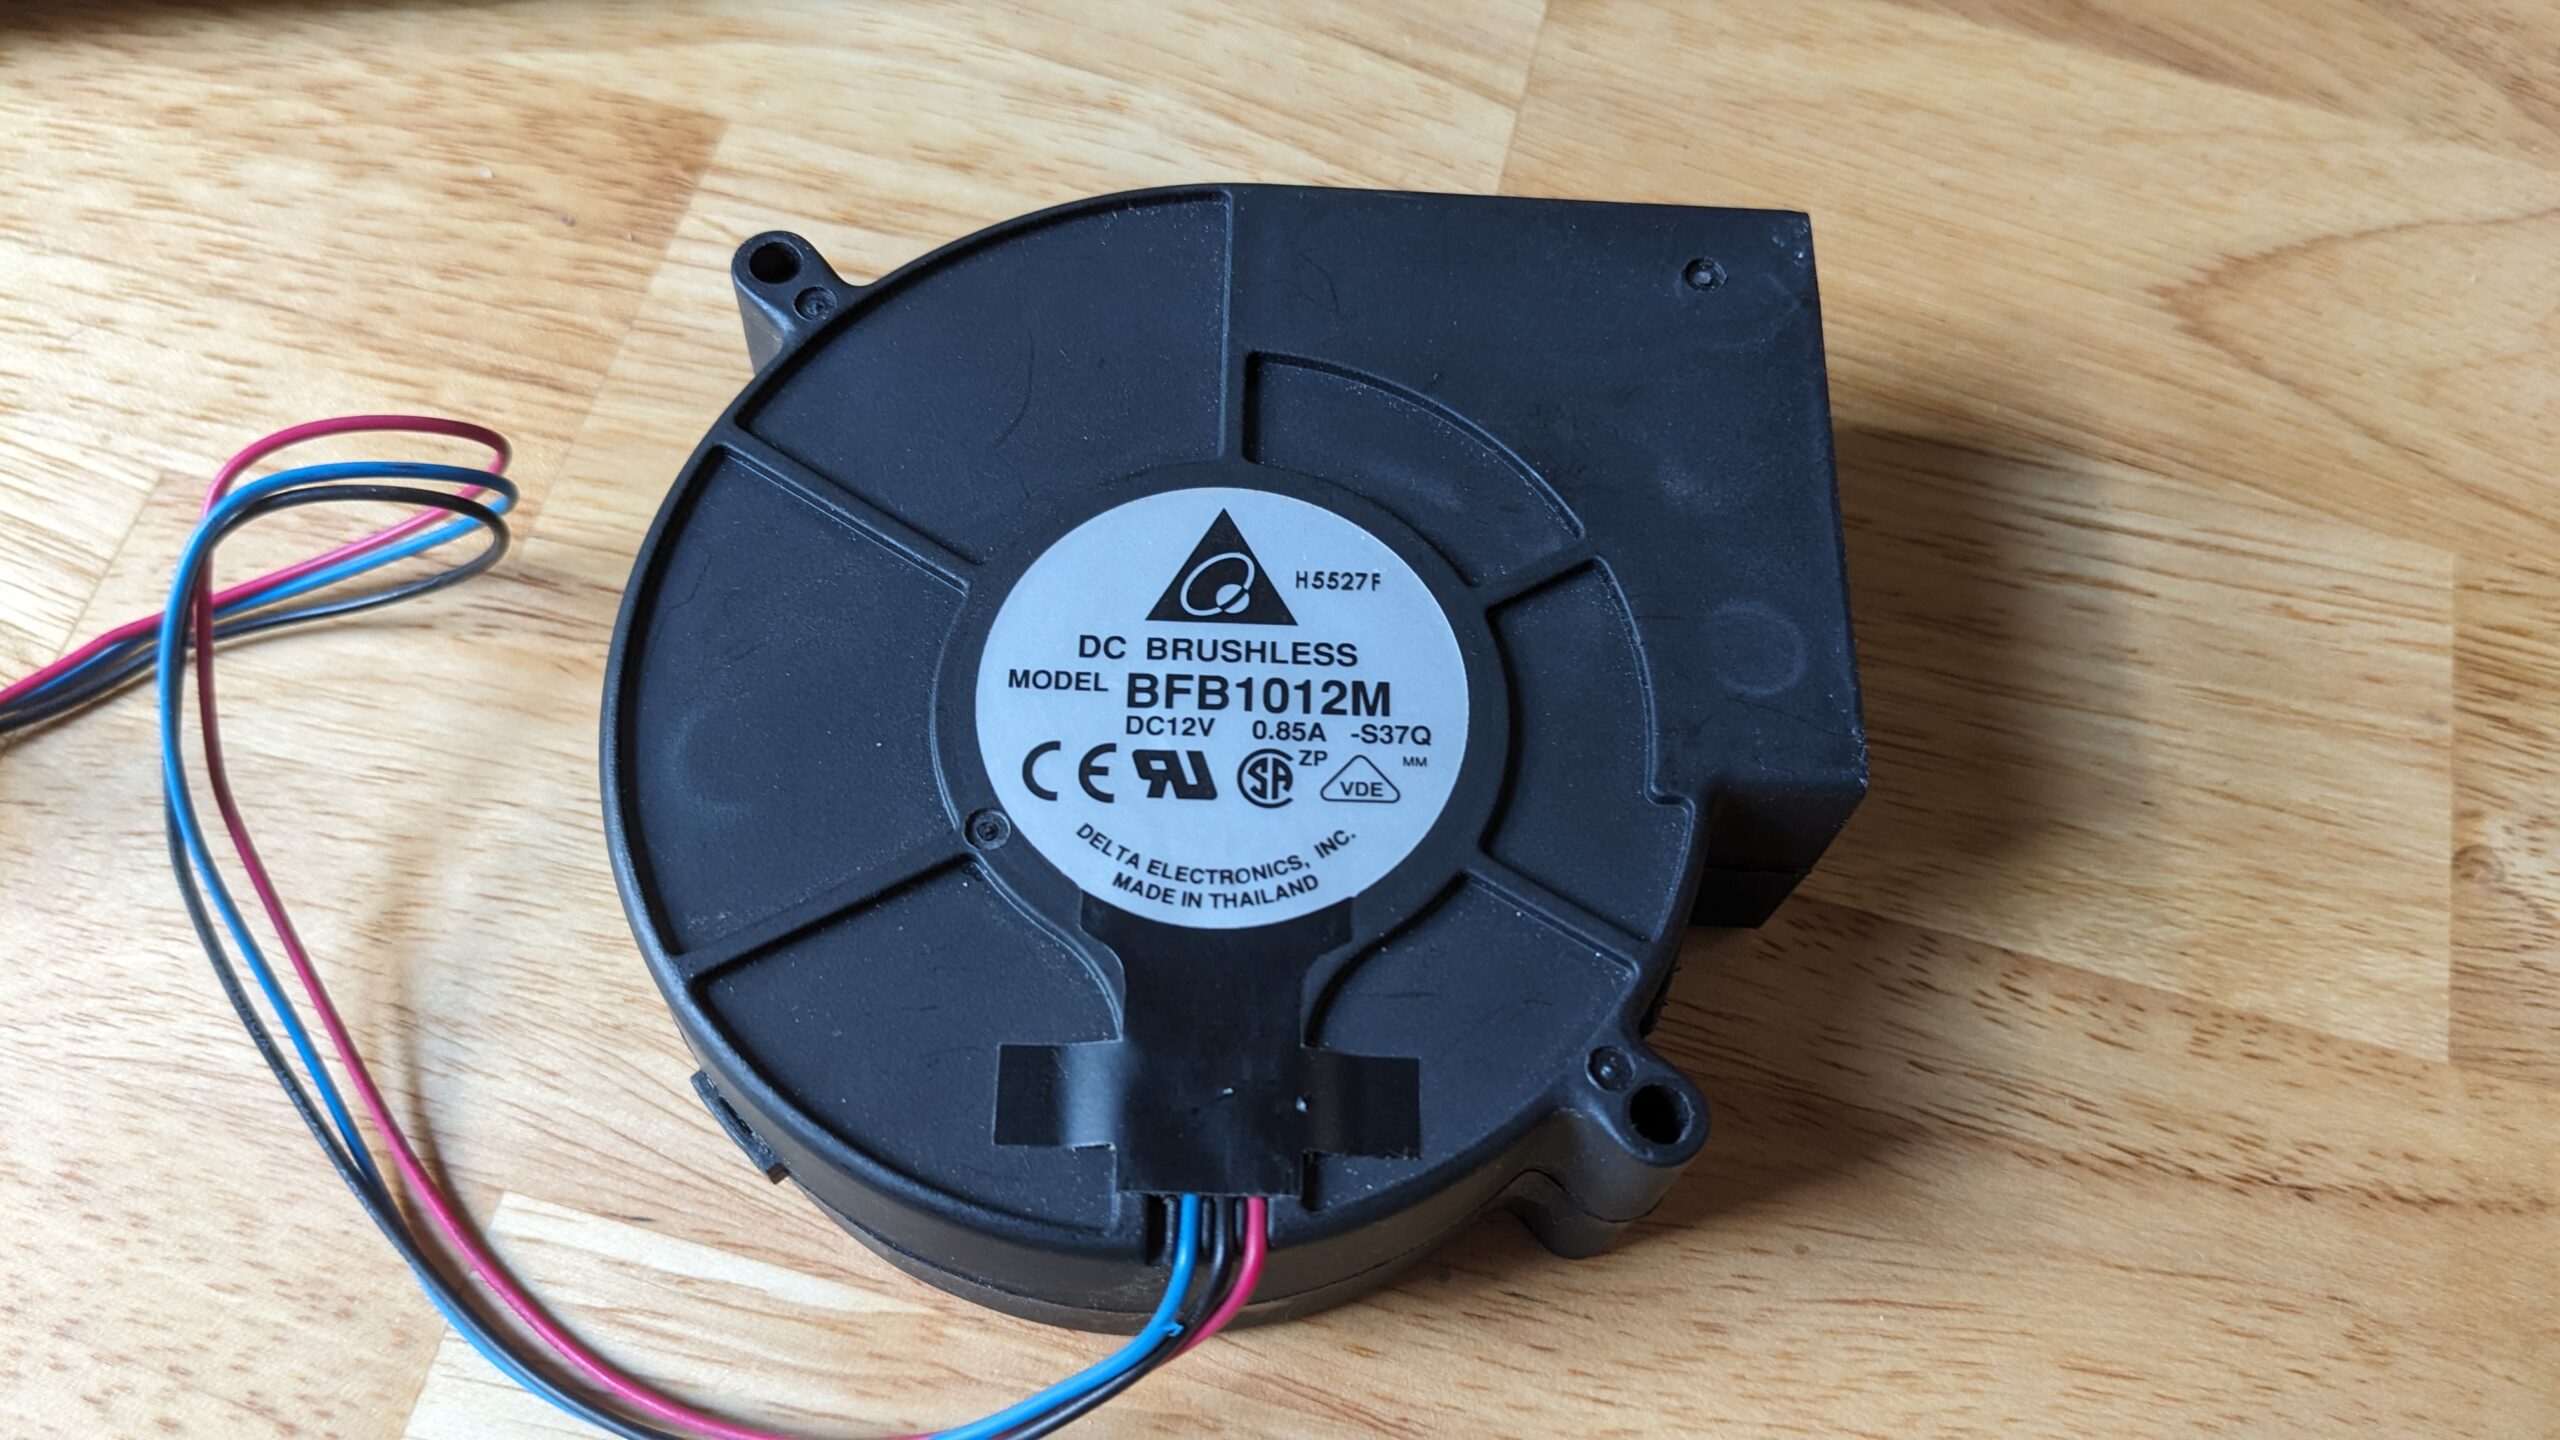 With the flow restriction, this thing only runs at 0.4A, but it’s better than nothing.
Next we need to power it. I’m using a Dc benchtop power supply, since I don’t have any female barrel jacks to steal power from one of my 12V wall warts. I’m also throwing a cheap PWM controller in the middle.
Next we make an adapter. I’m not going to go into the details, but I used the top plane along with 3 reference planes in Solidworks, with a sketch on each plane and then created a lofted extrusion through them. One side fits over my fan outlet, the other fits inside the hole from my forstner bit. You have to loft 0-1, 1-2, and 2-3 separately. Otherwise it tries to fit the profile with bezier curves, which give you some strange results, and doesn’t fit.

And here is everything in place. I think we’re about 16 hours in so far with this particular setup.
Bonus Points:
Use an ESP and temp/humidity sensor to monitor the drying process. I’m using an ESP8266 and DHT11 sensor, which I believe I have already covered in this blog. I’m using ESPhome firmware, and HomeAssistant to log the data.
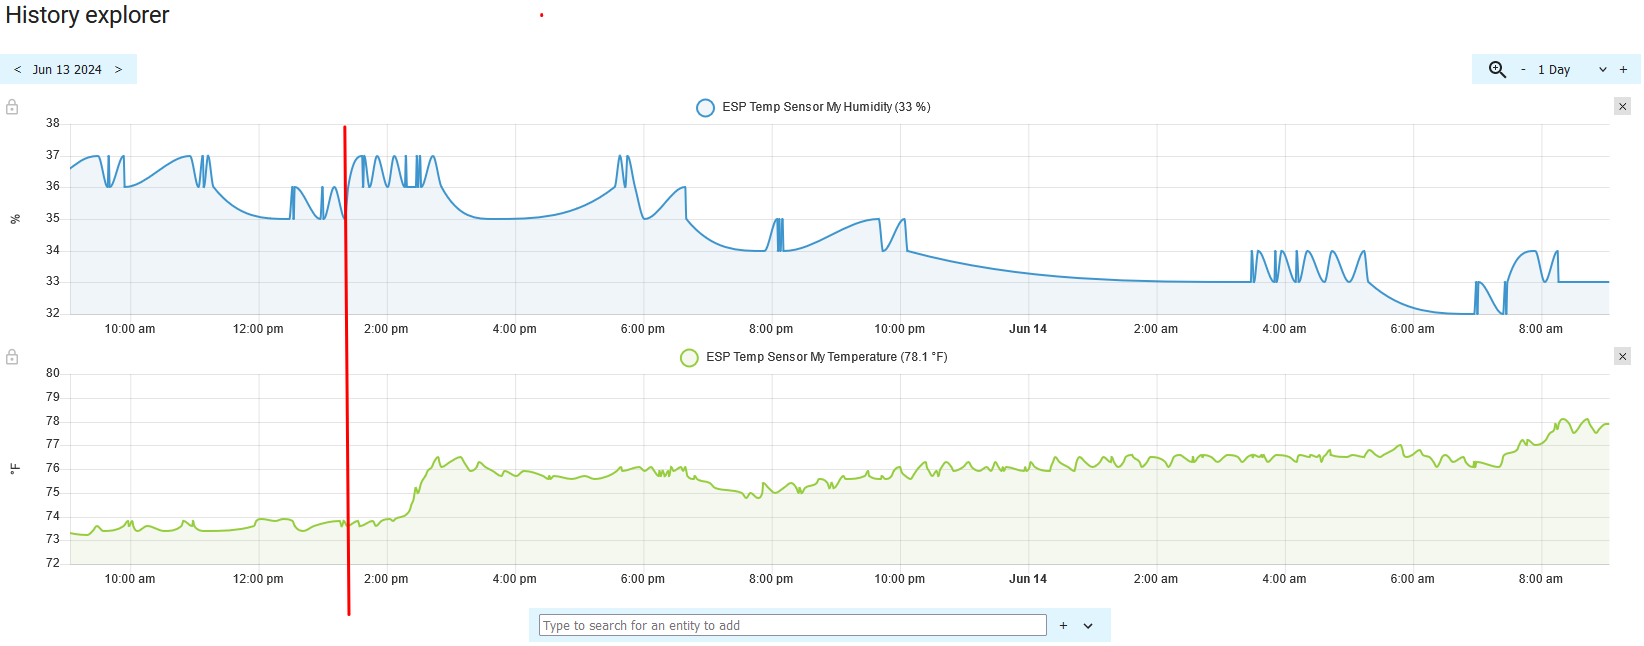 Moved the sensor from our back room to inside the cabinet at about 1:20pm
The humidity in the house was already high, since this problem has been ongoing since late Tuesday night. But the humidity in the cabinet has dropped about 4% according to the sensor, which is inexpensive, not calibrated, and NOT to be used for anything where you need real accuracy. But it can at least give me +/- 1%RH and help show a downward trend over time.
Here are the files for anyone who may need them (.7z with .sldprt and .stl inside).