Adding another category to the tags today, pottery. I fell in love with clay in high school, and about 6 years ago I ended up buying a new wheel and tools, and a used Skutt 1027 kiln from the Dallas ISD for ~300 shipped. Which I have some old photos to cover some future posts about kiln maintenance/repair.
Anyways, I need to fire a few things for me and the kids before moving. And I smashed the fuse holder on the side of the kiln controller a while back. I replaced it, but the spade connectors were too large, and needed to be modified.
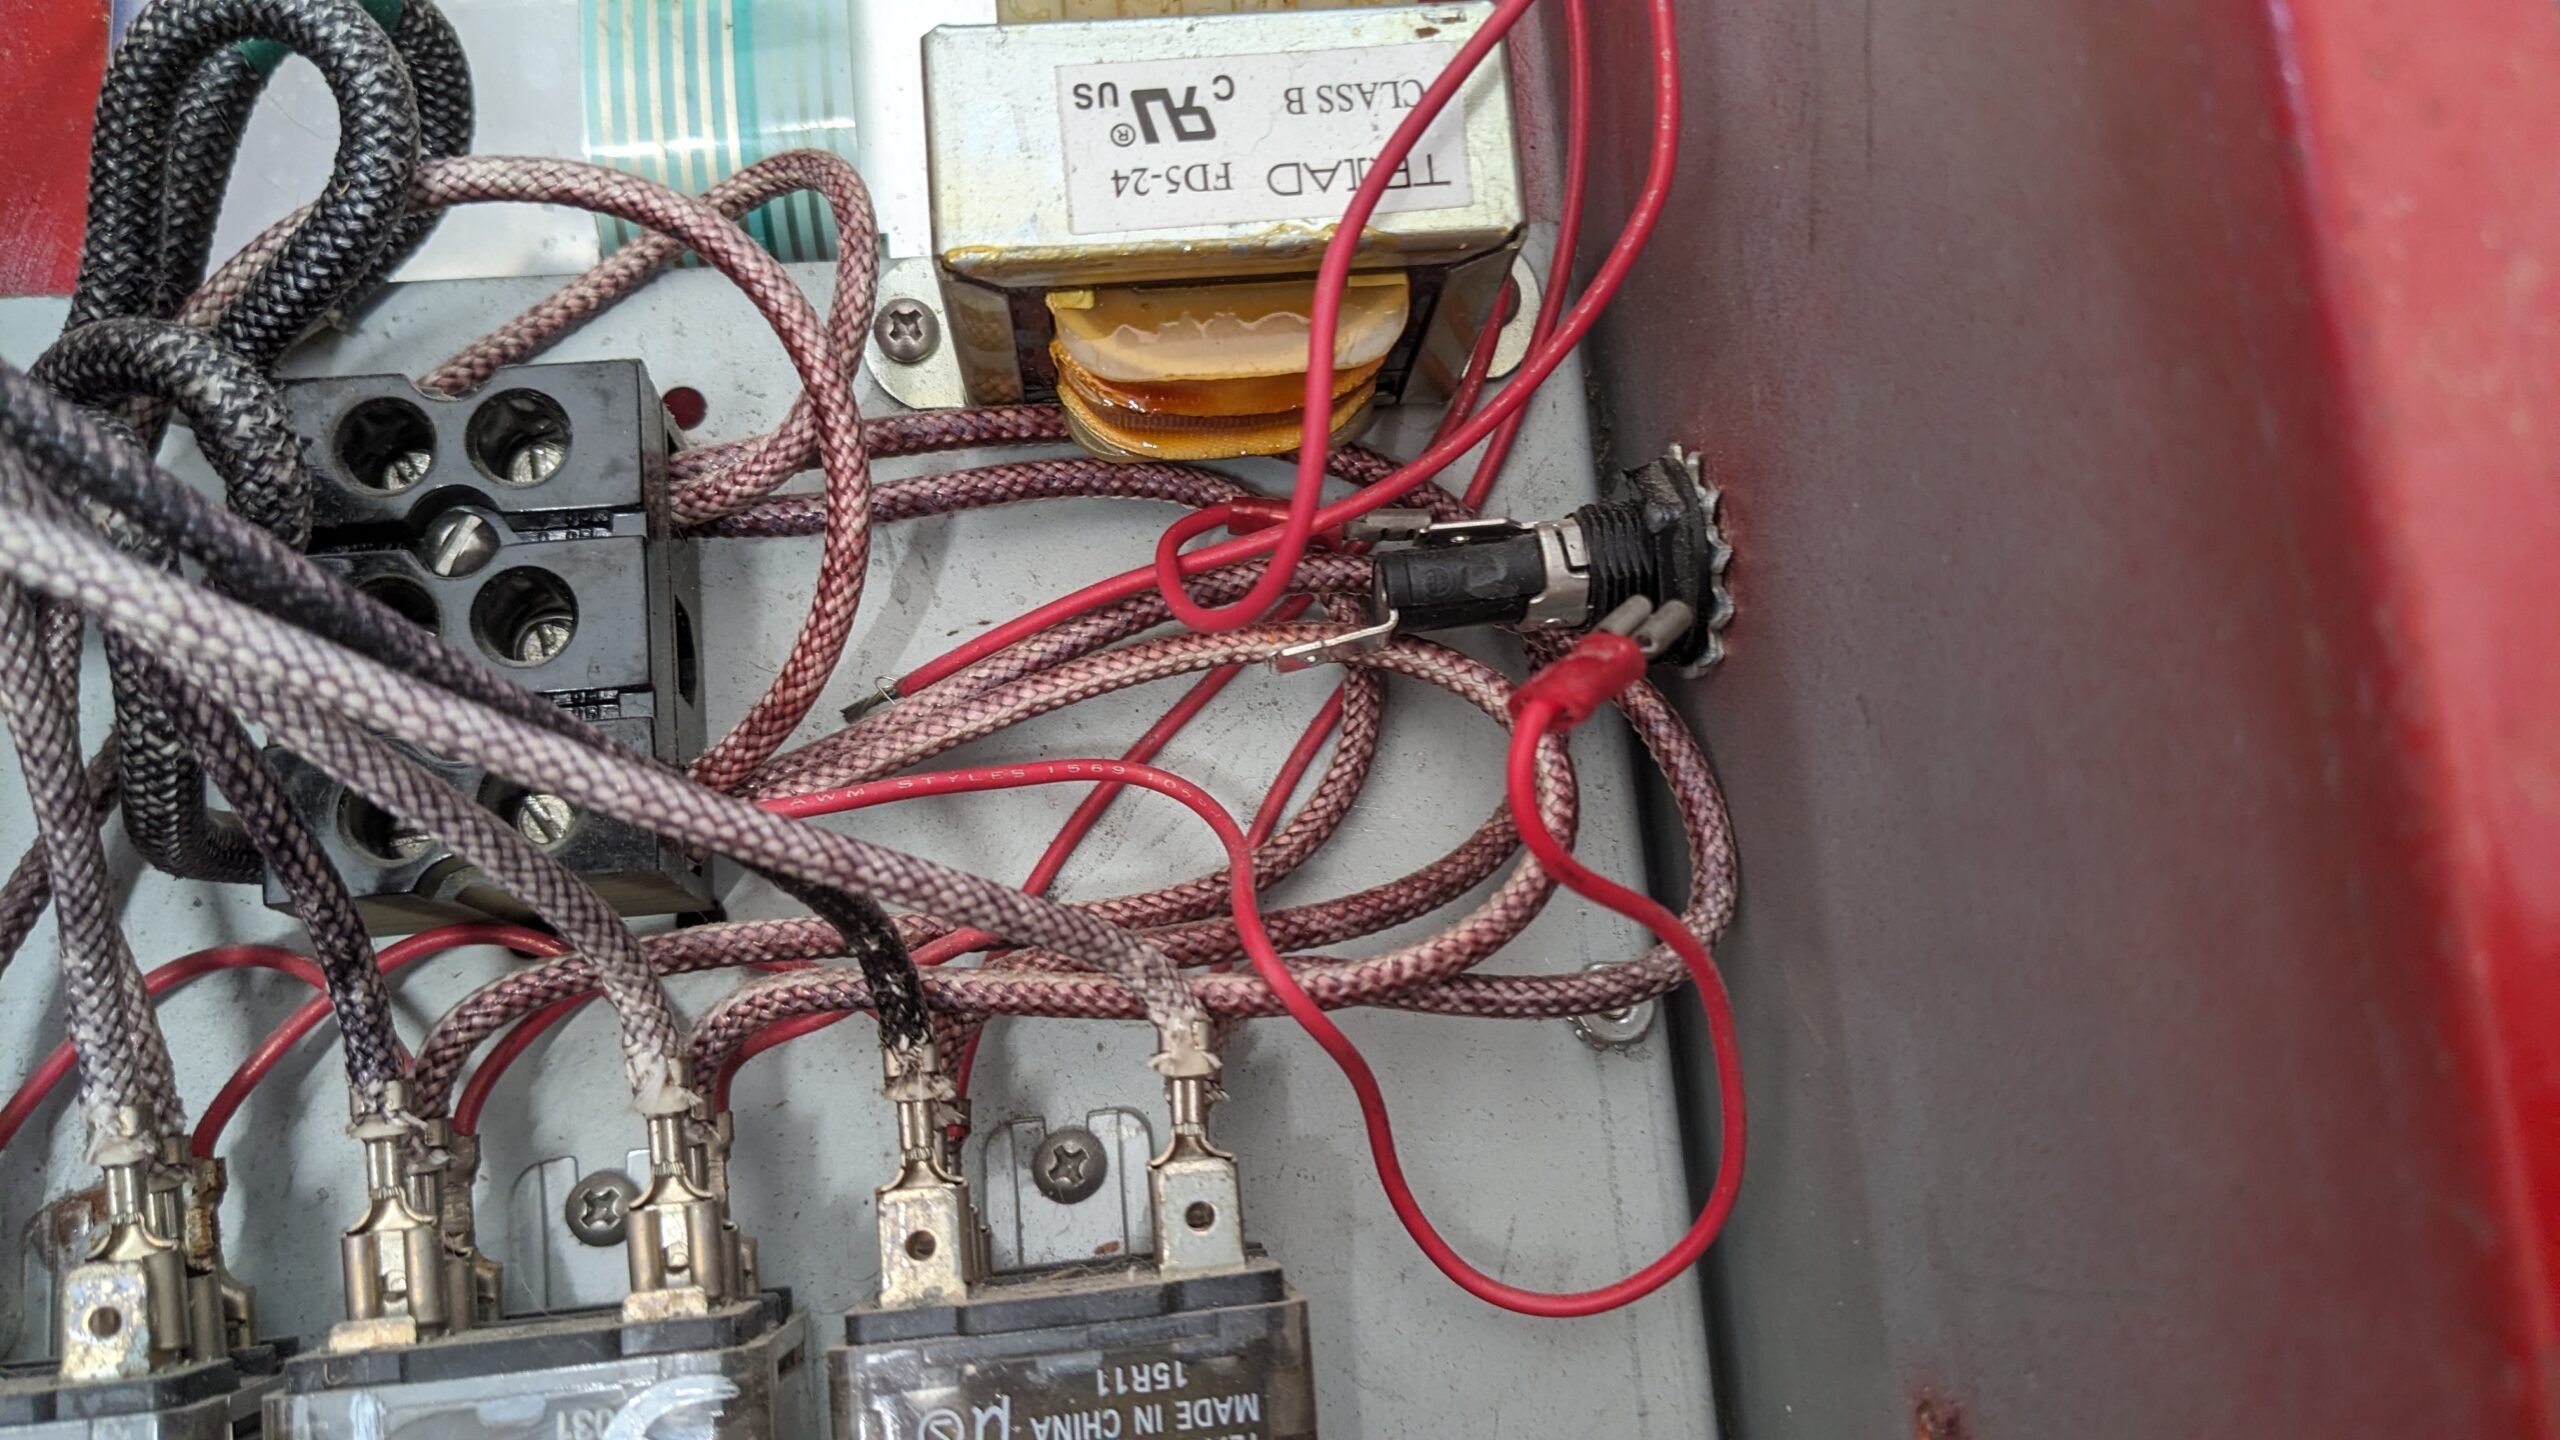 Yep, not going to work very well without those red wires connected to the fuse…
The controller can be removed from the kiln easily (it’s intended to come off for transportation, when you have to split the three rings of the kiln into separate pieces).
- Unplug the kiln from the wall, or turn off the circuit breaker.
- Remove 6x screws on the left side of the controller. Rotate the controller outwards on the hinges (which are on the right side)
- Unplug 6x spade connectors for the heating elements, and 2x spade connectors for the thermocouple.
- Lift upwards on the controller to get the hings pins out of the hinge attachment points. Set the controller down onto the ground.
- Remove 6x screws (3x on each side) that hold the heat shield in place.
I just removed the entire fuse holder, took it to the bench grinder, and brought it down to size. The nickel coating is now gone, but the terminals are brass and should be fine. Just throw a little dielectric grease on it for good measure. And use a hand file at the end to get a good finish.
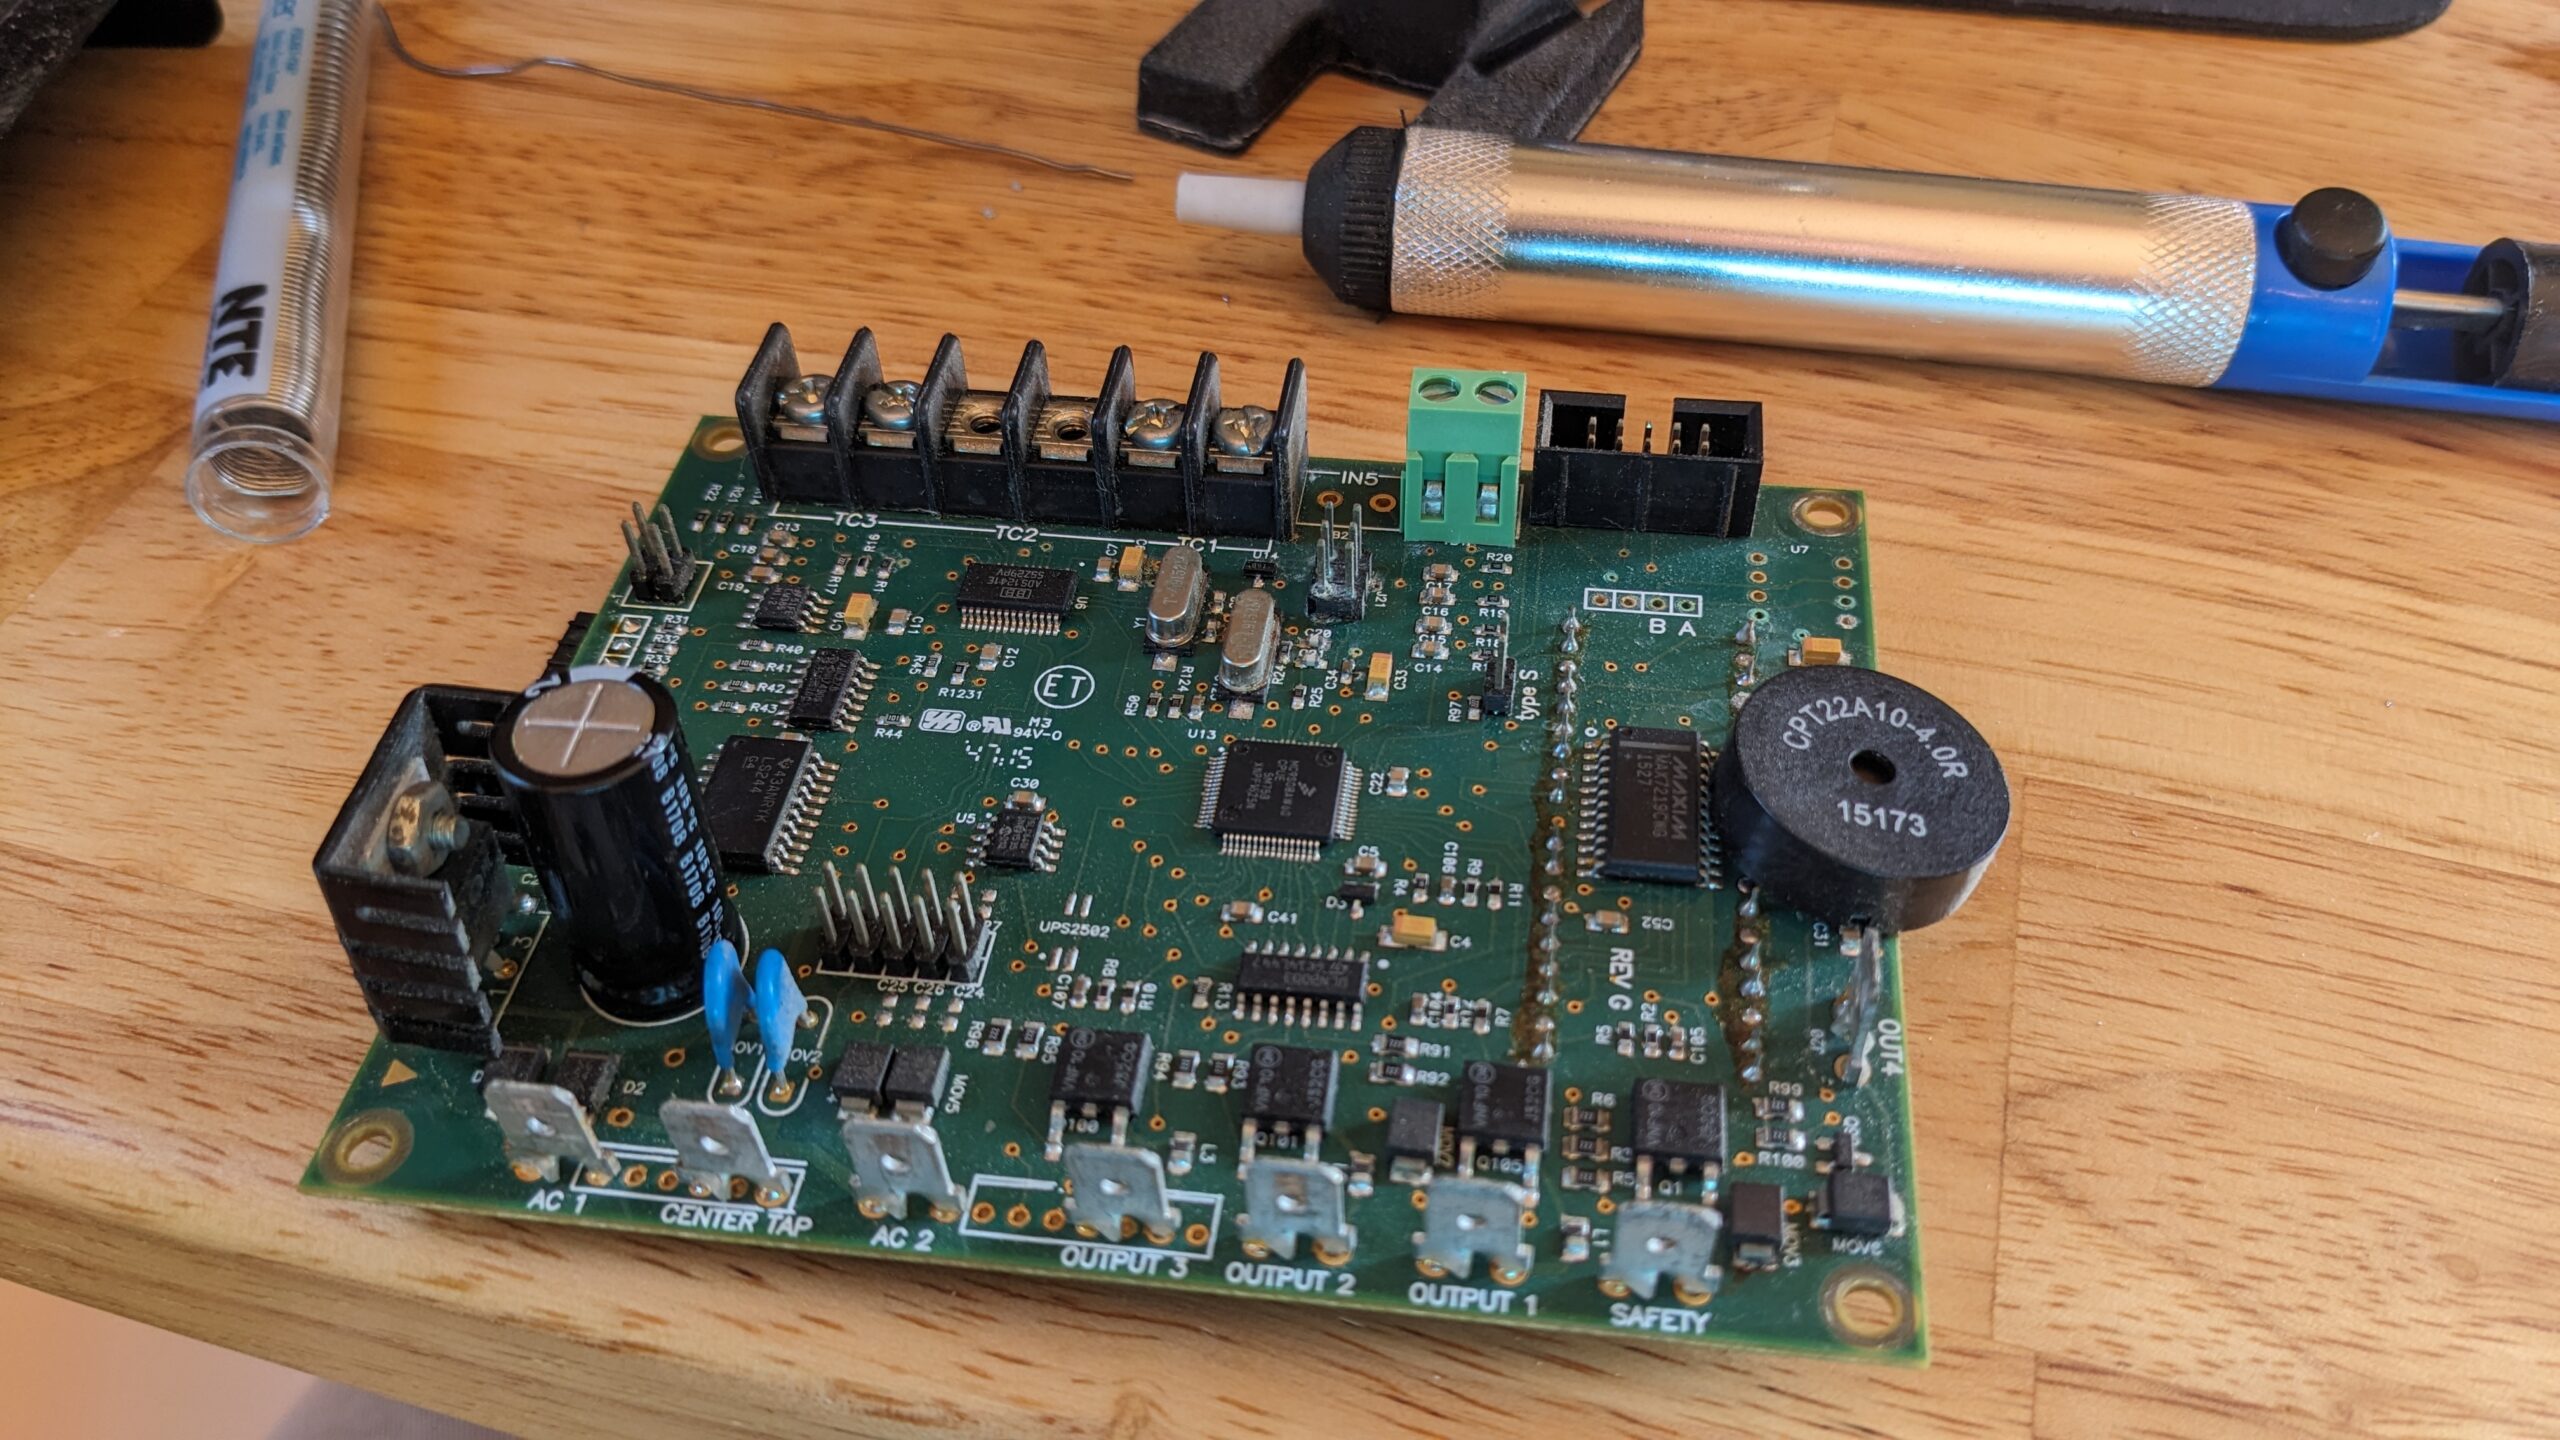
While I’m in there, I noticed a bulging capacitor on the controller board. I’m not sure if this is a problem, but I may as well fix it while we’re here. Capacitors like this are less than $1/ea, I happen to have a few of them leftover from an earlier project (the same exact specs and manufacturer as OEM!), and a new board (+ touchpad) is ~$356 from Skutt.
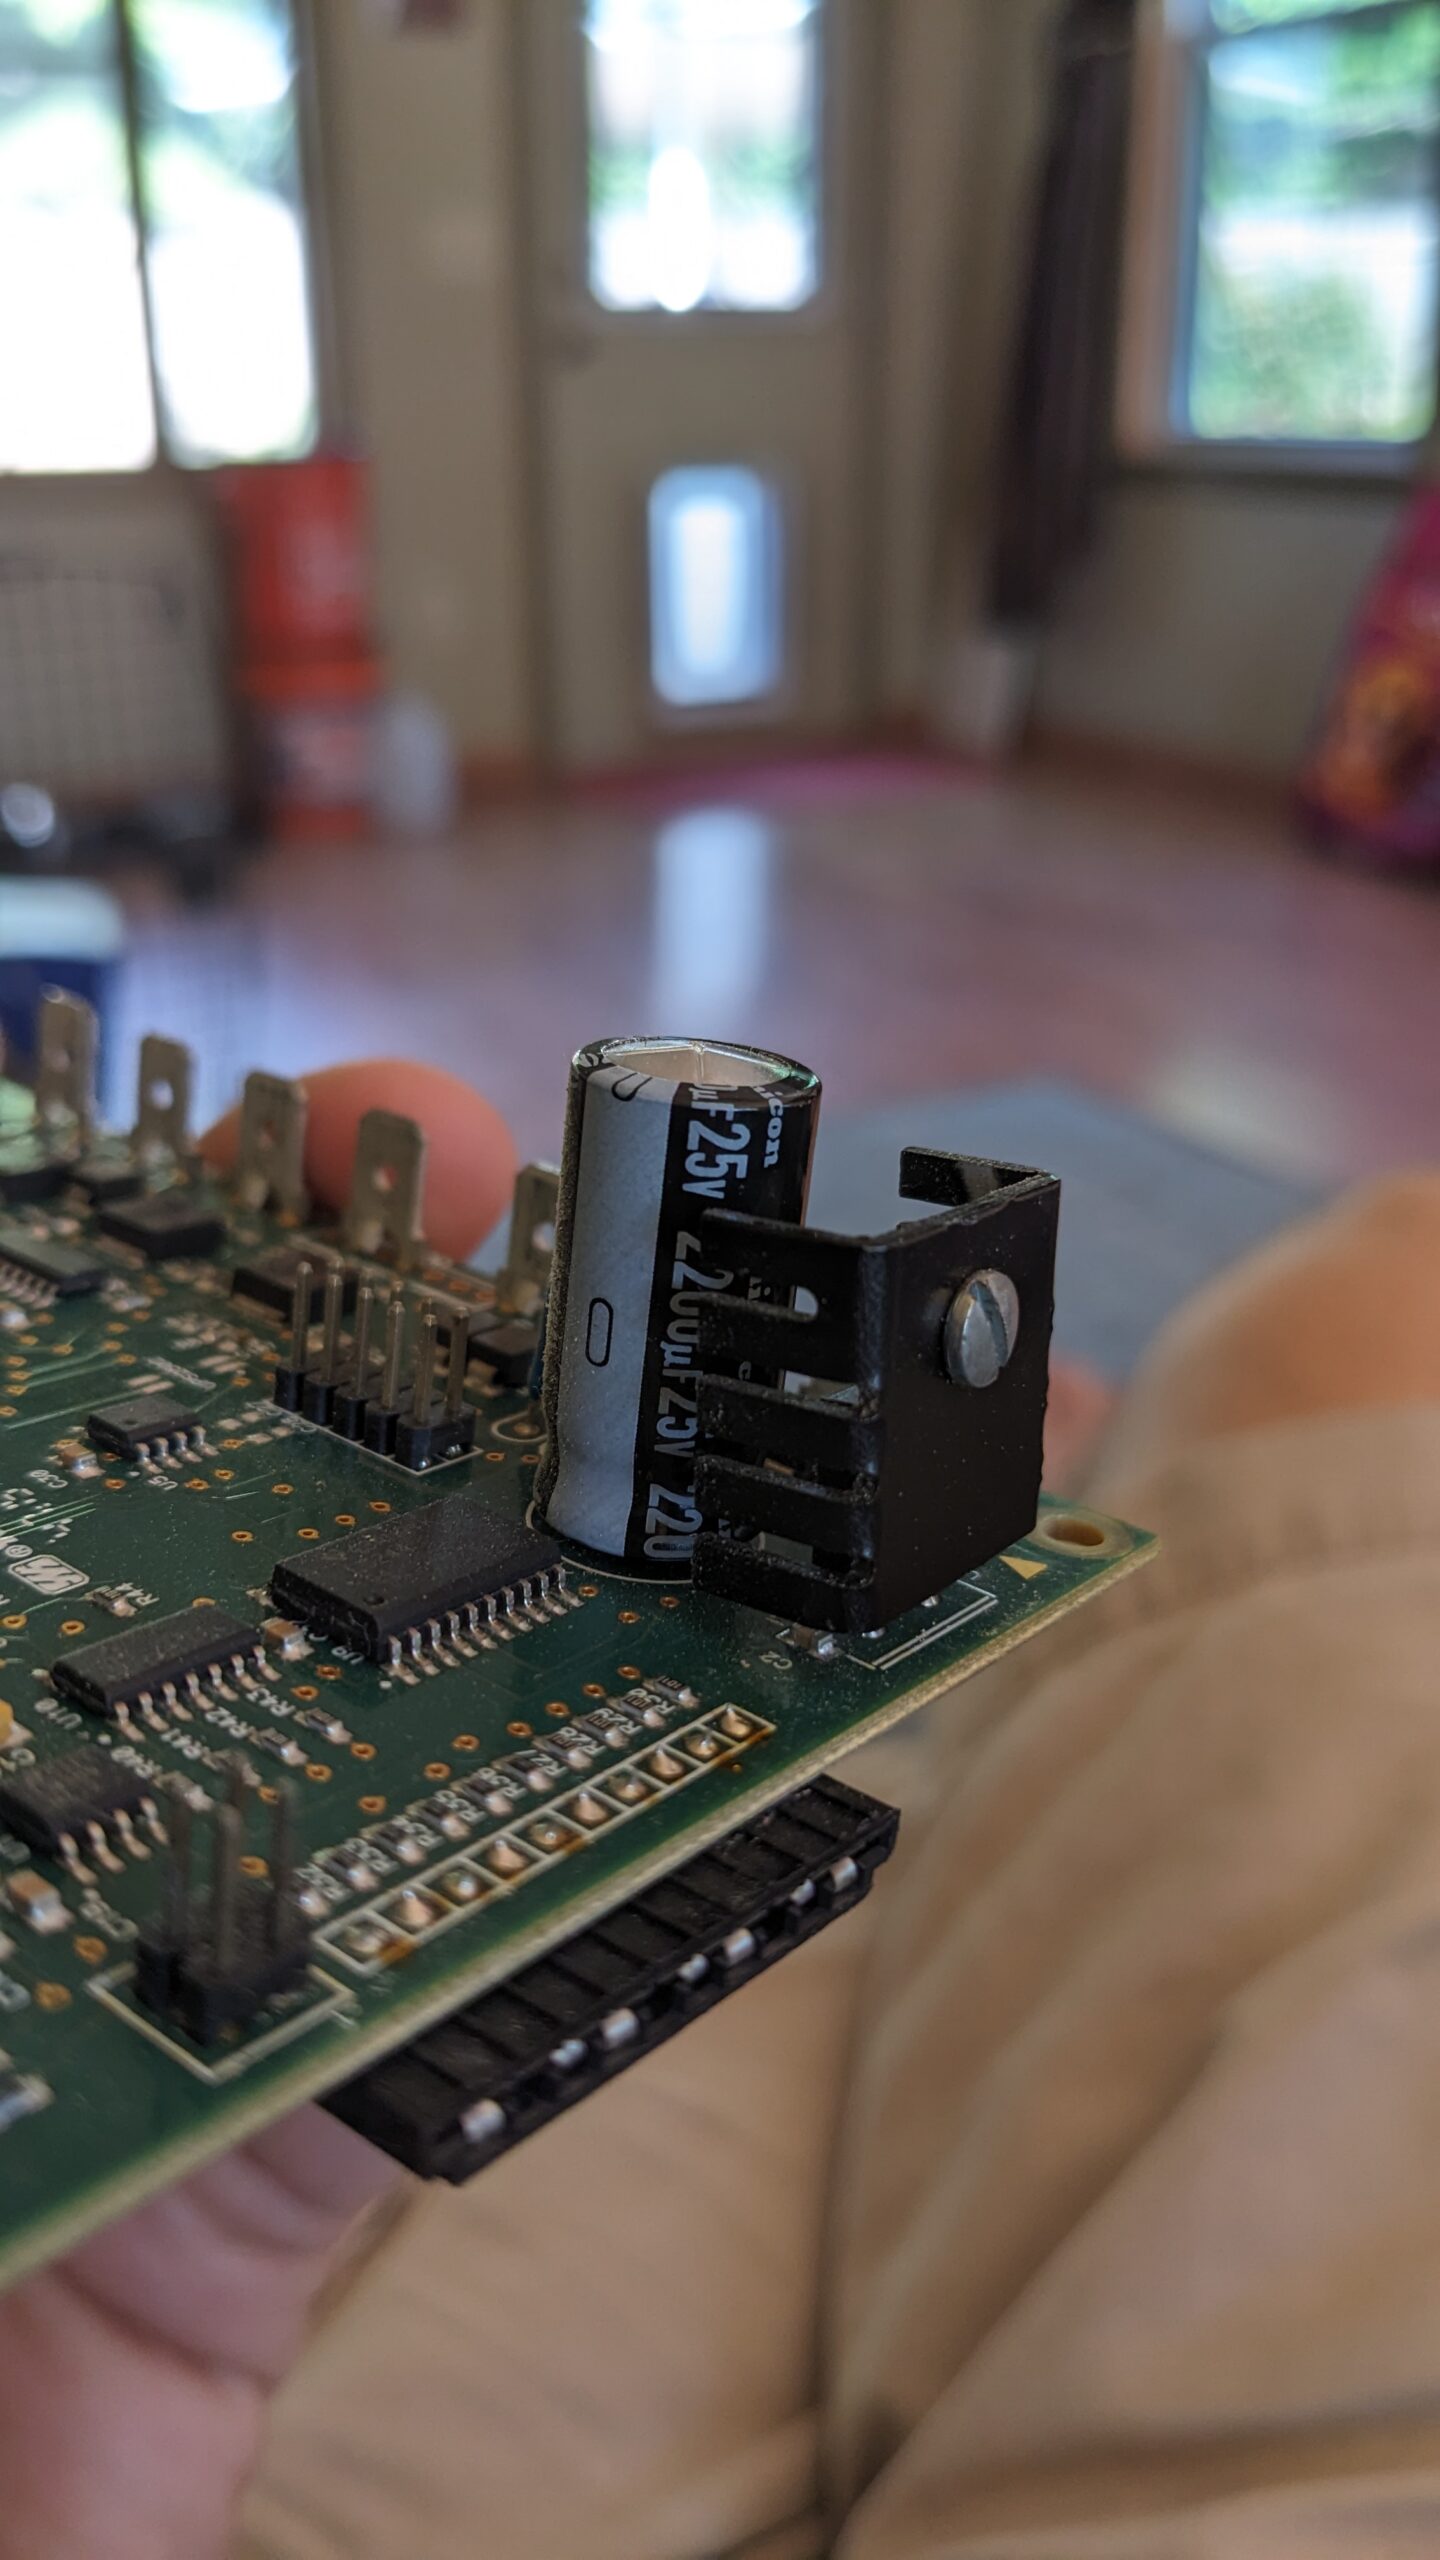
We’re just using a soldering iron and desoldering pump to remove the old capacitor. Make sure to note the orientation, if you reinstall the new one backwards it will be a problem. Solder the new one in place, and trim the excess off of the leads.
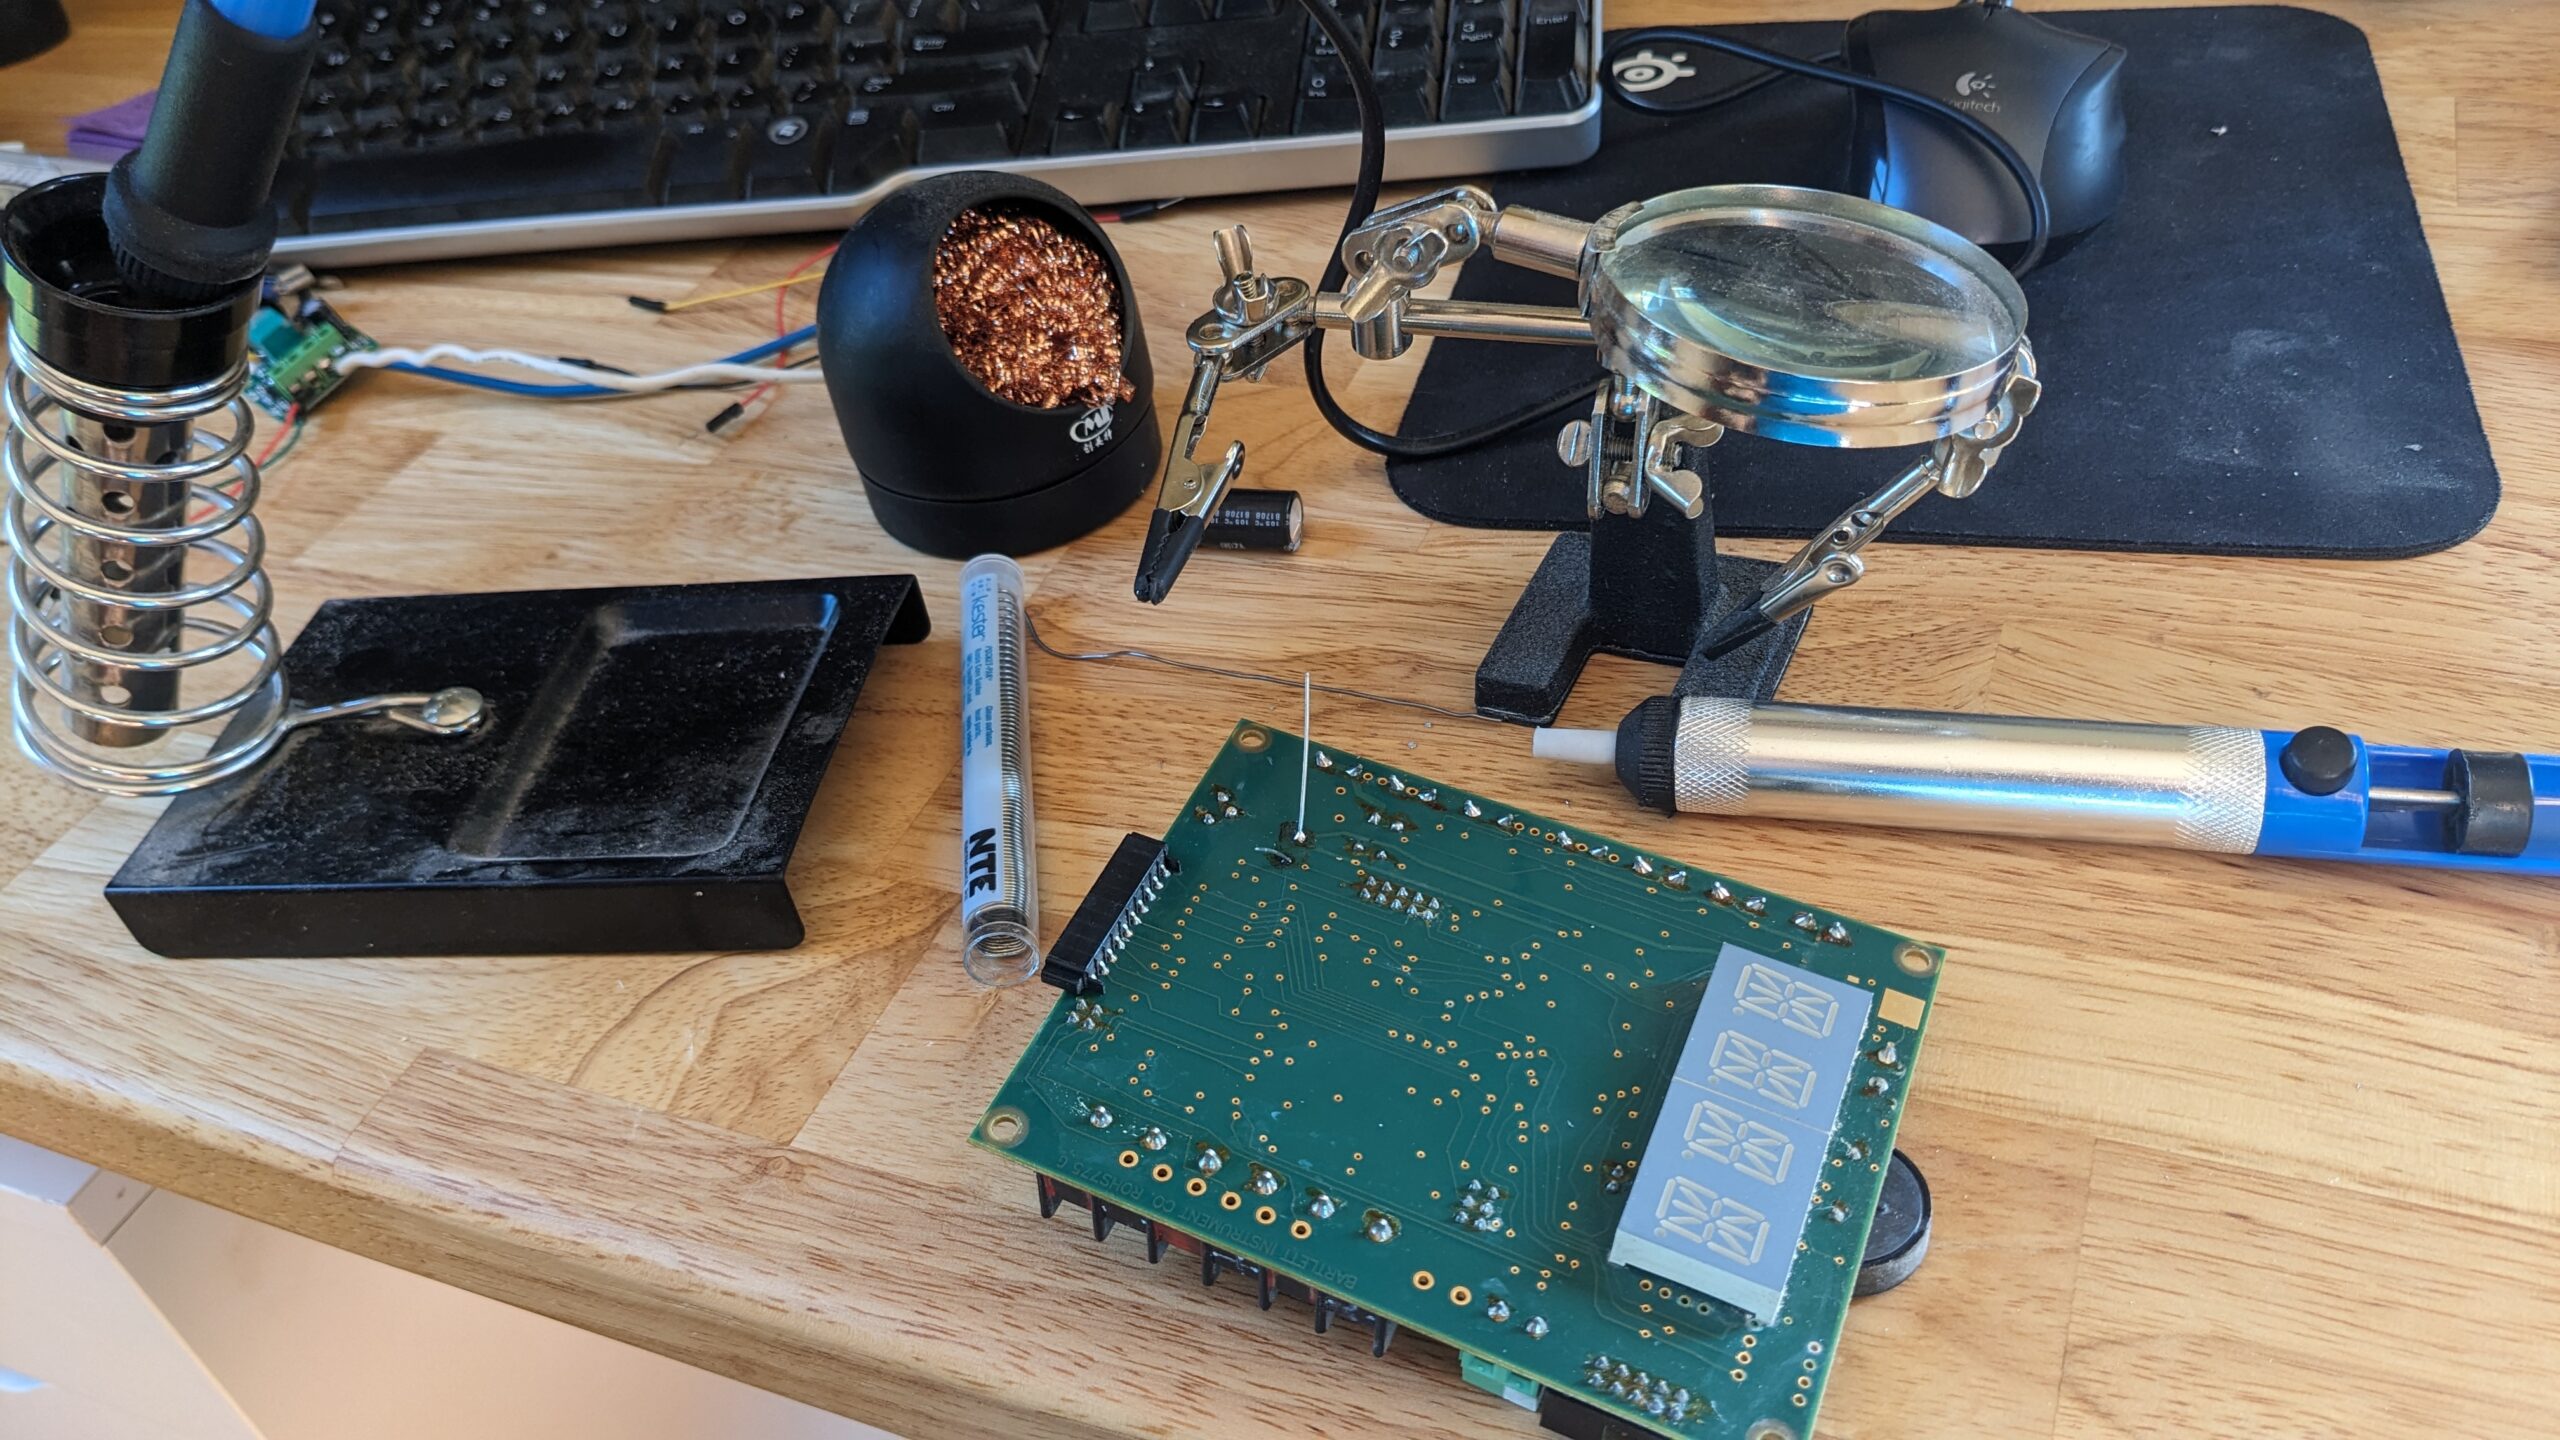 New capacitor is on the underside. Needs to be soldered completely and excess trimmed still.
 Good as new. This board bolts onto 4x standoffs on the back of the keypad.
All seems to be working. The numerical pad has a few numbers that aren’t registering when I hit them. It’s gotten worse over time, and I’m wondering if it’s delaminating internally or something. The keypad can’t be purchased on its own, the pad + PCB come as an assembly.
So I think in the future I will be pulling the touchpad and trying to decipher the pinout of the ribbon cable. I would rather replace it with an aluminum panel and through-hole buttons than spend that kind of money on a new one. I don’t need anything pretty, just something that works.
I did have my last cone 06 ramp firing saved still, so I was able to use the menu buttons and run button to select and do that for now.


Additional Info:
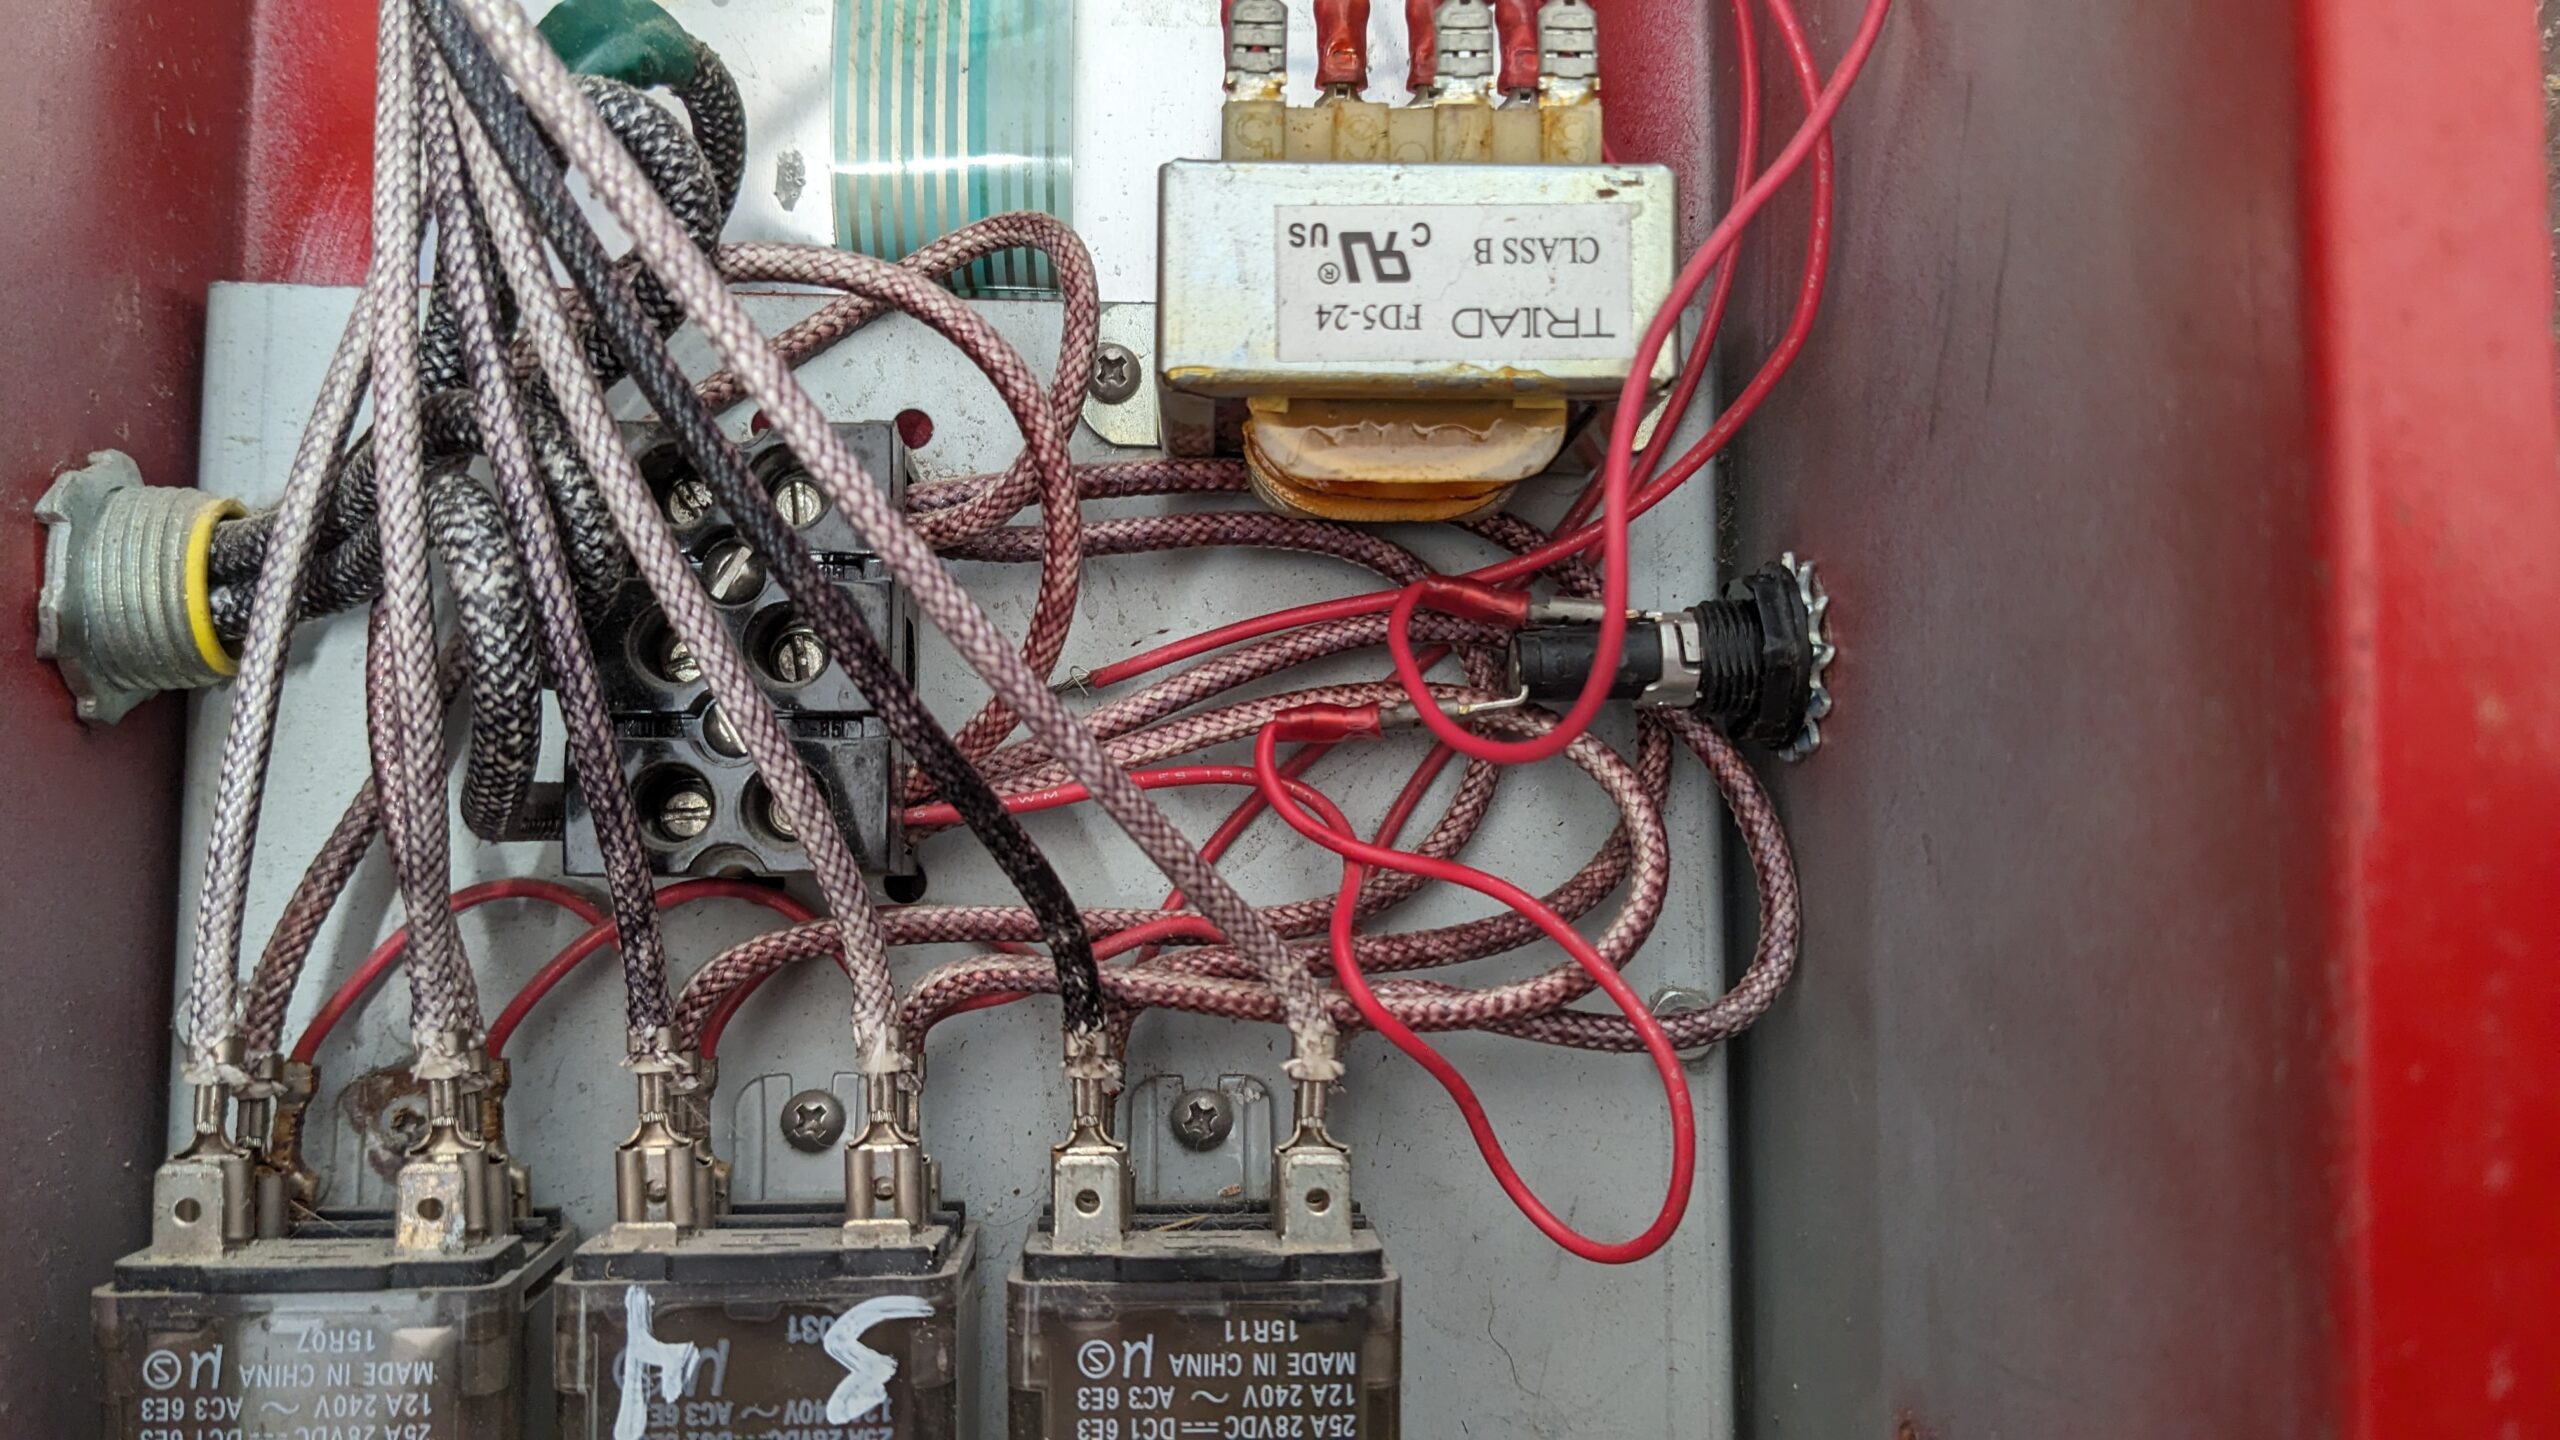
For anyone who is not familiar, the kiln controller is pretty simple.
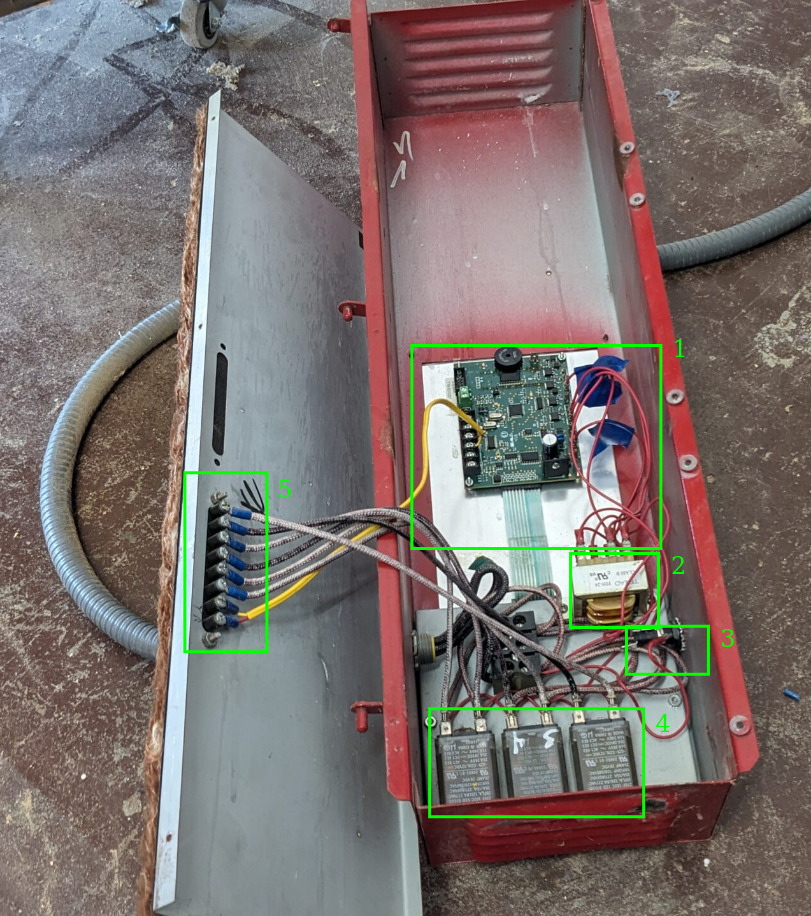
- The back side of the keypad, and controller PCB are bolted toether.
- A transformer. This just takes line AC voltage and gets it to the controller to be used for the logic. Almost no current runs through this.
- The fuse holder that was repaired.
- The relays. 1/2, 3/4, and 5/6 are together. I.e. top, middle, and bottom rings of the kiln. If you had a kiln with only two rings, there should be only two relays in use. The two heating elements in each ring are connected together, and the relay applies line voltage across the two connectors.
- The terminal block continues through the heat shield and has spade connectors up against the fiberglass insulation. This is just for quick disconnect for transport/maintenance. Heating elements 1-6 are here, and two connectors on the bottom for the thermocouple.
Not covered here, but you can pretty easily switch between 3 phase and single phase power. My kiln came wired for 3 phase. One relay used phases a/b, one uses b/c, and the last uses a/c. When switching to 240V single phase, Each relay uses the same connections, line 1 and line 2.
This is done with the terminal block just above the relays, and to the right of the power input. Just loosen the screws on the relay side of the terminal block, pull all 6x wires, and re-install those wires to the proper phases for your new configuration. Maybe that warrants its own post in the future.