It’s been a while. Before things fizzled out, we had moved into a new house and were brainstorming ideas for remodeling.
After downsizing, filling up storage units, etc. I realized that we didn’t really have anywhere for me to work. At the old house I could setup the saws and all the tools I needed in the garage. Measure, walk to the garage, cut some trim, walk back into the house, and nail it in place. At the end of the day, roll the air compressor back into the garage, and Bob’s your uncle.
But here, I had to setup all of the tools where I was working, walk over top of them, and either have a giant mess or spend a ton of time cleaning up each evening.
The solution is to have a workshop space. After realizing it would be $30-50k to build the attached garage in my /2024/11/18/new-house-3-modeling-and-ideas/, we decided on just a shed. In Mobile County we’re allowed to have up to 120ft^2 without needing a permit. So that’s what I’m doing.
Move old shed
Don’t think I have many photos, if any. There was an old metal shed from a kit in the way. The metal was in decent shape. But the wooden base had sunk into the sand over time. There were rotten holes in the floor, and cockroaches living in the leaves and scrap wood on the floor.
I built a new wooden base across the yard, and will use the old shed for the lawn mower and yard tools. I just emptied it out, used a hacksaw on all of the screws that were holding it to the wooden base, and then moved it. Some scrap lumber was used as an exoskeleton. I lifted it a little, slid the scraps underneath, and screwed them together temporarily. That gave me a handle to lift from, and kept it from racking itself apart or getting bent up.
I set one of these gussets onto the top of the wheelbarrow, and had one of the kids help me walk it across the yard slowly. Then we just screwed it back down onto the new base.
Pressure wash, and paint to make it nice again. A few spots were thin, and got patched. I chose to use a wire wheel and then some fiberglass-impregnated mastic smeared smooth with a putty knife. If they were really far gone I would have gotten some galvanized steel sheets and riveted patches into place. Then waterproof with mastic. It doesn’t need to be pretty, but we do have *some" standards here.
Build the base
Onto the actual shed. We ripped up the old base and put it by the road for the claw truck to grab. Alabama has bulk trash pickup most places monthly or bi-weekly. The hillbillies put all their junk on the curb anyways, so it may as well get cleaned up properly.
The ground is uneven, so I’m raking it flat-ish but not level. Then digging holes and making concrete pieces from some leftover pieces from another project. I might get into that later and link here after the fact.
I mostly just got a laser, dug and placed my partial piers, and then dug deeper or backfilled and tamped a bit as needed to get close. We’ll shim later to get it perfect.
Going with three 4x4s as skids, and 2x6 joists 16" oc. 12" oc would be nice for a higher load rating on the floor, but the center skid gives me 5’ between supports, and keeps it from being just simply supported.
 We were in a hurry with rain coming, so no photos of the subfloor or walls.
I’m not insulating this or anything, but might want to later. And I don’t like bugs and fungus. So I added 6mil plastic and seam tape under the floor deck. Then put 3/4" ply down for the floor. It will take three full sheets, and three half-sheets. I tried my best to minimize waste and avoid unnecessary cuts everywhere I could.
Walls
Using a normal 8’ wall with single bottom plate and double top plate. So 92-5/8" pre-cut studs so I can use a single sheet of osb. For those unaware, a 2x4 nominal board is 1.5"x3.5". So 8’=96". 96"-3(1.5")=92.5". Build the side walls on the ground, tip them up when done, and tack them down. Then do the same with the front and back walls. 16" OC will be slightly different here because the outside corners have 3.5" to account for.
I don’t remember exactly what I did. We don’t have to follow code (2018 International Residential Code in my jurisdiction) to a tee. But I want to stay very close to acceptable standards. We get hurricanes here sometimes, I want it to last, and we will be selling in the next 4 or 7 years depending on my wife’s residency situation. So we’re not cutting corners.
Once the walls are up we’re sheathing. Just normal oriented strand board. You would generally lay the sheets in a landscape orientation and stack 2 with overlapping joints. But I just placed them in portrait orientation and worked my way around the perimeter. 12" spacing is normal around the sheathing edges, so I’ll end up using a few extra nails doing it this way. But it’s faster and there’s no second story. I’m not a SE that builds skyscrapers. But I think the difference in strength is negligible here.``
I’m using siding nails, because I have a pneumatic nailer. They’re galvanized, ring shank, __ diameter, and ___ long. I had to be careful with the air pressure. The OSB is a little squishy and the nails like to over-drive. I prefer to under drive them, and give each a whack with a hammer to finish up. It’s good QC to make sure you didn’t forget to nail an edge anyways…
Roof framing
I’m matching what’s on the house which is a 10" overhang for the soffit and a 5/12 pitch. I want to continue the trend of cutting my sheet goods on 2’ intervals, so I’m doing a 12" overhang on the gables. So the roof is 14’ total length.
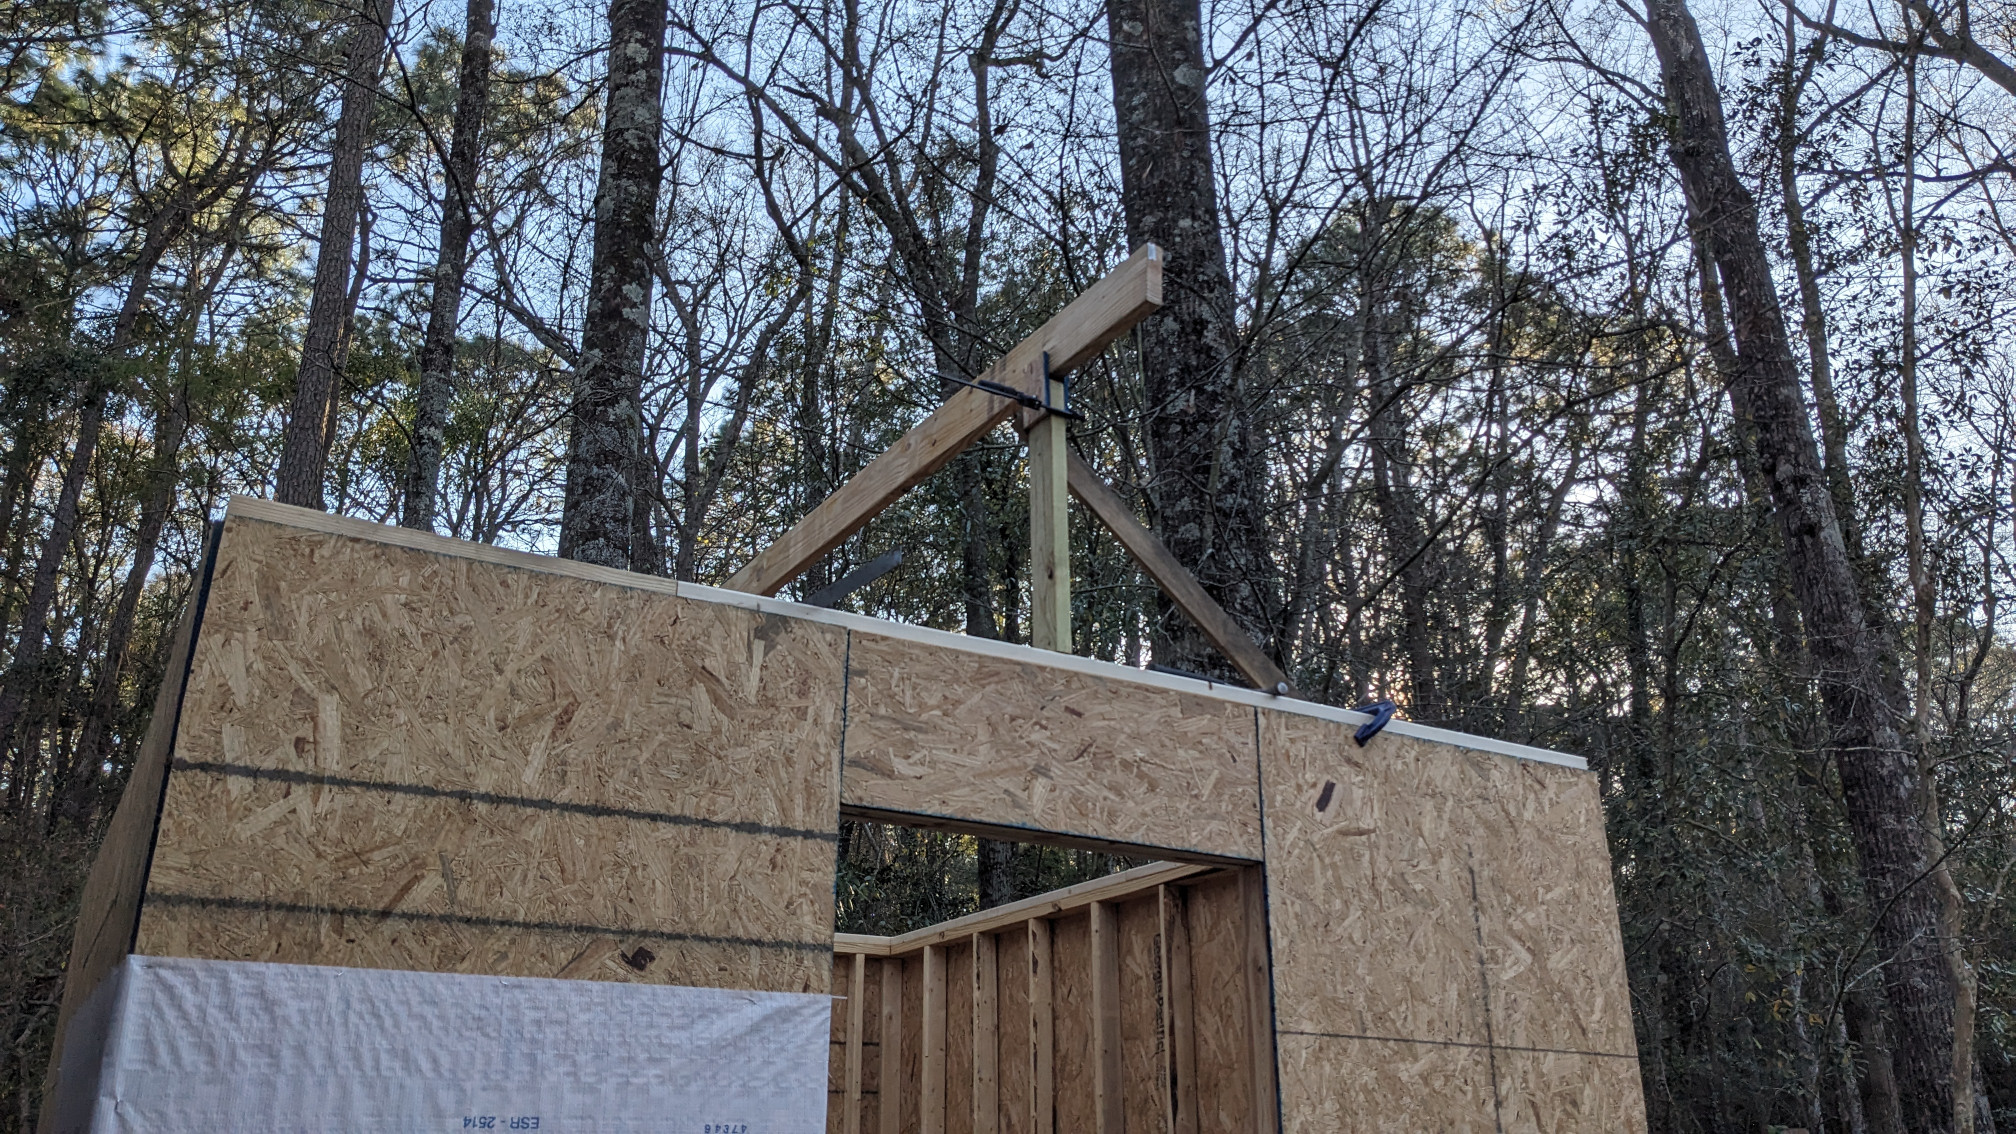
I did the math first and determined how high up the ridge beam needed to be. Find the center of the wall and cut a stud to length. Cross brace temporarily, and put some scrap OSB plates on to act as guides, or a yoke.
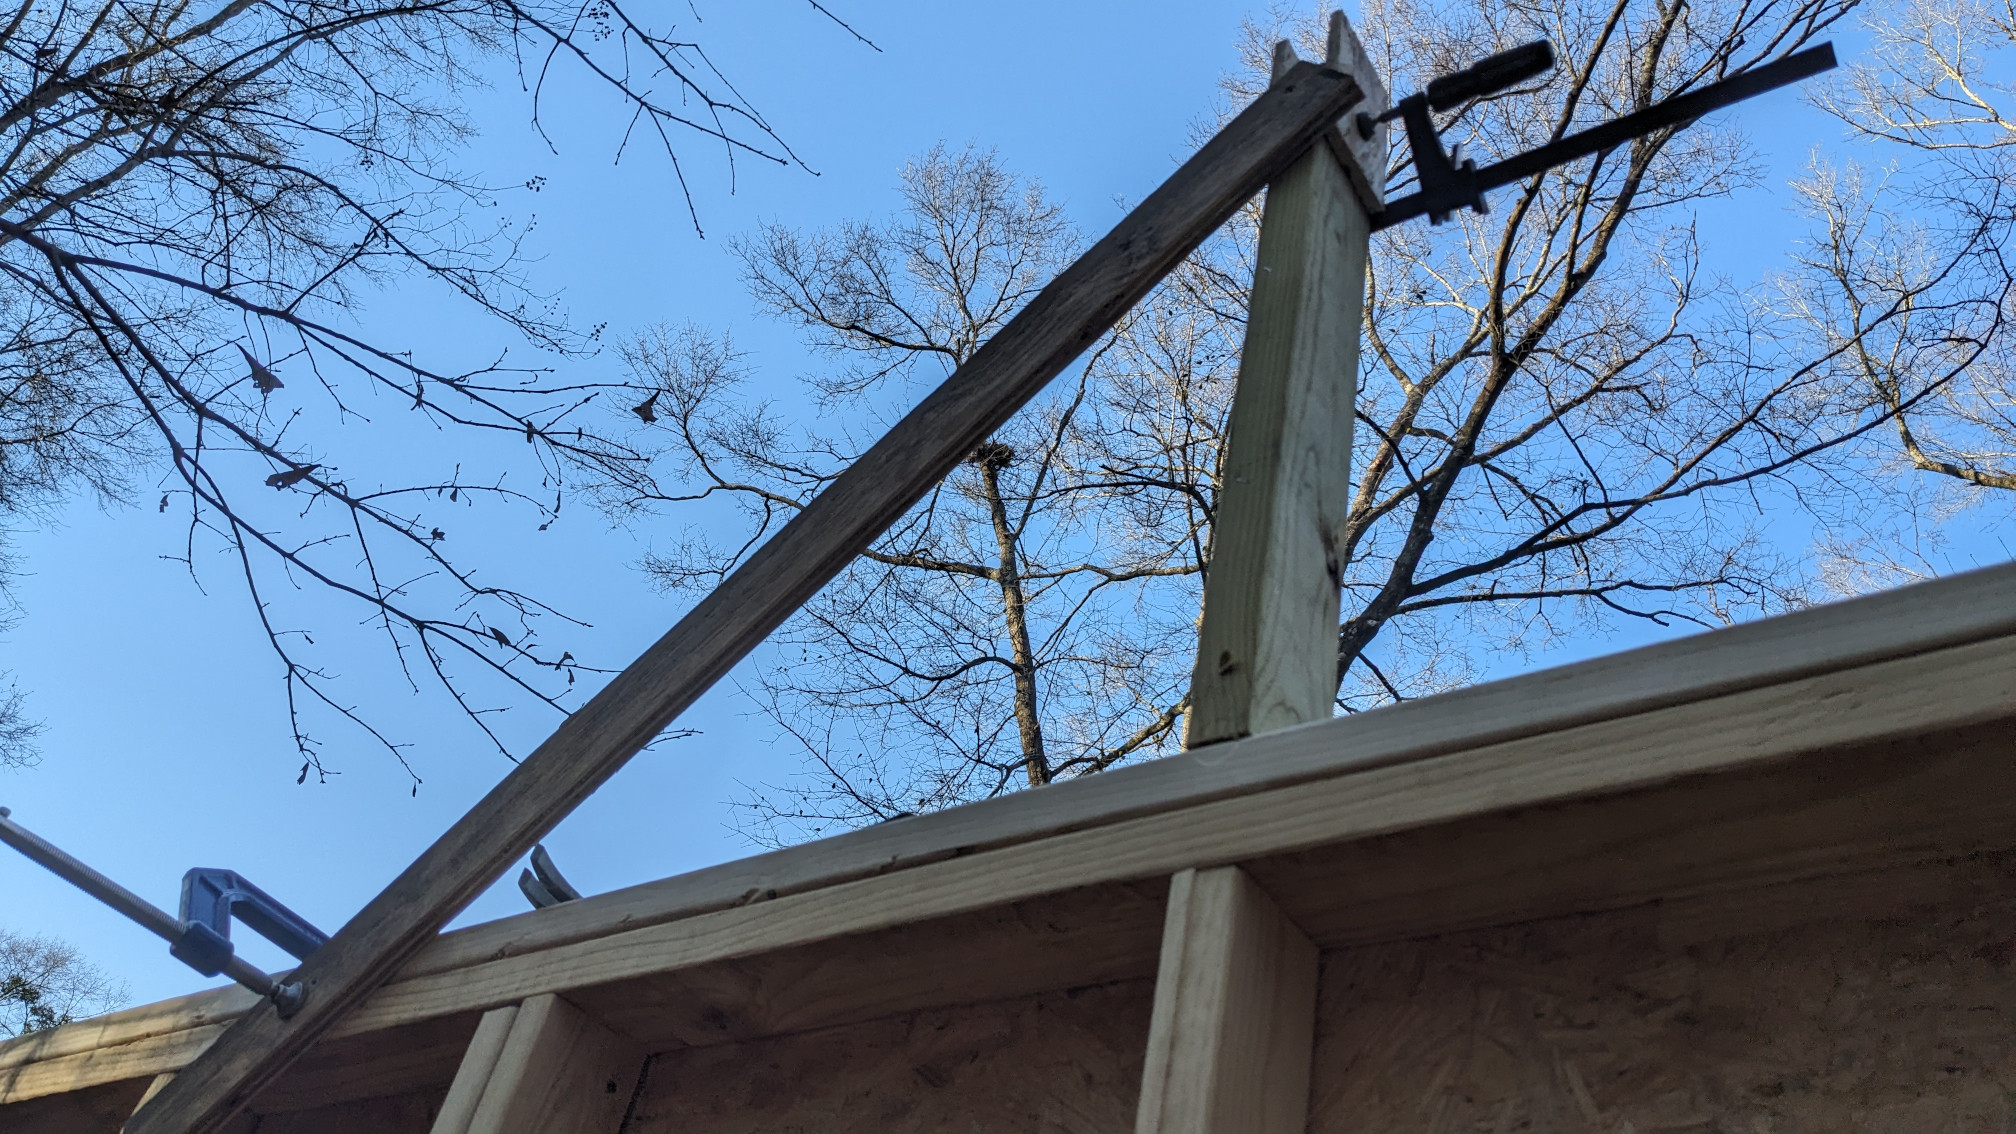
I marked the roof joist spacing on the ridge beam on the ground, and then slid it through the yoke, checked placement, and nail into place. Once that’s done, we’re ready for roof joists.
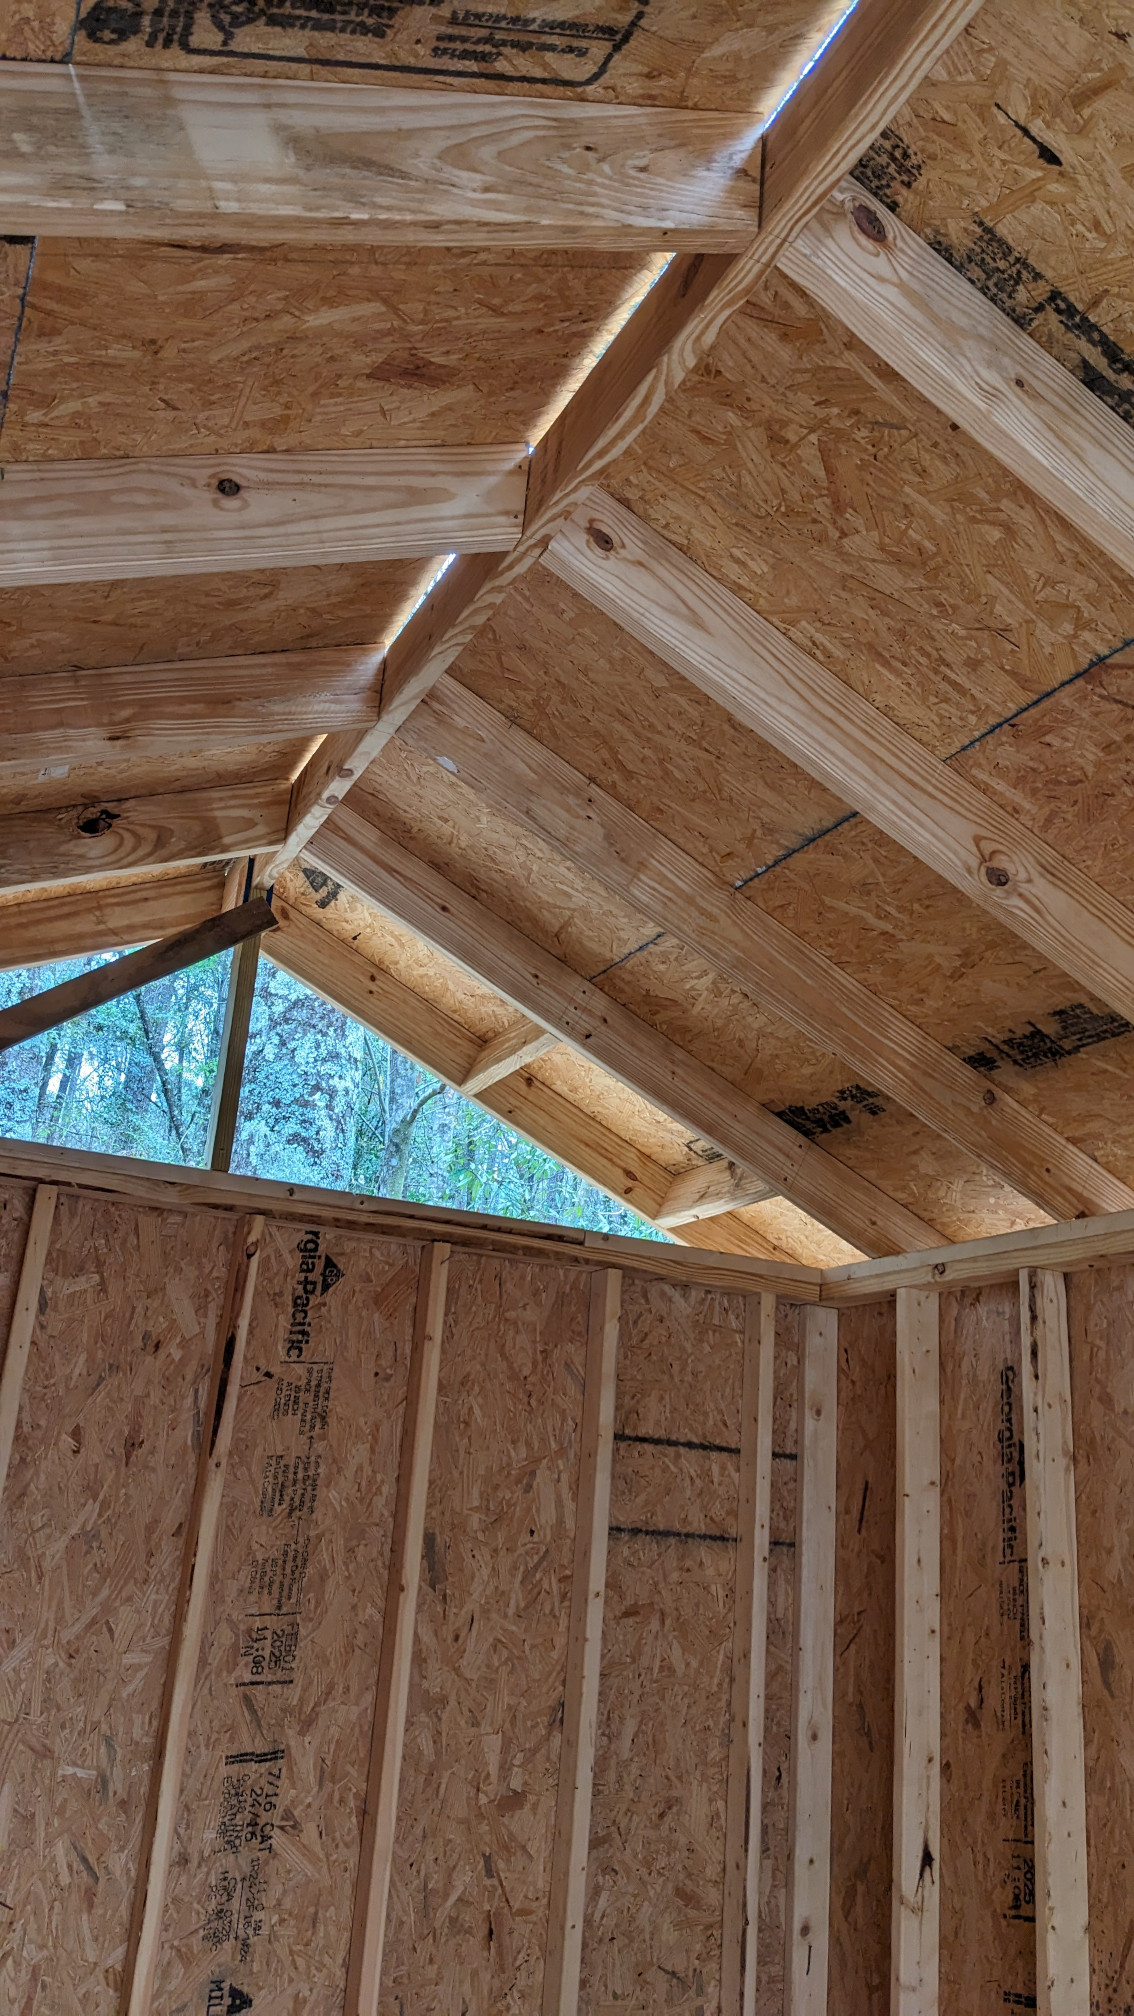
Do some more math for the birds mouths, and cut one side at ~25 degrees. The tops got toe screwed into place, and the birds mouths toe nailed onto the top plates. Once they were all in place, check for parallelism and spacing, correct as needed.
The I went around and added more nails in the top. And hurricane ties around the perimeter. I really liked the timberlok structural screws that I used in lieu of normal hurricane ties. They came in a 12-pack which is exactly what I needed, and it came with a bit for the impact driver. One tried to walk out the side of a joist and needed to be re-angled. But all the rest went in straight and worked flawlessly. They like to drain the batteries in the impact quickly though.
Finish the roof frame by cutting the rafter tails to length. I measured each end, snapped a chalk line, and then continued that line downwards with a torpedo level. Keep the off cuts for shelving and whatnot later on.

Finish with the gable ends last. These were a little difficult since there’s no birds mouths and no top plate to rest them on. Clamps are your friend if you’re working alone. And some lumber offcuts with a stop, just temporarily screwed into the bottom of the rafter tails, keeps the fascia piece manageable with one set of hands.
Roof
Not much to say here. Put up the OSB, nail the edges, and climb up on it once it’s secure. Check spacing along the way and adjust as needed. A cheap 5’ pipe clamp was great here. Once one rafter is locked in with nails, you can use it to pull or push against for the next one.
If I were smart, I would have accounted for the angles when I set my ridge beam height. The ridge is now unsupported by a tiny bit. If it were a vented ridge it wouldn’t matter. So I will probably go back and glue in shims later on for peace of mind.
I added drip edge next, but didn’t have fascia picked out for sure. So I put a 1/2" space between the 2x6 fascia board and drip edge. Nail the drip edge down with roofing nails.
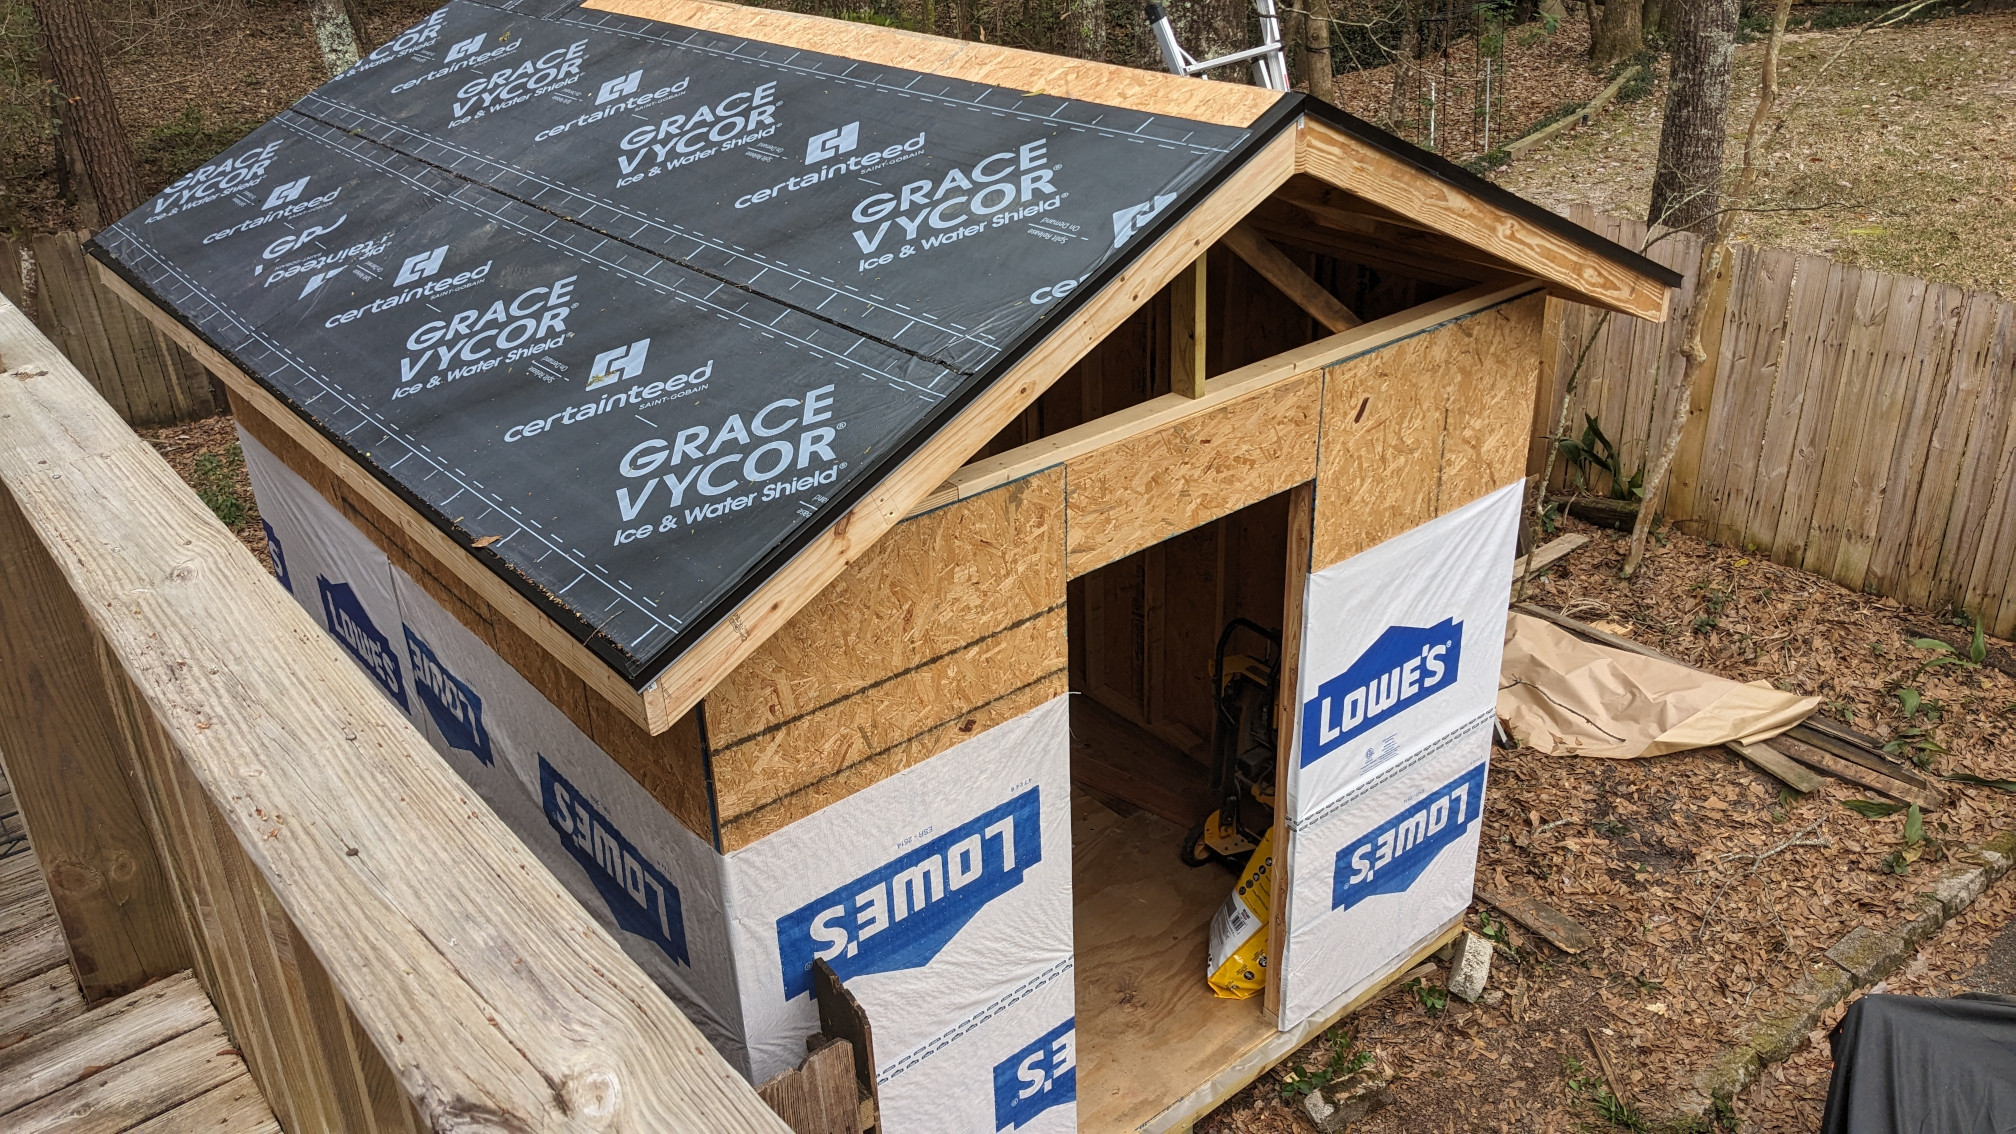
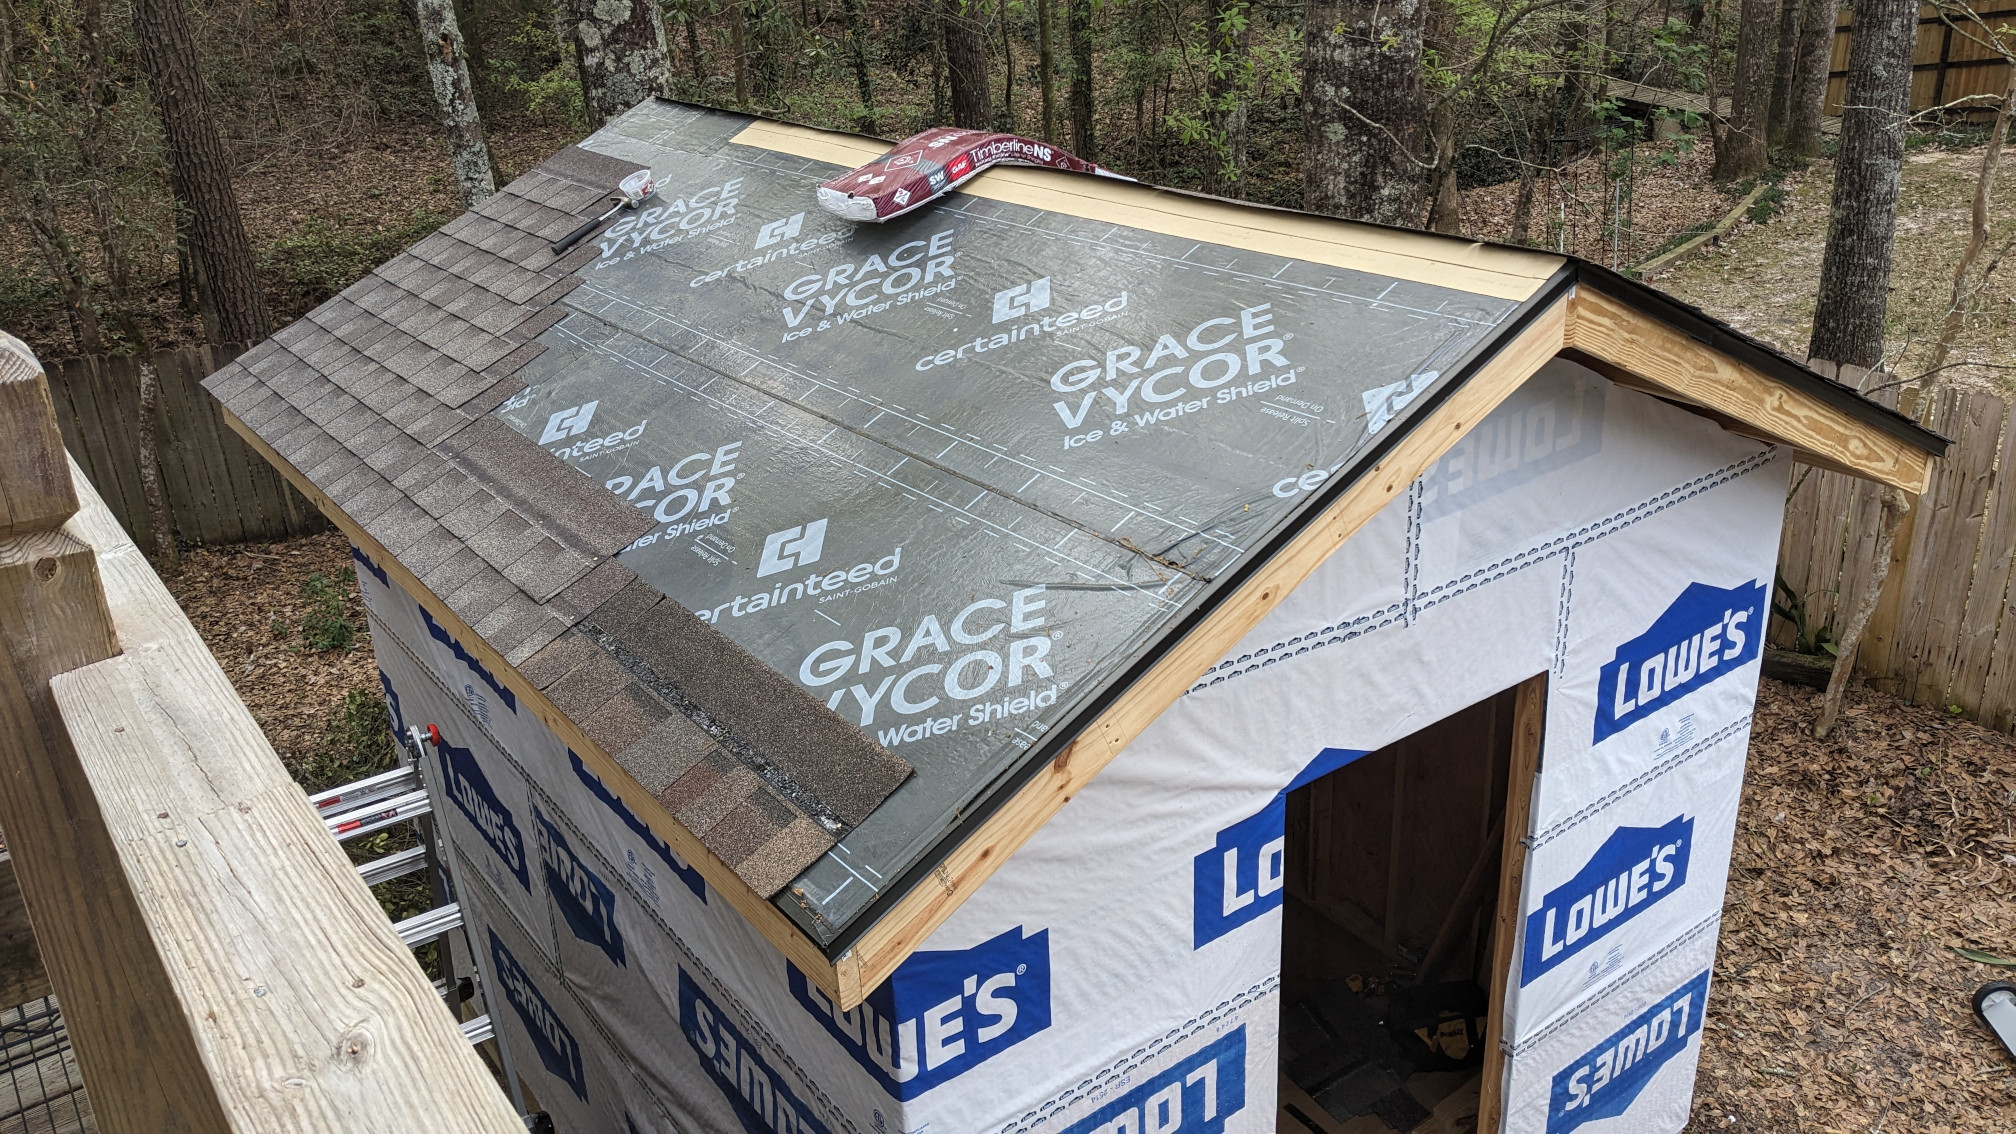
Then I chose to cover the entire roof deck with ice and water shield. We have a lot of shade here, and tree litter that sits on the roofs. So I like the idea of an impervious barrier on top of the wood. So even of the fiberglass and asphalt shingles stay damp, the roof deck won’t rot. I bought a roll for like $88, and bought most of a roll used from a local guy for $25. I consider that cheap insurance. I was a bit short, and used a $11 roll of flashing tape for the little bit on the ridge that was missed.
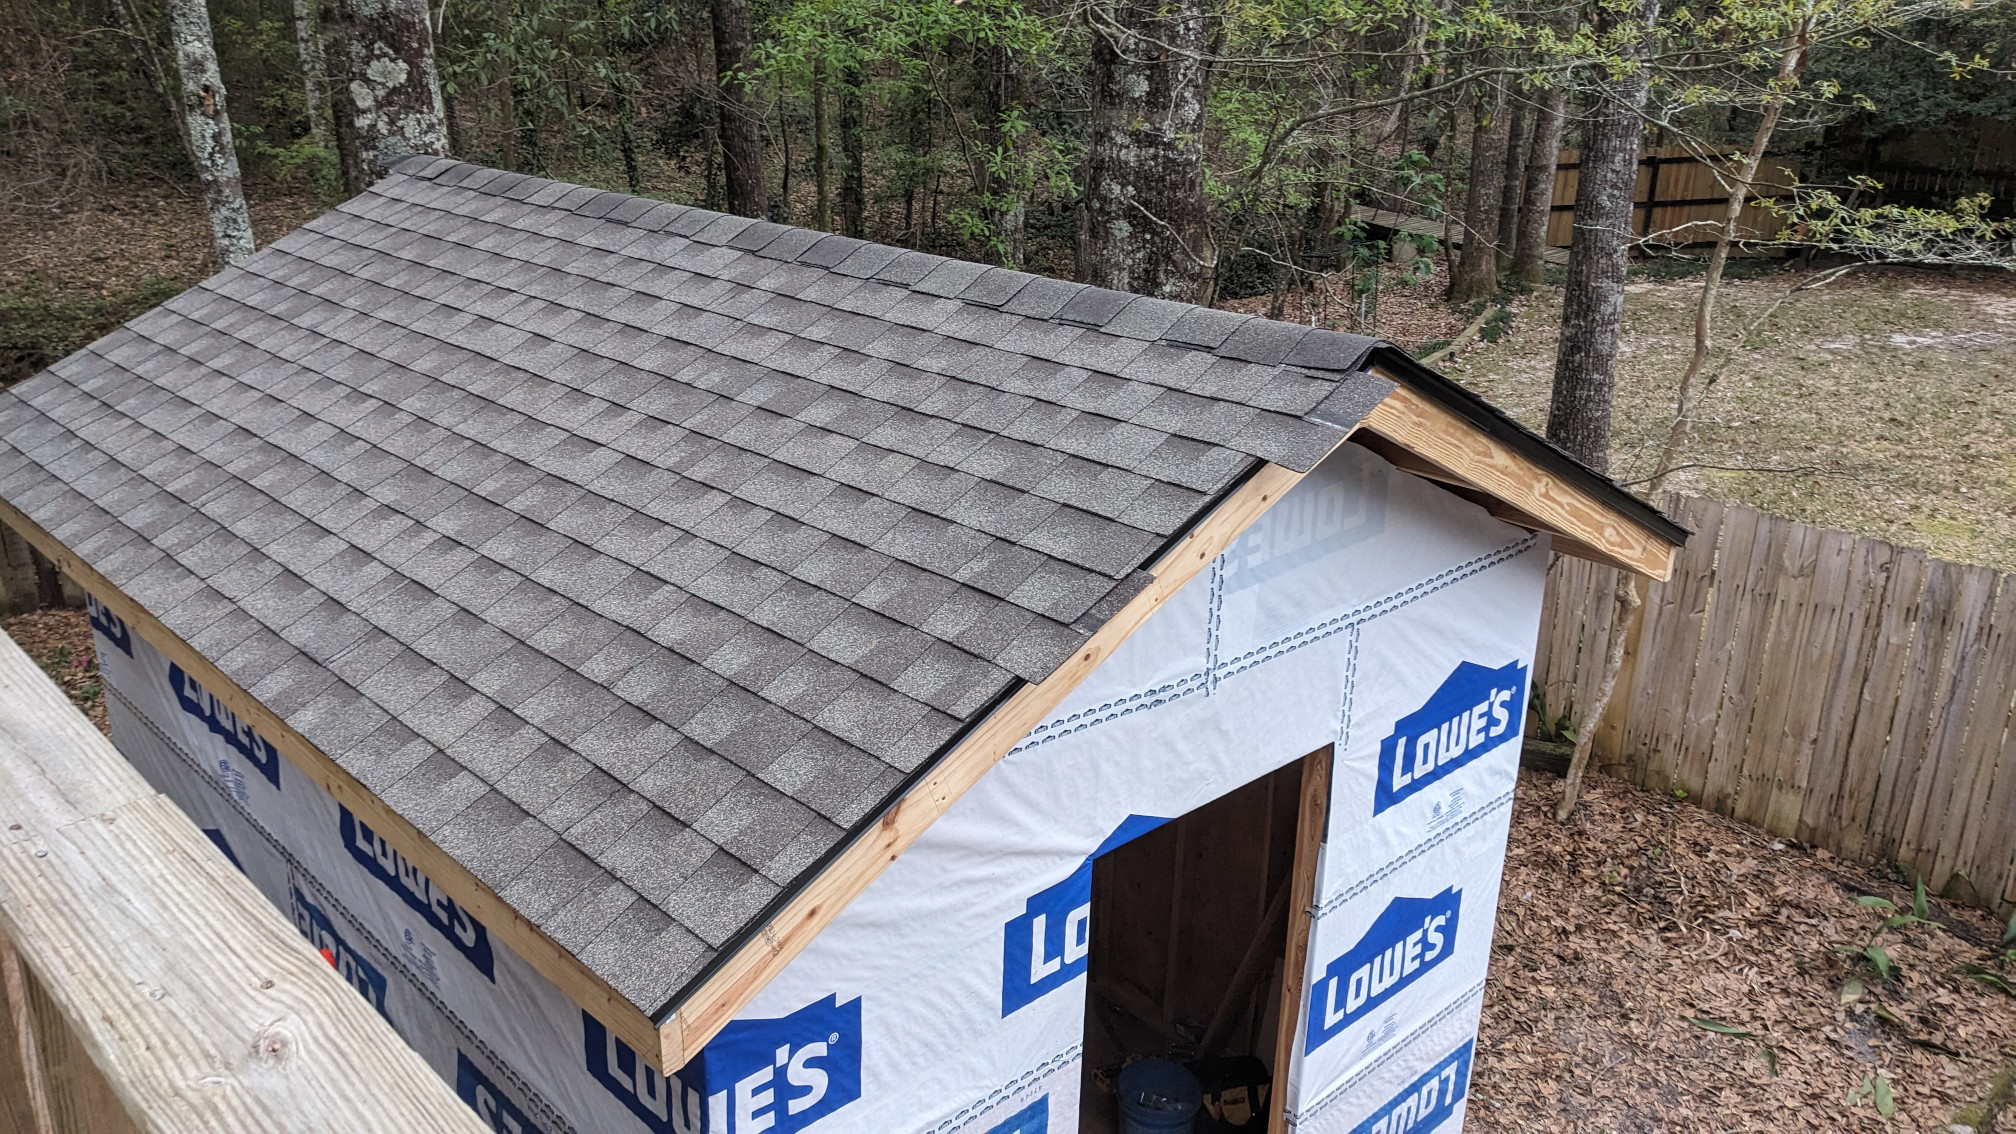
Next were shingles. We just chose what matched what’s on the house. The house had a new roof put on 2 years ago or something, so we’re not trying to reinvent the wheel anytime soon. I’m not made of money.
Siding
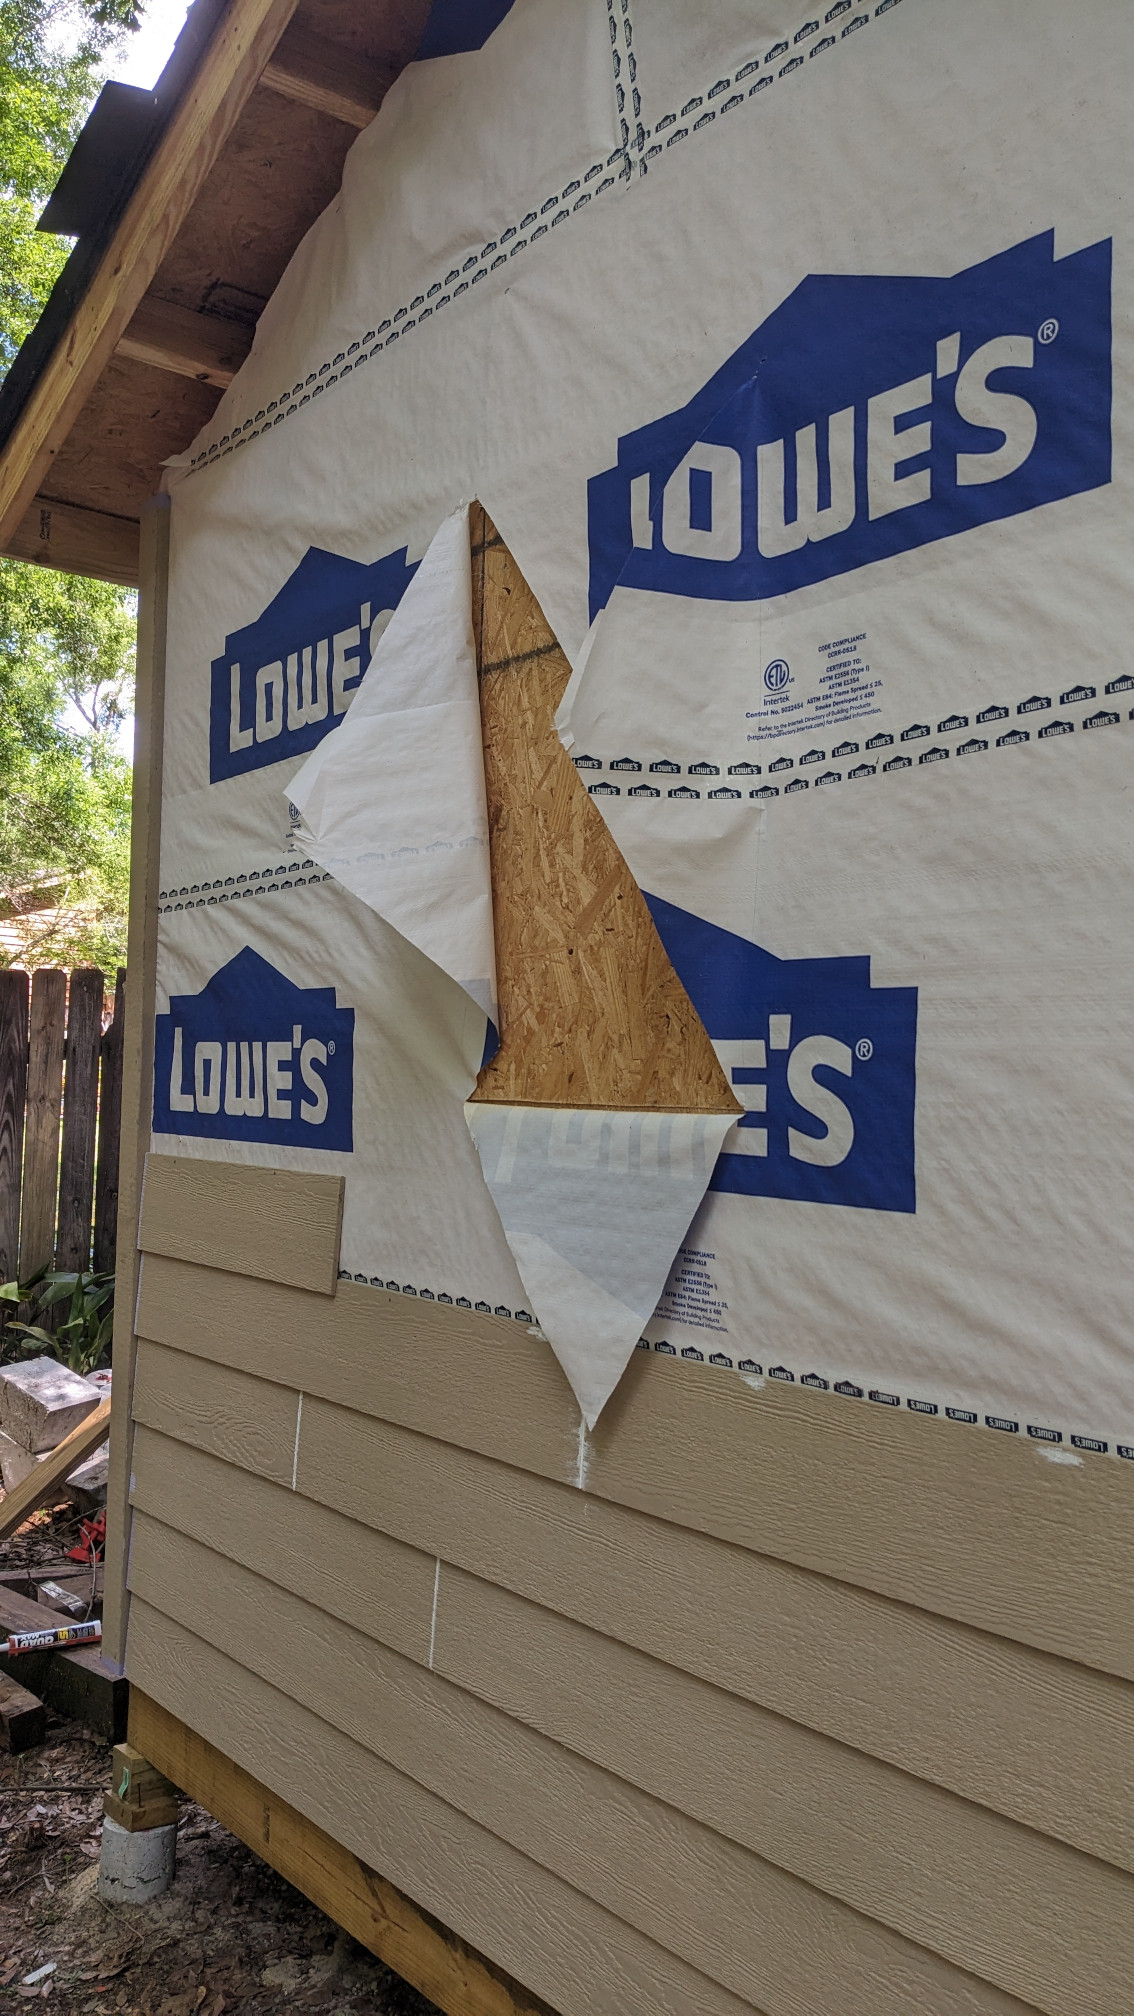
We used LP Smartside lap siding. They make a handful of varieties now. We used the normal 8" wide stuff with cedar texture.
It’s actually something like 7.9" wide, and says you need at least 1" of overlap. So I chose 6.75" reveal for a round-ish number that’s compliant with the install instructions.
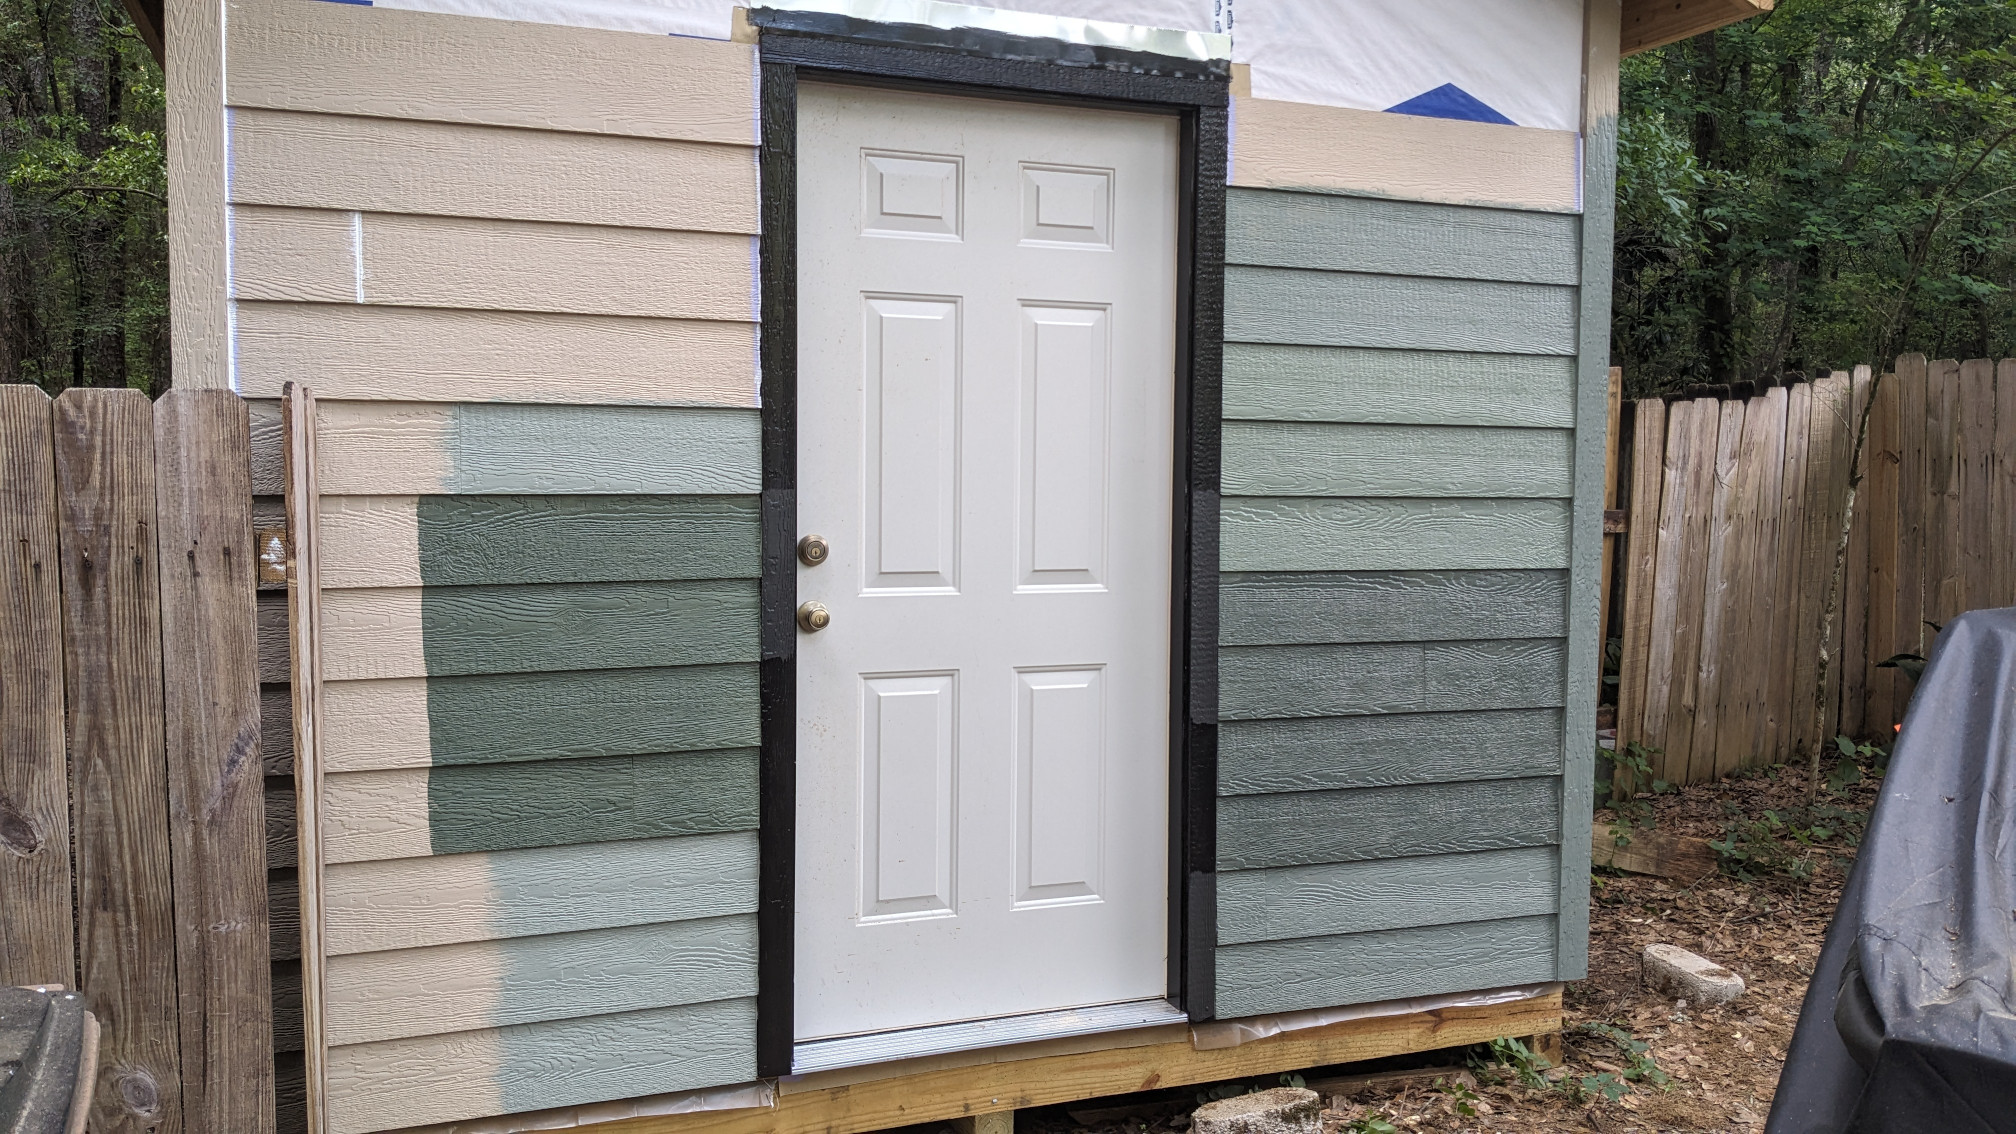 Door installed, gables framed and enclosed, testing colors. We ended up with 5 different samples before we found one that looked good in shade and sun.
They sell a few thicknesses and widths of trim. The siding is 3/8" thick, so where is doubled up is 3/4". The stuff that’s really available won’t work, unless you want weird protrusions. So I bought 5/4" thick trim. Which is a nominal measurement, it’s actually about 1" thick. This doesn’t make sense for engineered wood products in this day and age to use nominal/actual measurements, but I digress… I went with 6" wide, and ripped it down to what I needed for the aesthetic that we liked. Then glue and brad nail it into a monolithic piece before hanging it on each corner.
I tried my best to nail into studs. Instructions say every 2’ or less, and I don’t want the nails poking through the sheathing for me to snag myself on. So every single stud got a nail here since I’m 16" oc. I ened up buying a pair of Gecko Gauges to help me hang this siding by myself. They work ok as a second pair of hands for long boards, but ultimately you need to make a story pole or something. I marked each corner trim piece from the bottom upwards with a tape measure and then just ran my boards to the marks on each end. If you only use the gecko gauges, prepare to have tolerance stacking issues, and your top courses to not line up with one another.
Sid[ing] Quest
As I filled in the soffit with plywood it got quite dark. I’ll ultimately figure something out for electricity, whether it be a temporary connection, or getting a permit and running a branch line underground from the panel (not likely, if I add an additional branch line my entire house will require being upgraded to the current code, and cost me a ton of money).
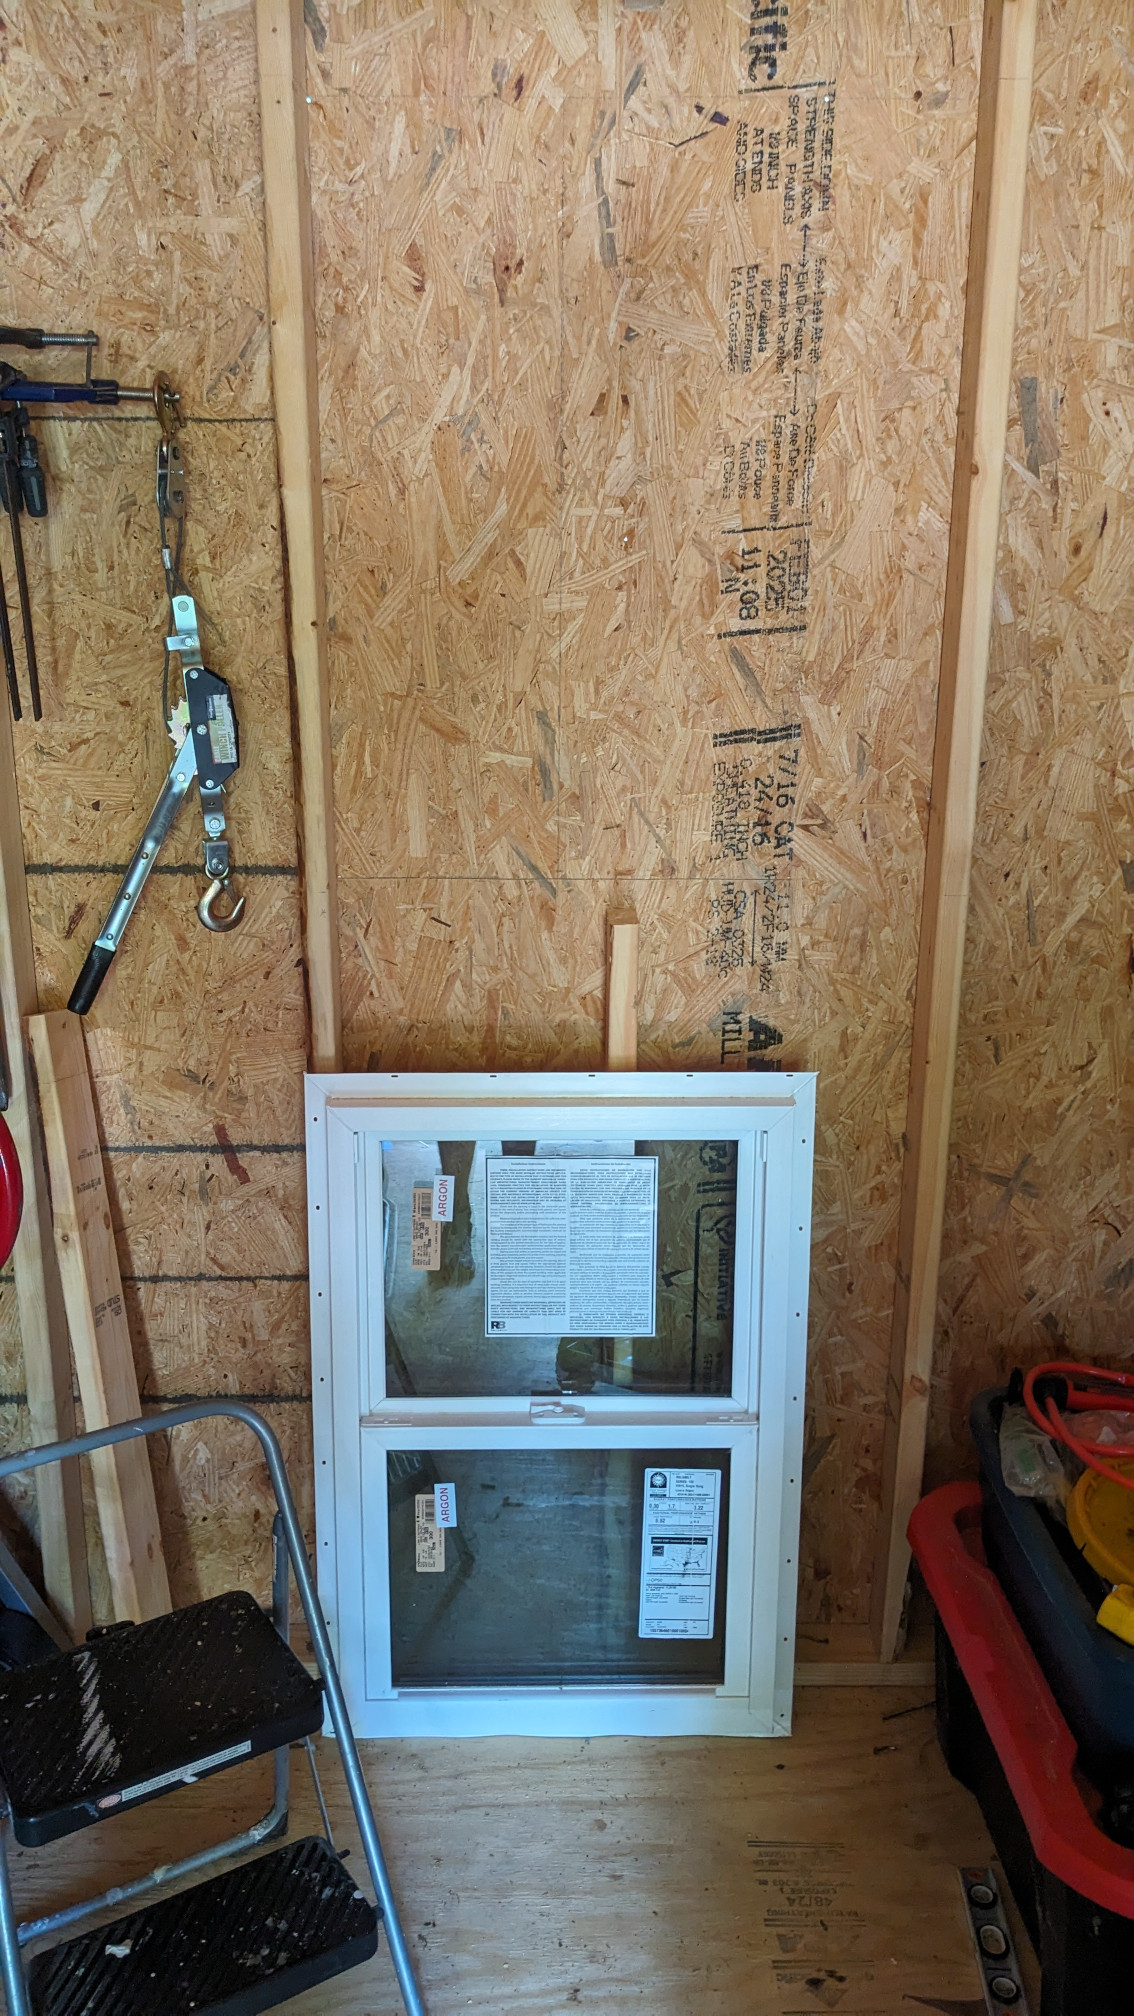
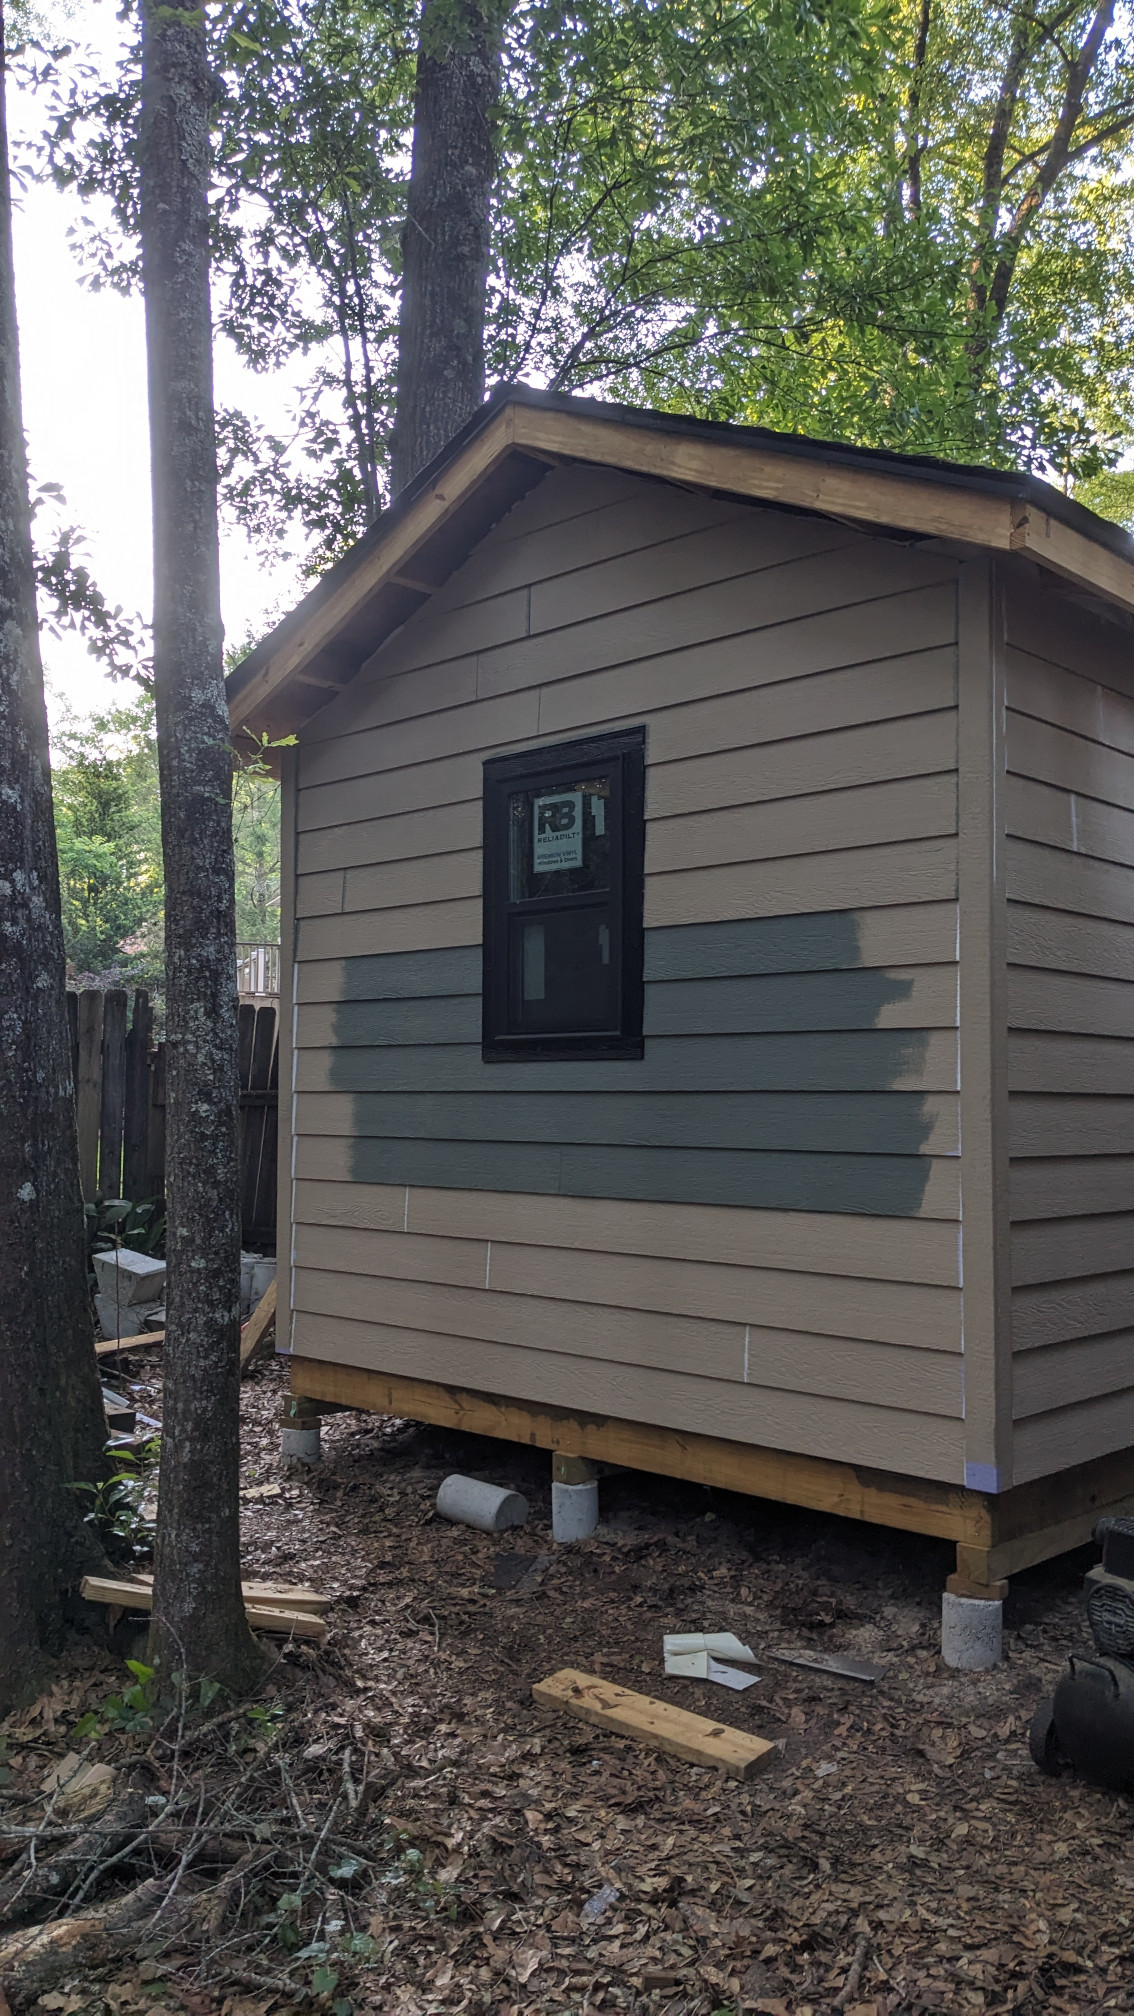 So we decided to add a window. Again, this is the style we’ll end up going with on the house. Black on the outside, white on the inside, single hung.
Once the window was in, I could continue upwards and get the siding lapped all the way up into the gable. Soffit got trimmed flush, and more siding got used as fascia (ripped to width a little, and pre-painted to stave off any rotting)
Accoutrements
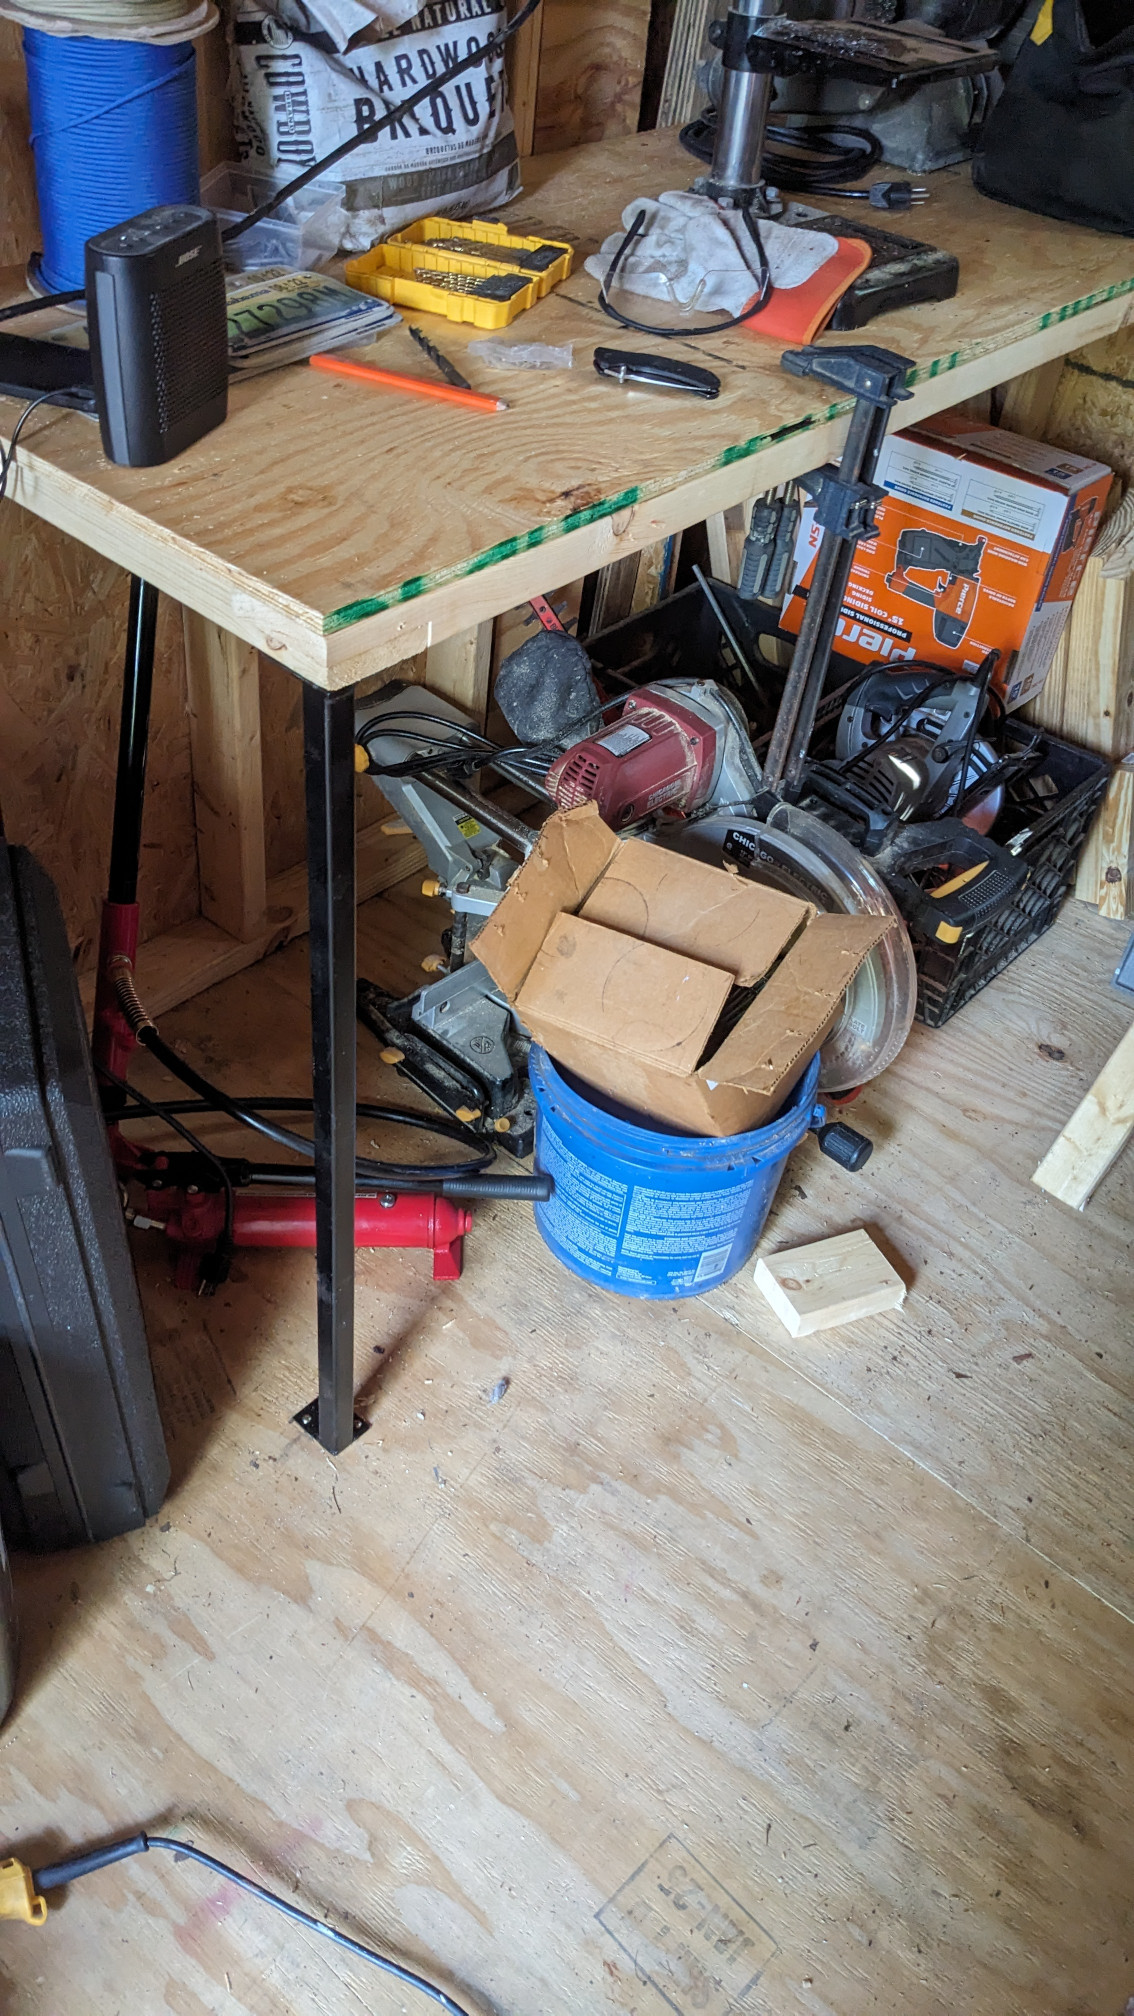
I added a workbench on the left. But I didn’t want the framing to take up so much space, like I used to have in the garage at the old house. So I used some spare 1" square tube and 10ga steel plate to weld up a support bracket for the corner. I still have a cross-brace to add in underneath the middle of the plywood top, but didn’t have material at the time.
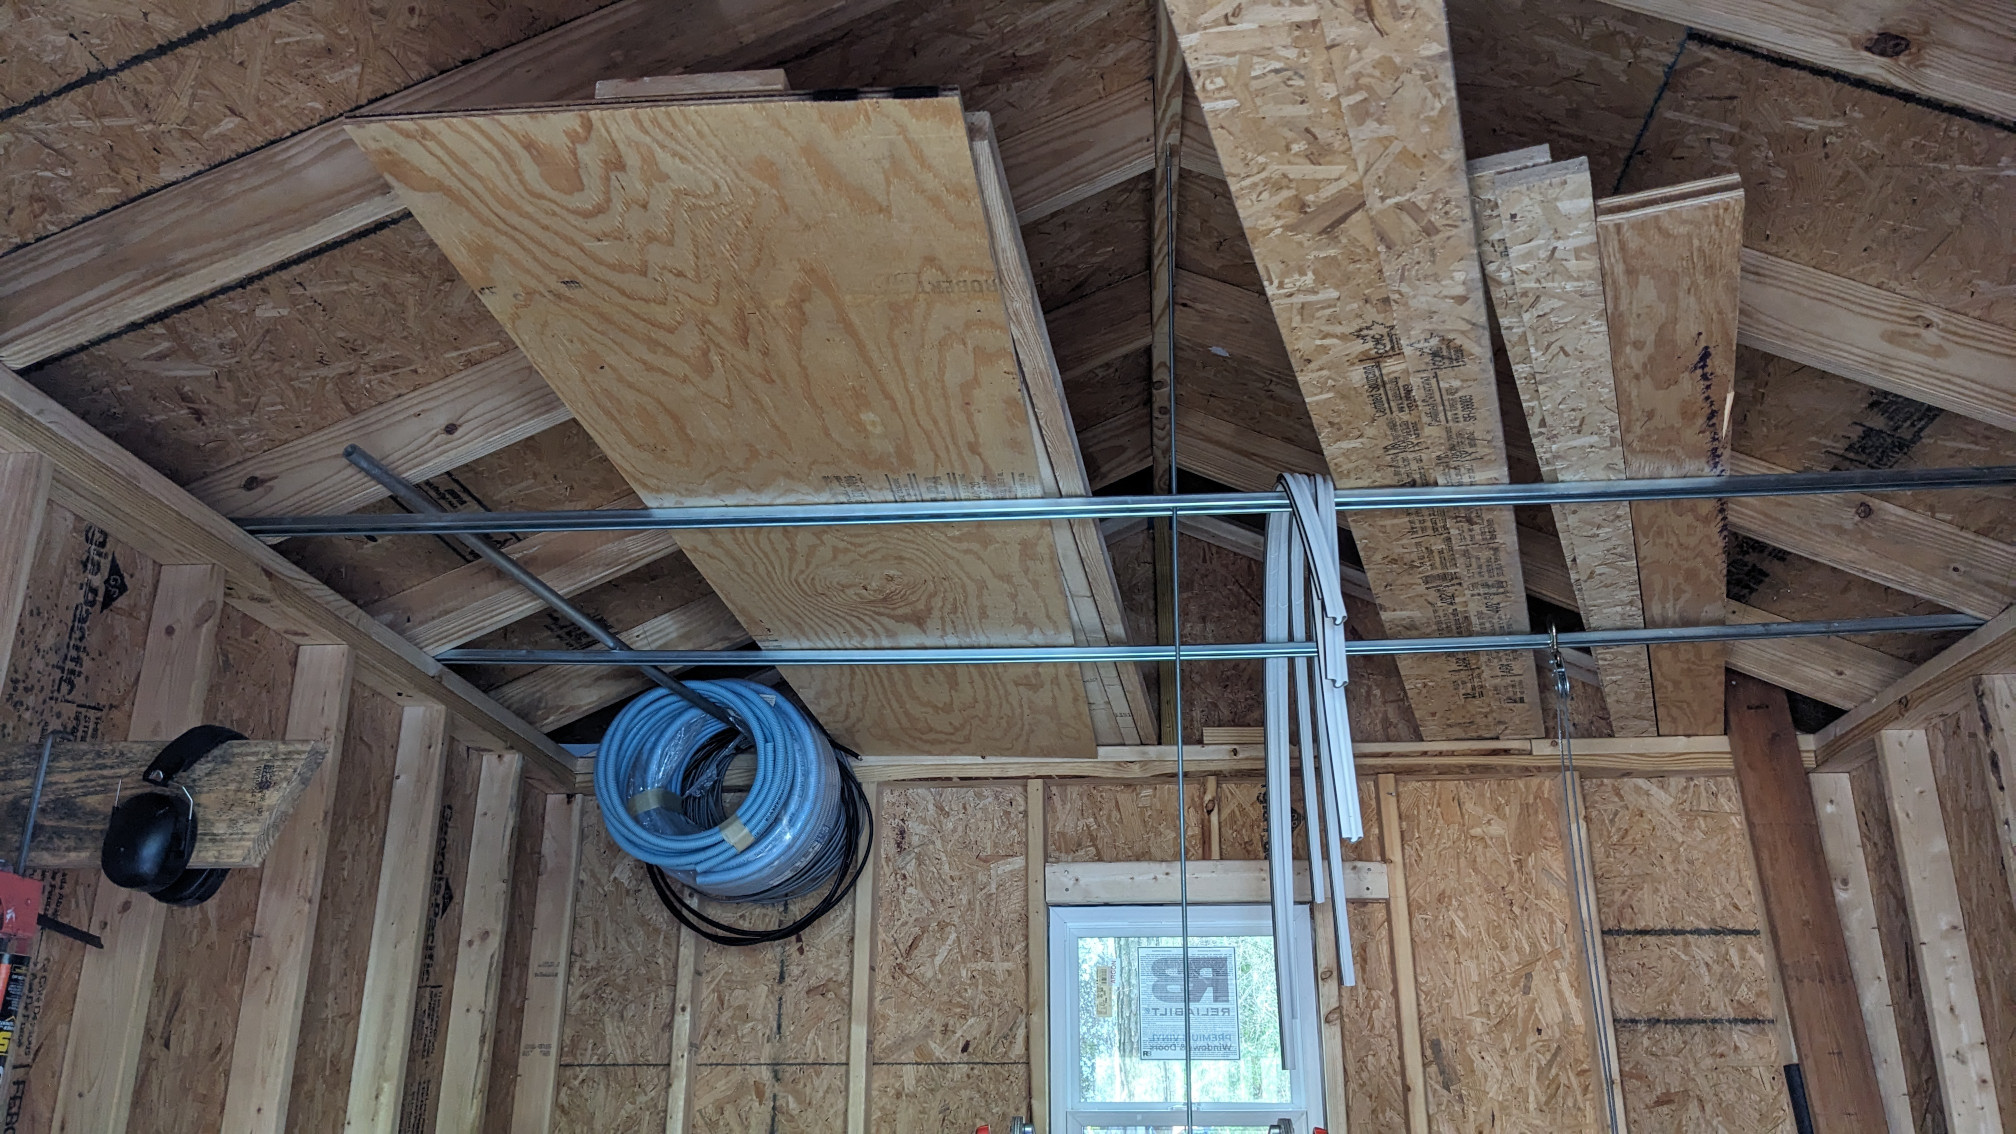
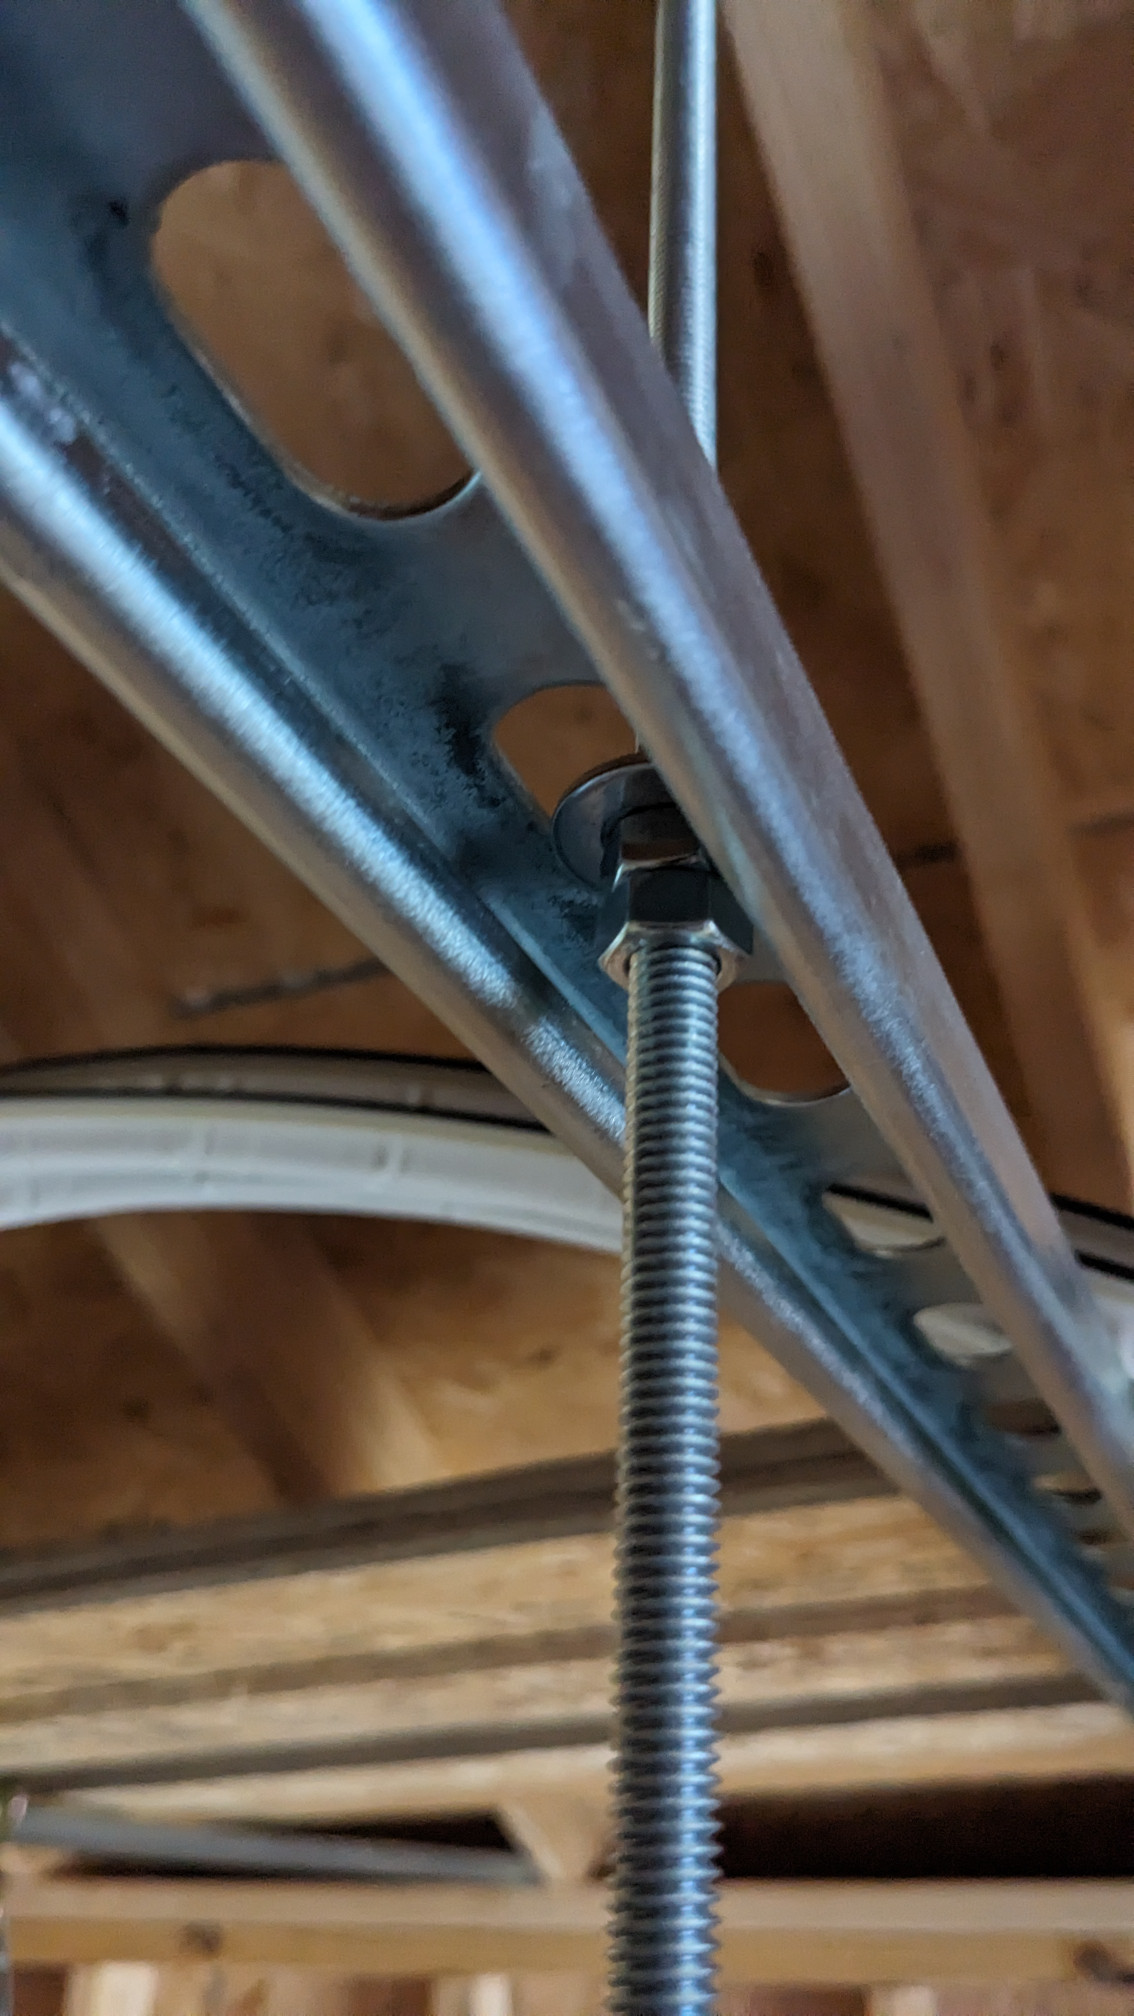
I also wanted some overhead storage for sheet goods and long pieces of lumber. I grabbed some unistrut from the store, the thinner gauge stuff. a 10’ section fits perfectly along the width. It sits on top of the top plates, and is screwed downwards to keep it from sliding around when loading/unloading. But it sagged a bit in the middle.
I used some allthread to hold it up in the middle. There’s one of those half lag screw, half machine screws on top. Double-nut the top and screw it into some pre-drilled holes until the lag screw threads are sunk all the way in. Then I used a coupling nut and some loctite to join the machine screw side to the allthread (they’re the same 5/16x18 thread).
 The allthread right before getting cut in half to finish the other support.
Lift up the unistrut by hand as you thread on a nut, 2x fender washers, and another nut. The washers can be tipped and pushed through the slots of the unistrut, so you don’t have to pre-thread them on the top. But when you’re tightening with one hand and lifting with the other, the hardware tends to fall downwards. So it’s kind of a pain no matter how you slice it. Either way, just keep lifting until the level tells you you’re high enough in the middle, then tighten the nuts down against one another, and you don’t have to worry about everything falling onto your head and sending you to an early grave.
 The washers go through these slots pretty easily.
Final thoughts
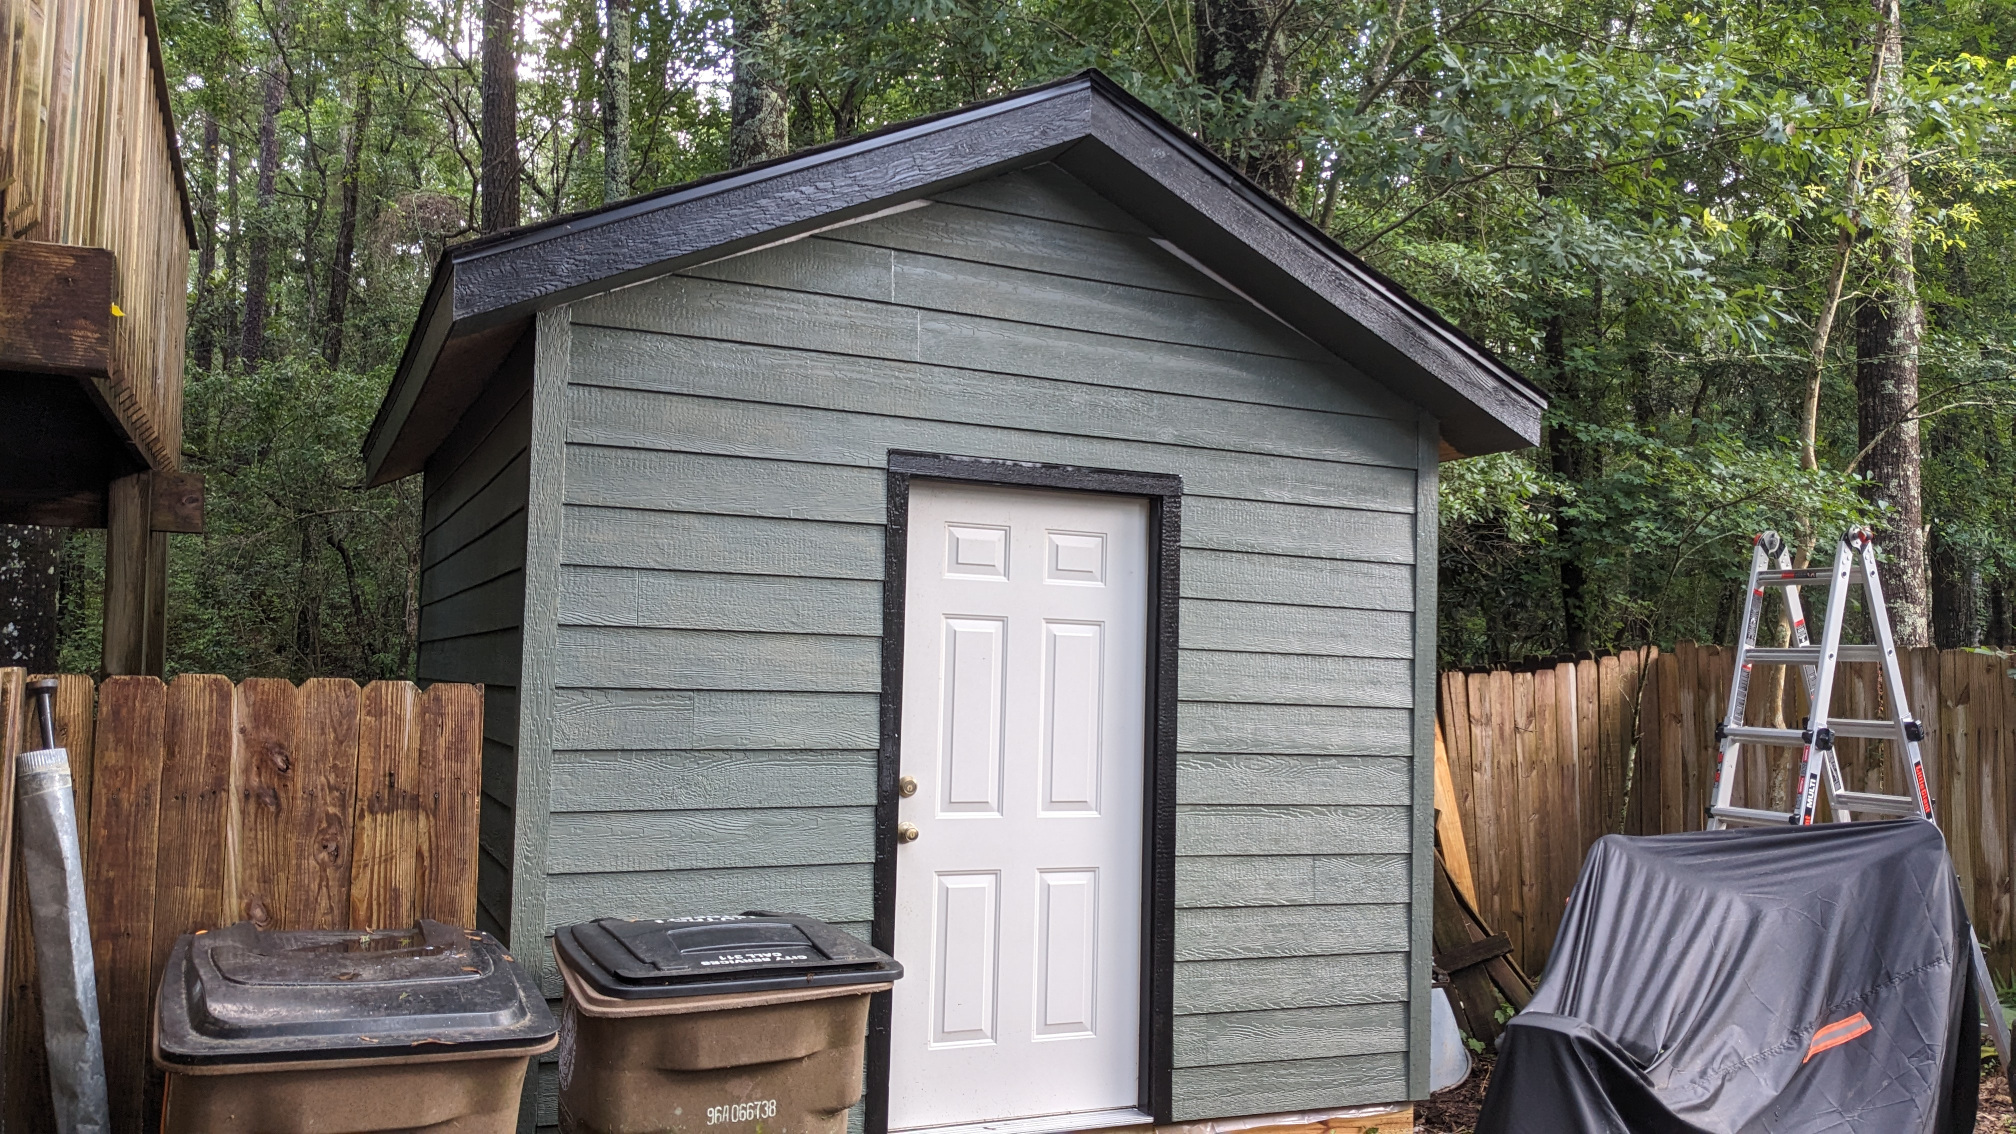 Here’s the shed as it sits today. I’m not 100% complete yet. I don’t know if I ever will be, to be honest.
-
I have some frieze boards to cut and attach in the gables to cover some gaps.
-
I have some more green paint to put on the soffits. And the siding gaps were filled with sealant (OSI Quad Max) which really hates to take paint well. But is one of the only things recommended by LP if you want any form of warranty.
-
I need to find some 6" wide black flashing to wrap up the floor joists that are exposed. I think black will tie it into the ground a little better and make it look like it’s anchored better. And protect the base from rain.
-
The door will be painted black, or maybe green. We’re not sure which will look better yet.
-
And finally I need to build a little ramp so that I can roll tools in and out easier. Right now I’ve been getting them to the edge and lifting them over onto the ground, which is tiring.
I may update this post, or might make a short follow-up in the next few weeks. For now, it’s really nice to have somewhere dry and bug-free to work on other things while it’s rainy outside.
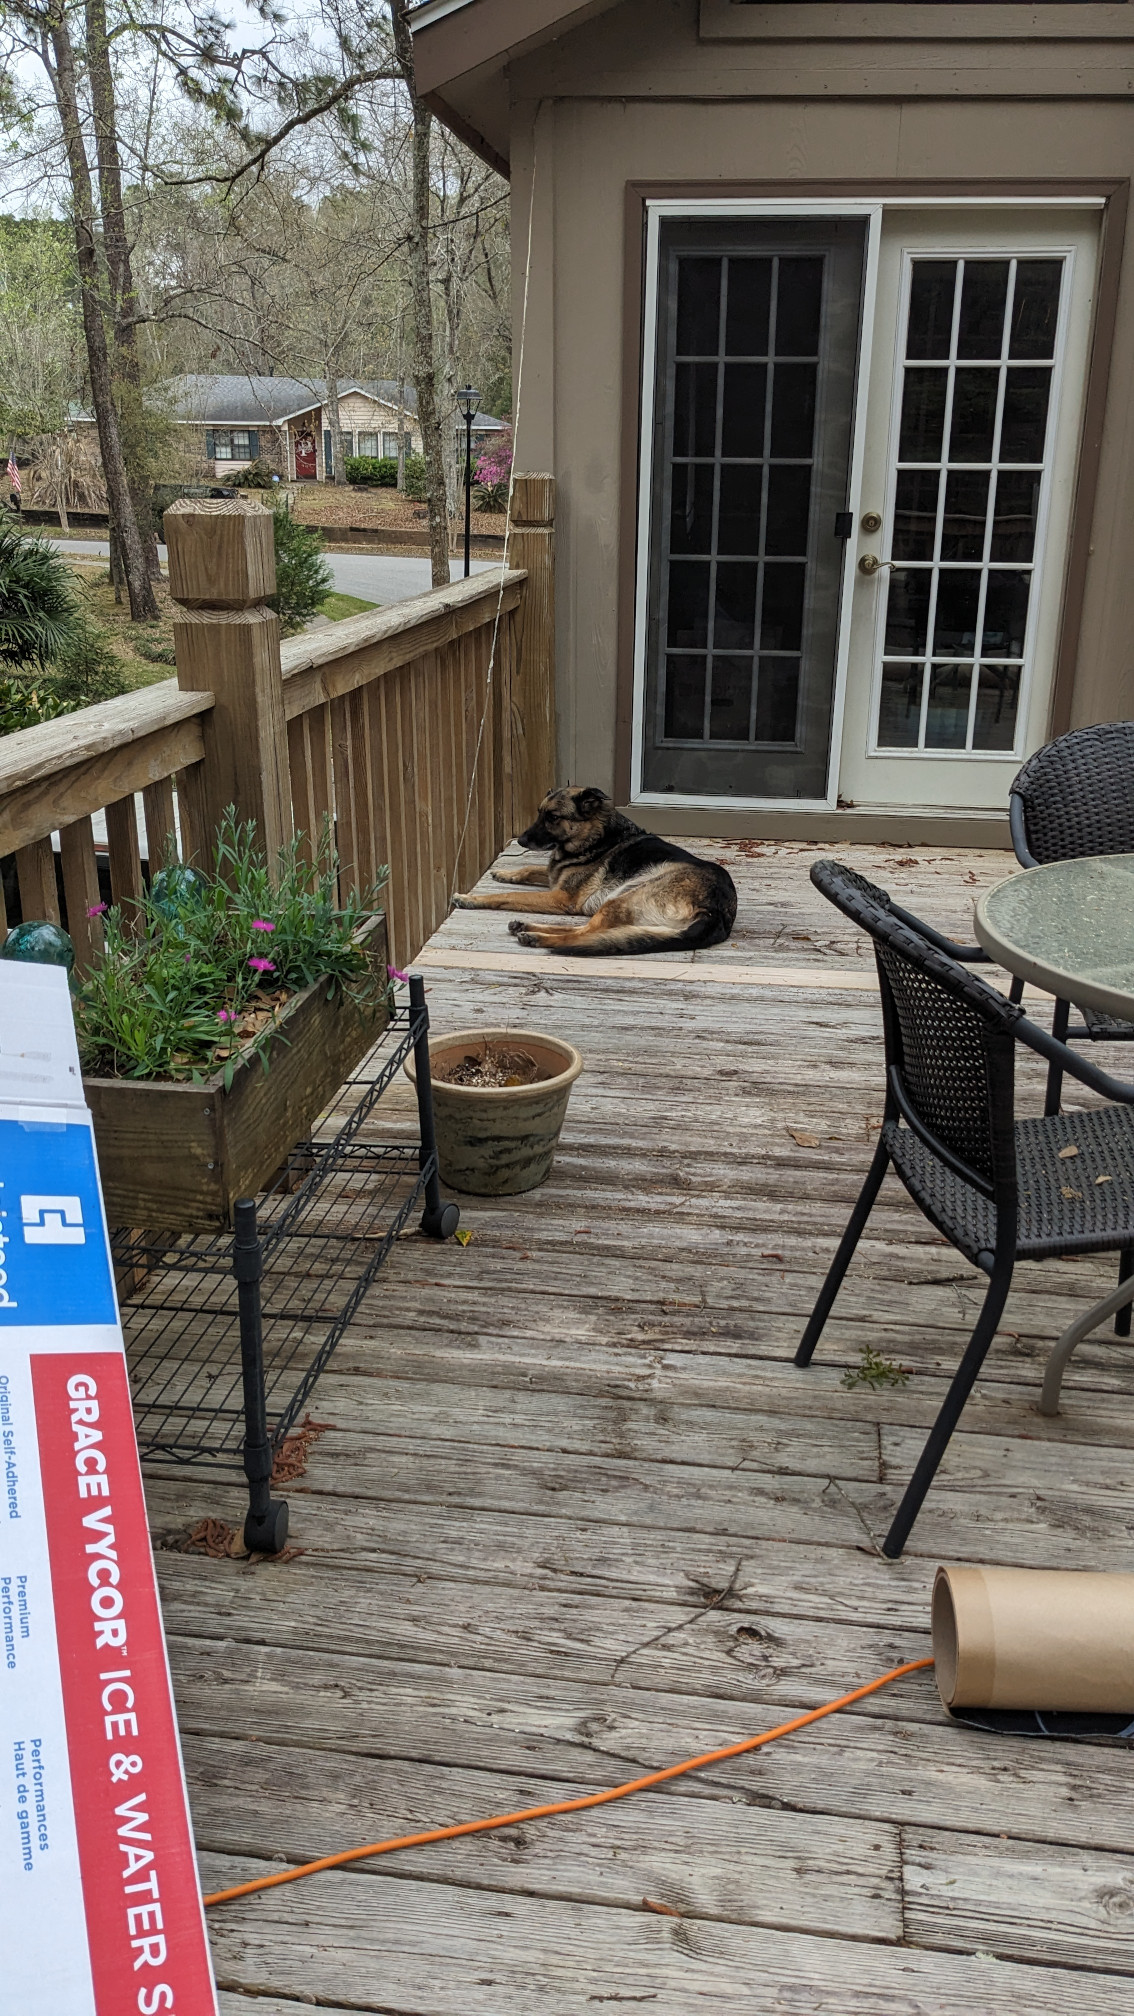 And a huge shout out to my helper, Odin, who would sit up on the deck looking down at what I was doing for hours on end. As long as there was water in the bowl, he was there, no matter how hot and humid it was outside.